Saturday, June 23, 2012
11:44 PM | Edit Post
Dream A Little Dream
This tutorial was written
by Sarah Fiack on
June 23, 2012
Any resemblance to another
tutorial is purely coincidental.
For this tutorial, I’m using a
tube by Mitzi Sato-Wiuff.
You can purchase this tube at
PSPTUBESTOP.
Supplies:
Tube of Choice
Scrap of choice
I am using one called
Anastasia
by Baby Cakes Scraps
You can purchase the scrap
at Taggers Delight
Open a 600x600 new image.
Open up your tube & scrap supplies.
Copy & paste your main tube as
a new layer onto your main image.
We're going to build the scene around
the tube.
Open a corner element.
Resize 70%.
Paste on the bottom layer
by your main tube.
Add a drop shadow to the tube
& corner element layers.
2,2,50,5 Black.
Open grass stalks element.
Resize 50% twice.
Paste behind your main tube twice
side by side.
You want the stalks to appear to be
coming up from the corner element.
Select a leaf branch element.
Flip.
Paste once along the vertical part
of the corner element. Make sure the branch is
on the bottom layer of the tag.
Duplicate the branch once.
On the duplicated layer -D1
rotate free rotate right 15.
Duplicate the D1 layer &
this is D2 - rotate this one right 15,
Move over slightly to the right.
Repeat these steps until you have a total of
5 leaf layers along the back of the tag.
Merge the 5 leaf layers together.
Adjust blur gauassian 5.00
On your layer palette, fade the leaf blur layer
to about 55 by lowering the opacity.
Open falling scattering flowers element.
Resize 70%.
Rotate free rotate left 25,
Paste above the blurred leaf layer near the top
of the tag.
Open hanging lights element.
Resize 80% twice.
Paste between the tube & corner element layer.
You want it on the side of the tube.
Add the earlier drop shadow to the lights layer.
Open a butterfly element.
Resize 20%.
Paste on the top at the end of the string of
hanging lights.
Open a word stone element.
Resize 60% & 70% once each.
Paste on the bottom part of the corner element.
Merge layers visible.
Crop to desired size.
Add artist copyright info & name.
Save as png.
Thanks for trying my tutorial
Labels:BCS,Fairy,Nature,Tutorial | 0
comments
9:09 PM | Edit Post

Tiny Blessings
This tutorial was written
by Sarah Fiack on
June 23, 2012
Any resemblance to another
tutorial is purely coincidental.
For this tutorial, I’m using a tube
by Zindy S.D. Nielsen. You can purchase
the tube at her store.
Supplies:
Tube of choice
Scrap of choice.
I’m using a kit called The Cottage Mouse
by Leigh Penrod. It is available at
Heartfelt Perfections Shop
Wordart by Create With TLC
Open a 600x600 new image.
Open up your tube, closeup & scrap supplies.
Note: I am using a page kit.
Due to this my resize amounts will be
larger. Please adjust if using a tagger size kit.
Choose a frame of choice.
Resize 50% twice.
Copy & paste as a new layer.
Use your selection tool &
select around the center of your frame.
Select a paper. Resize 17%.
Copy & paste the paper as a new layer.
Selections invert & press delete.
Move the paper layer under the frame layer
on your layer palette.
Paste your closeup layer between the two layers.
Position as wanted in the frame.
Press delete.
Select none.
Paste your main tube in center of
the tag.
Add a drop shadow to the close up, tube &
frame layers.
2,2,50,5 Black.
Open a roses cluster.
Resize 50% three times.
Paste on a bottom corner of the frame.
Open a single flower element.
Resize the flower 50% twice.
Paste underneath the roses layer.
You want the single flower petals to come
out from behind the roses on one side.
Open a glass bottle element.
Resize 50% four times.
Paste on the opposite side of the
flowers.
Open a circle doodle.
Resize 50% twice.
Paste on the bottom layer of the tag.
Position on the top corner of the tag.
Oepn a doll or stuff animal element.
Resize by 50% three times
Paste by the bottle element.
Open a wordart of choice.
For the wordart I am using,
Resize 50% twice & 80% once.
Add a gradient glow
Setting Fat glow width 3.00
Apply.
Merge layers visible.
Crop to desired size.
Add artist copyright information to the tag
along with name of choice.
Save as png.
Thanks for trying my tutorial.
Labels:Fairy,Tutorial,Words,Zindy | 0
comments
Friday, June 22, 2012
11:32 PM | Edit Post
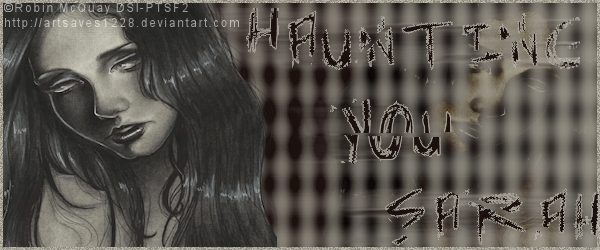
Haunting You
This tutorial was written
by Sarah Fiack on
June 22,2012
Any resemblance to another
tutorial is purely coincidental.
I am using a tube by Robin McQuay.
You can purchase this tube at
Dreamscape Imaging
Supplies:
Tube of choice
SpawnsFSMask79
Blog
Plugin: VM Distortion
Open a 600x250 new image.
Open up your tube of choice.
Fill the new image with a
black or dark color of choice.
Add a new raster layer.
Fill with a lighter color
from your tube.
On your tube, resize 80%.
Paste as a new layer on your tag.
Arrange on one side of your
tag,
Make sure the 2nd layer
of your tag -the lighter color -
is selected in the layer palette.
Apply the mask SpawnsFSMask79.
Merge group.
Now to add your text of choice.
Choose a font of choice to use.
Light color on Stroke
Dark color on fill.
Stroke width 1.0
Type out whatever text fits your tag.
Convert to raster.
Now while still on your text layer,
select the plugin VM Distortion
Broken Mirror Default settings
Click apply.
Duplicate the text layer.
On the bottom text layer,
adjust blur -motion blur
Double vision.
On your tube layer,
duplicate once & mirror.
Move the mirror layer to under
your mask layer.
On your layer palette,
change the blend mode to
hard light.
Merge your layers visible.
Add a new raster layer.
Fill with your light color.
Click on this layer with your
magic wand.
Selections contract by 3.
Press delete.
Select none.
Adjust
add noise
uniform & 25.
Add artist copyright information & name.
Save as png.
Thanks for trying my tutorial.
Labels:Digital Chaos,DSI,Forum Style,FTU,Gothic,RMQ,Tutorial | 0
comments
10:33 PM | Edit Post

Ice Cream Cutie
This tutorial was written
by Sarah Fiack on
June 22,2012
Any resemblance to another
tutorial is purely coincidental.
For this tutorial, I’m using
a tube Cuddly Rigor Mortis
You can purchase her tubes at
CDO
Supplies:
Tube of choice
Scrap of choice.
I’m using a kit by TK Dezigns
inspired by Cuddly Rigor Mortis.
The scrapkit is available also at
CDO.
Open a 600x600 new image.
Open up your tube & scrap supplies.
Open an ice cream sign element.
Resize 88%.
Paste as a new layer.
Use your selection tool to
select around the center of the sign.
Paste a paper of choice as a new layer.
Selections invert & press delete button.
Select none
Move the paper under the sign layer.
Open a canopy element.
Paste along the top of the sign layer.
Add a drop shadow to the canopy layer.
2,2,50,5 black.
Open a dripping chocolate element.
Resize 80% & 84% once each.
Paste on the bottom of the frame.
Make sure this layer is underneath
the previous layers.
You want to see dripping chocolate
from the bottom.
On your main tube, resize 80%.
Paste on the top layer of your tag.
Position on a side of choice.
Add the earlier drop shadow to the tube.
Erase the dripping chocolate
except for underneath the main tube.
We're going to animate this later.
Open an ice cream element.
Resize 50% twice.
Paste on opposite side of our tube.
Open a whip cream element.
Resize 50% & 60% once each.
Paste by the ice cream element.
Duplicate the sign layer twice.
Move to the bottom layer of the tag.
Move on side to the left slightly past
the original sign layer.
Duplicate this layer & mirror.
This should give the illusiong of a store front.
Resize all layers 88%.
Hide your dripping chocolate layer.
Merge visible the other layers.
Add artist copyright to your tag.
Now if you don't wish to animate,
you can save the tag now.
To animate, please continue below.
Open up animation shop.
Copy merged & paste as a new animation.
Now back in psp, move the chocolate down just
slightly with your move tool.
Copy merged & paste after current frame.
Repeat these steps 2 more times for a total
of 4 frames. You want the chocolate to move
down more slightly each time.
Now staying in AS,
select all frames.
Animation Frame properties -change to 25.
Select all -Copy & paste as new animation.
On the new animation, select all.
Animation -reverse frames.
Copy.
Back on the original animation, paste
after current frame.
Select all.
View animation.
If happy, save as gif.
Thanks for trying my tutorial.
Labels:Animation,CDO,Food,TKDezigns | 0
comments
Wednesday, June 20, 2012
8:16 PM | Edit Post

Sounds Of Freedom
This tutorial was written
by Sarah Fiack on
June 20,2012
Any resemblance to another
tutorial is purely coincidental.
For this tutorial, I’m using a
tube by Al Rio.
I purchased the tube at CILM
which has closed.The artist's
tubes are no longer available.
Supplies:
Tube of choice
Animation Shop
Plugins:
Xero Porcelain
Muras Meister Copies
EyeCandy 4000 Gradient Glow
Open a 600x250 new image.
Open a tube of choice.
Copy & paste your tube as
a new layer onto your tag image.
Duplicate the tube once.
On the bottom tube layer,
apply the plugin
Muras Meister Copies
Line (Rotate)
Default settings.
Use your selection tool,
select a horizontal narrow
rectangle along the copies layer.
Promote this selection to layer.
Select none.
Duplicate it once.
Move the copy either down or
up on your tag.
Merge the two layers together.
Now on the copies layer,
go to adjust
hue & saturation -set both to 0.
This will greyscale the layer.
Apply Xero Porcelain on the same
layer. Default settings.
Add a drop shadow to your 2nd tube
layer & to the rectangle layers.
2,2,50,5 Black.
Add a new raster layer on the top
of the tag.
Fill the new layer with a color
of choice.
Click this layer with your magic wand tool.
Selections modify contract by 4.
Press delete.
Select none.
Adjust
add noise 25 uniform.
Add the earlier drop shadow to the frame.
Add wordart or text of choice to the tag.
I used the words Sounds Of Freedom.
It is entirely up to you.
Add a gradient glow to the text.
EyeCandy 4000 Gradient Glow
Setting Fat Glow width 3.00
Merge the main tube & frame layers
together.
Make sure your rectangle layers are not
merged with another layer.
Add artist copyright information.
Open up Animation Shop.
Copy merged & paste as a new animation.
Back in PSP.
On the rectangle layer, go to adjust
hue & saturation - both set to 0.
Copy merged & paste after current frame.
Select all copy & paste after frame 2.
This should give you 4 frames total.
Select all Animation
Frame Properties -change to 50.
View animation.
Save as gif.
Labels:Animation,Forum Style,FTU,Patriotic,Sexy,Tutorial | 0
comments
Tuesday, June 19, 2012
10:32 PM | Edit Post
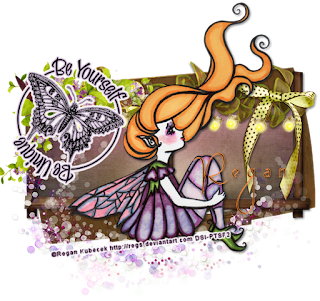
Be Yourself
This tutorial was written
by Sarah Fiack on
June 19,2012
Any resemblance to another
tutorial is purely coincidental.
For this tutorial, I’m using
a tube by Regan Kubecek
You can purchase the tube at
Dreamscape Imaging.
Supplies:
Tube of choice
Scrap of choice.
I’m using one by designs by sarah
called Warm Summer NIghts
It is available at Pimp My Tags
with Scraps
Here
Wordart by Create with TLC
Plugin
EyeCandy4000
Open a 600x600 new image.
Open up your tube & scrap supplies.
Choose a frame of choice.
Resize 80%.
Paste as a new layer.
Select your selection tool.
Draw a rectangle around the
inside of your frame.
Paste a paper of choice.
Selectiosn invert & press delete button.
Select none.
Move the paper layer underneath
the frame layer in your layer palette.
Add a drop shadow to the frame layer.
2,2,50,5 Black.
Open hanging lights element.
Resize 25%.
Paste a total of 4 times along the top
part of the frame.
Open a corner leaf element.
Resize 50%.
Position on a top corner of the frame.
Open a butterfly element.
Resize 50% twice.
Paste by the corner leaf element.
Paste your tube as new layer.
Position in the center of the frame
on the top layer of the tag.
Add the earlier drop shadow to the tube.
Open a 2nd frame of choice.
Resize 88% twice.
Paste above the mask layer on the tag.
Open a glitter splatter element.
Paste behind your main tube layer.
Choose a wordart of choice.
Resize 50% twice & 70% once.
Add a gradient glow to the wordart
EyeCandy4000 Gradient Glow
Fat Color of choice
Setting 3.00
Apply a 2nd glow with Fat color white.
Paste as a new layer.
Merge layers visible.
Crop your tag as wanted.
Add artist copyright info & name.
Save as png.
Thanks for trying my tutorial.
Labels:Fairy,Positive,Tutorial,Words | 0
comments
Saturday, June 16, 2012
1:10 AM | Edit Post
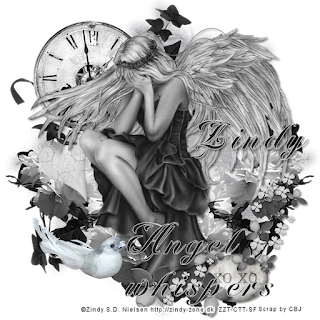
Angel Whispers
This tutorial was written
by Sarah Fiack on
June 15,2012
Any resemblance to another
tutorial is purely coincidental.
For this tutorial, I’m using
a tube by Zindy S.D. Nielsen
You can purchase this tube at
her store
Supplies:
Tube of choice
Scrap of choice
I am using a PTU one called
Dark vs Light by CBJ
Blog
Mask Tresemask 033
Blog
Open a 600x600 new image.
Open a tube & scrap supplies of choice.
Copy & paste your main tube as
a new layer.
Add a drop shadow to the tube.
2,2,50,5 Black.
Open a flower element branch.
Resize 70%.
Erase the branch part of the element.
Copy & paste as new layer.
Move this layer underneath your main
tube in your layer palette.
Positon so that it appears your tube
is on the flowers.
Duplicate the flowers once & mirror.
Oepn a leaf circle frame.
Resize 70%.
Paste on the bottom layer of the tag.
Select a scrap paper of choice.
Paste on the bottom layer of the tag.
Apply the mask
Tresemask 033
Merge group.
Duplicate the mask layer once.
Open a clock element.
Resize 40% & 80% once each.
Paste behind your tube on the left side
of your tag.You want it slightly to the side
of your main tube.
Open a scattering of flowers element.
Resize 40%.
Paste along the right bottom top of the tag.
Add the earlier drop shadow to the flower layer.
Open a stone element.
Resize 50%.
Paste underneath the scattered flowers layer.
Open a bird element.
Resize 50% twice.
Paste on the bottom left side of the tag.
Open a heart ribbon element.
Resize 25%.
Paste under the clock element.
You want the heart to be visible &
hanging from the clock.
Add a text of choice.
I chose the words Angel Whispers.
It is entirely optional & you can change text
to fit your tag.
Add the same drop shadow we used earlier.
Merge layers visible.
Resize 88%.
Add artist copyright info & name.
Save as png.
Thanks for trying my tutorial.
Labels:Angel,Tutorial,Zindy | 0
comments
Friday, June 15, 2012
6:05 PM | Edit Post
Sharing a tag I did today.This is what I call a Microtut since it is very basic. I used an inspired scrapkit by Schnegge.
The scrapkit is based off a tube by Lorenzo Sperlonga. You can purchase both at CDO.
Really love how the scrapkit works so well with the tube.
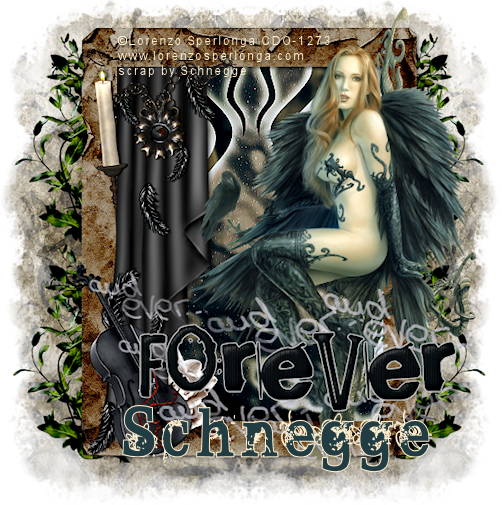
The scrapkit is based off a tube by Lorenzo Sperlonga. You can purchase both at CDO.
Really love how the scrapkit works so well with the tube.

Labels:Angel,Gothic,MicroTut,Tag | 0
comments
Wednesday, June 13, 2012
4:58 PM | Edit Post
I designed my 3rd scrap. Thought I would share it with all of you.
Hope you all can use it!
I based the scrap off the tube Lucy Loves Cupcake by Kim Turner.
This tube is available at PSPTUBESTOP.
Download Here
Hope you all can use it!
I based the scrap off the tube Lucy Loves Cupcake by Kim Turner.
This tube is available at PSPTUBESTOP.
Download Here

Labels:cupcake,FTU,Scrap | 4
comments
Tuesday, June 12, 2012
10:58 PM | Edit Post
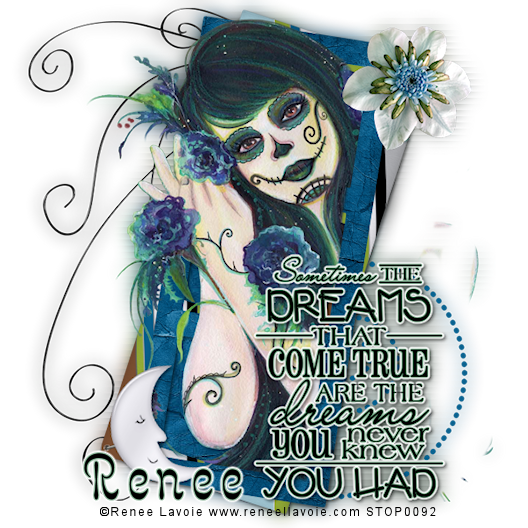
Sharing a tag I did tonight.
This is what I call a Microtut since it is very basic.
Below is what I used on the tag.
Hope you all like it!
Tube by Renee Lavoie
Available at PSPTUBESTOP
PTU Scrap by Wddesignz
called Sweet Dreams.
Wordart by Create With TLC
Blog
This is what I call a Microtut since it is very basic.
Below is what I used on the tag.
Hope you all like it!
Tube by Renee Lavoie
Available at PSPTUBESTOP
PTU Scrap by Wddesignz
called Sweet Dreams.
Wordart by Create With TLC
Blog

Labels:Fantasy,MicroTut,Tag | 1 comments
Monday, June 11, 2012
12:09 AM | Edit Post
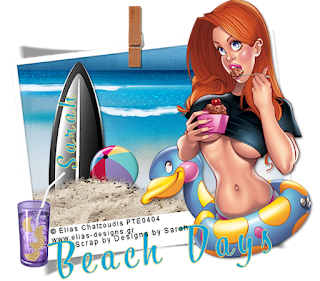
Beach Days
This tutorial was written
by Sarah Fiack on
June 10,2012
Any resemblance to another
tutorial is purely coincidental.
For this tutorial, I’m using
a tube by Elias Chatzoudis.
You can purchase the tube at
his store.
Supplies:
Tube of choice
Scrap of choice.
I’m using one by designs by sarah
Called Skully Shores
It is available at Pimp My Tags
with Scraps
Here
Open a 600x600 new image.
Open up a tube & scrap supplies.
Open a frame of choice.
Resize 85%.
Paste as a new layer.
Click inside the frame
with your magic wand tool.
Selections modify expand
by 7.
Paste a paper of choice.
Selections invert & press delete.
Move the paper under the frame layer.
Keep selected.
Take a sand element.
Paste between the two layers.
Position as wanted.
Press delete.
Open a surfboard element.
Resize 70%.
Paste below the sand layer.
You want the surfboard to appear
to come up from behind the sand.
Press delete.
Select none.
Open a beach ball.
Resize 25%.
Paste by the surfboard element.
Add a drop shadow to the surfboard
& the sand layers.
2,2,50,5 Black.
Open your main tube.
Resize 88% or as needed.
Paste along one side of your tag.
Add the earlier drop shadow.
Open a drink element.
Resize 50%.
Paste on the oppsite side of
your main tube.
Add wordart or text of choice.
Position as wanted.
I put the text I added along the bottom
of the tag.
Merge layers visible.
Crop tag to desired size.
Add artist copyright information &
name.
Save as png.
Thanks for trying my tutorial.
Labels:Summer,Tutorial,Women | 0
comments
Sunday, June 10, 2012
1:42 AM | Edit Post
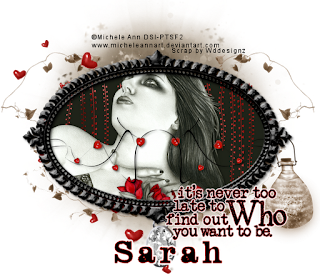
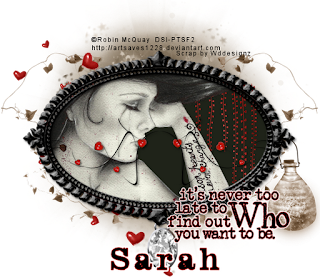
Never Too Late
I also have a 2nd tag below the tutorial
featuring the artwork of Robin McQuay.
This tutorial was written
by Sarah Fiack on
June 9,2012
Any resemblance to another
tutorial is purely coincidental.
For this tutorial, I’m using
a tube by Michele Ann
You can purchase her tubes at
DreamscapeImaging
Supplies:
Tube of choice
Scrap of choice.
I am using one called Diamond Hearts
The scrap is by Wddesignz.
You can purchase it at Whisprd Designz
Here
Wordart by Create with TLC
Blog
Plugin: EyeCandy4000 Gradient Glow
Open a 600x600 new image.
Open up your tube & scrap supplies.
Resize your tube 80%.
Choose a frame element.
Copy & paste as a new layer.
Click inside the frame with your
magic wand tool.
Selections modify expand by 8.
Add a new raster layer.
Fill this layer with a dark color
from your tube.
Move this layer underneath your
frame layer in your layer palette.
Open hanging vines element.
Resize 50%.
Paste inside the frame above your paper layer.
Erase any parts of the vines showing
past your frame.
Copy & paste your main tube
between the two layers.
Position as wanted on the tag.
Selections invert & press delete.
Select none.
Add a drop shadow to both the frame
& tube layers.
2,2,50,5 Black.
Open a circle blur element.
Flip this image.
Paste on the bottom layer of the tag.
Position behind the frame layers.
Open a leaf vine element.
Resize 95%.
Paste above the blur layer.
Duplicate once & mirror.
Open a hanging bottom element.
Resize 50%.
Paste as a new layer.
Position underneath the frame layers
on the side of the frame.
You want the bottle to appear to
"hang" from the frame.
Oepn falling hearts element.
Resize 50%
Paste twice on the tag above the circle blur layer.
Position one near the top left side of the tag.
Position the 2nd one undertneath the left side of the tag.
You want to see hearts at the top of the frame & below it.
Open a ribbon diamond element.
Paste underneath the frame layers.
Move so the ribbon is hidden under the frame layers.
You want the diamond visible & to appear to hang
from the frame.
Open a thin heart doodle.
Resize 50%
Paste in the frame.
You want this layer just below the frame layer.
Duplicate once & mirror.
Merge the two doodle layers together.
Add a drop shadow to the layer.
2,2,50,5 Black.
Open wordart of choice.
For the one I am using, I resized it by
50% twice & 80% once.
Add a gradient glow to the wordart.
Setting Fat ( I changed the color to red )
Glow width 3.00.
Paste as wanted on the tag.
Merge your tag layers visible.
Crop your tag to desired size.
Add artist copyright information & name.
Save as png.
Thanks for trying my tutorial.
Labels:Gothic,Tutorial,Words | 0
comments
Thursday, June 7, 2012
7:39 PM | Edit Post
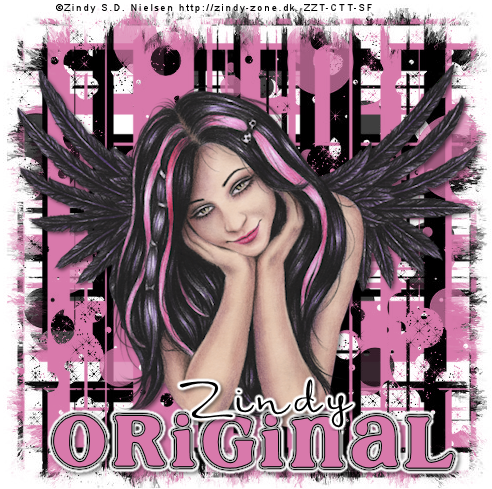
Original
This tutorial was written
by Sarah Fiack on
June 7,2012
Any resemblance to another
tutorial is purely coincidental.
I am using a tube by Zindy S.D. Nielsen.
The tube is available at her
store.
Supplies:
Tube of choice
WSLMask 144 by weescottlass creations
Blog
Plugin: EyeCandy4000 Gradient Glow
Open a 600x600 new image.
Open up your tube of choice.
Resize your tube 80%
Copy & paste your tube as a
new layer.
Choose your font tool.
You want a big chunky font.
In your materials palette,
make your foreground a dark color.
Make your fill color a brighter color.
I am using black & pink.
Add a drop shadow to the tube.
2,2,50,5 Black
Type out a single word which
matches with your tube.
I did size 26 & stroke width 1.0
Enlarge as needed.
Convert to raster.
Move to just below your tube
on the tag.
We're going to apply two gradient
glows to the word.
For the first one:
EyeCandy4000 Gradient Glow
Black Halo Setting.
Glow width 3.00
For the second one:
Fat Setting
Glow Width 3.00
Add a drop shadow to the word.
2,2,50,5 Black
Now add a new raster layer on
the bottom layer of the tag.
Fill with your dark color.
Apply the mask WSLMask 144.
Merge group & mirror.
Now add another raster layer
above the mask layer.
Fill this one with the brighter color.
Apply the same mask as before.
Merge group.
Merge the two mask layers together.
Duplicate once.
On the bottom mask layer.
Rotate Free Rotate Left 90.
Merge your layers visible.
Crop your tag was wanted.
Add artist information & name.
Save as png.
Thanks for trying my tutorial.
Wednesday, June 6, 2012
2:44 AM | Edit Post
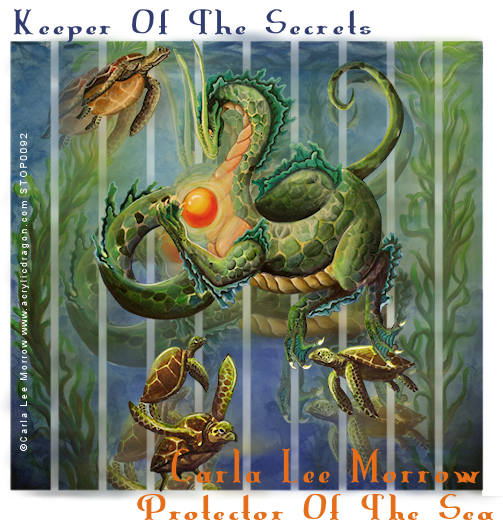
Keeper Of The Secrets
This tutorial was written
by Sarah Fiack on
June 5, 2012
Any resemblance to another
tutorial is purely coincidental.
For this tutorial, I’m using a
tube by Carla Lee Morrow.
You can purchase this tube at
PSPTUBESTOP.
Supplies:
Tube of Choice
Vixmask127 Blog
Open a 600x600 new image.
Open up your tube & image.
Copy & paste your image as
a new layer onto your new image.
Apply Vixmask127 to the image.
Merge group.
Duplicate this layer once.
Select your smudge brush tool.
Size +Round25 for brush
Shape Circle
Size 25.
Hardness 50
Step 10 Density 100
Thickness 100 Opacity 77
Use the smudge brush on
the duplicated layer.
Make your movements in circular
fashion to resemble waves.
Once you have the whole layer
smudged, go to adjust.
Blur Motion Blur
angle 90 strength 100.
Now take your selection tool,
draw around the excess blur to the
right side of your image layers.
Press delete.
This will remove the extra blur by
our tag.
Lower the opacity on this image
to 75%.
Open your main tube.
Resize 88%.
Paste as new top layer.
Add a drop shadow to the tube.
2,2,50,5 black.
Select your font tool.
Choose a color for the top text
& a color for the bottom text.
For the top text I used
" Keeper Of The Secrets".
For the bottom text I used
"Protector Of The Sea."
Feel free to use text which fits
your tube.
Merge your layers visible.
Crop your image to desired size.
Add artist copyright information
& name.
Save as png.
Thanks for trying my tutorial.
Tuesday, June 5, 2012
10:02 PM | Edit Post

Beauty With A Gothic Heart
This tutorial was written
by Sarah Fiack on
June 5,2012
Any resemblance to another
tutorial is purely coincidental.
I am using a tube by Zindy S.D. Nielsen.
The tube is available at her
store.
Supplies:
Tube of choice
Scrap of choice
I am using a PTU scrap by CBJ
called Gothic Heart. It is exclusive to
Zindy's store.
Plugins:
EyeCandy4000 Gradient Glow
Xero Radiance
Open a 600x600 new image.
Open up your tube & scrap supplies.
Choose a heart frame & open.
Copy & paste onto your new image.
Position to the right slightly.
Click in the heart frame with
your magic wand tool.
Selections modify expand by 8.
Paste a paper of choice.
Selections invert & press delete.
Move the paper under the frame layer.
Paste your main tube between the
two layers.
Duplicate the tube layer once.
Move the tube copy to the top in
your layer palette.
Back on the original tube, press delete.
Select none.
Now on the tube copy, erase the parts
of the tube which you don't want seen past
the frame.
Add a drop shadow to the bottom tube
& frame layers.
2,2,50,5 Black
Open a wordart heart element.
Resize 70%
Paste on the bottom layer of the tag.
Position around your heart frame.
Apply a gradient glow to the wordart layer.
EyeCandy4000 Gradient Glow
Setting fat Glow width 3.00
Open glitter spaltter.
Paste twice & position so it appears
the 2nd layer of your main tube is
"on" the glitter splatter.
Open heart trail splatter.
Resize 50%
Paste on the left side bottom layer
of your tag. You want it to appear behind your
other layers.
Duplciate once & mirror.
Open a bow element.
Resize 20% & 80% once each.
Paste at the bottom of the heart frame element.
Merge the layers visible.
Apply the plugin Xero Radiance
Strangeness 94
Charm 50
Truth 128
Beauty 255
Resize the tag 88%.
Add artist copyright information & name.
Save as png.
Thanks for trying my tutorial.
Labels:Gothic,Tutorial,Zindy | 0
comments
1:28 AM | Edit Post
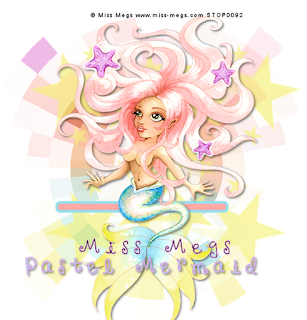
Pastel Mermaid
This tutorial was written
by Sarah Fiack on
June 4, 2012
Any resemblance to another
tutorial is purely coincidental.
For this tutorial, I’m using a
tube by Meg Baker
You can purchase this tube at
PSPTUBESTOP.
Supplies:
Tube of Choice
VixMask_112 Blog
Plugin: VM Toolbox
Open a 600x600 new image.
Open your tube of choice.
Resize the tube 78%.
Paste as a new layer.
Add a drop shadow to the tube.
2,2,50,5 Black
Select your rectangle shape tool.
On your materials palette, select
two colors from your tube for
foreground & fill colors.
Width 5.00
Draw out a narrow rectangle
on the layer below your tube layer.
Convert to raster.
You want your tube to appear
to sit on the rectangle.
Add a new raster layer to
the bottom layer of the tag.
Fill with a different color from
your tube.
Apply the VixMask_112.
Merge group.
Resize the mask layer 80%.
Duplicate once & mirror.
Merge the two mask layers together.
Lower the opacity to 65.
Duplicate your main tube
two more times.
Move the two copy layers so
they are side by side.
Now merge the two layers together.
Move the merged tube layer to
underneath the mask layer.
Adjust Blur Gaussian 10
Apply the plugin VM Toolbox
Radial Mosaic
Default settings.
Merge the mask layer with the
mosaic layer.
Resize 95%.
Add words of choice.
Add a drop shadow to the text.
Merge all the layers visible.
Crop your tag image.
Add copyright information & name.
Save as png.
Thanks for trying my tutorial.
Labels:Cute,FTU,Mermaids,Tutorial | 0
comments
Monday, June 4, 2012
7:43 PM | Edit Post
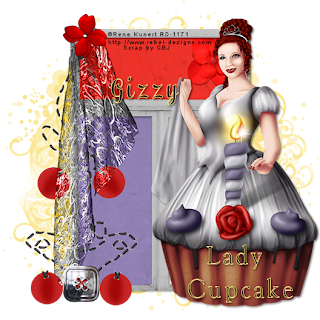
Lady Cupcake
This tutorial was written
by Sarah Fiack on
June 4, 2012
Any resemblance to another
tutorial is purely coincidental.
For this tutorial, I’m using a
tube by Rene Kunert
The tube is now FTU &
available here.
Supplies:
Tube of choice
Scrap of choice
I am using a PTU scrap called Colour Pop_Red
by CBJ. You can purchase the scrap at
Dreamscape-Imaging
TreseMask0034
Here
Open a 600x600 new image.
Open up your tube & scrap supplies.
Choose a frame of choice.
Resize 88%.
Paste as a new layer.
Using your magic wand
tool, & holding the shift button
down: click inside the inner
parts.
Selections modify by 6.
Add a new raster layer.
Fill different sections
inside the frame with
different colors from your
main tube.
Once filled, move this layer
underneath the frame in your
layer palette.
Open a scrap paper.
Resize 75%.
Paste the paper as a
new layer.
Selections invert &
press delete.
Select none.
Move this layer directly
underneath frame layer.
On your paper layer, in your
layer palette, change the blend mode
to overlay.
On your main tube,
resize 75% & 90%.
Paste as a new layer making sure its
the top layer on your tag.
Add a drop shadow to
the frame & tube layer.
2,2,50,5 black.
Open a draped cloth element.
Resize 45%.
Paste on opposite of your tube
along the side of the frame.
Change the blend mode on this
layer to Luminance.
Open a flower element.
Resize 25%.
Paste on top corner of the
draped cloth.
Open a vertical stitches element.
Resize 48%.
Mirror once.
Paste underneath the draped cloth element.
Duplicate once & mirror.
Move the copy layer back to by the original.
Paste a small tile on the bottom of the stitches
where they meet.
Add a new raster layer to above the
bottom layer on the tag.
Fill with a color of choice.
Apply the mask TreseMask0034.
Merge group.
Add any text or saying you want
to tag. I did Lady Cupcake
on the cupcake.
It is entirely optional.
Do add the earlier drop shadow
to your text.
Merge layers visible.
Resize 88%
Add artist copyright info & name.
Save as png.
Thanks for trying my tutorial.
Labels:cupcake,Food,Rene Kunert,Tutorial,Women | 0
comments
Sunday, June 3, 2012
4:27 PM | Edit Post
Clear Reality
Note: I have two more examples below the tutorial with two different tubes by Zindy.
This tutorial was written
by Sarah Fiack on
June 1,2012
Any resemblance to another
tutorial is purely coincidental.
I am using a tube by Zindy S.D. Nielsen.
The tube is available at her
store.
Supplies:
Tube of choice
Scrap of choice.
I am using a scrap called All Good Things
by Gothic Inspirations.
Blog
Open a 600x600 new image.
Open up your tube & scrap supplies.
Choose a circle frame.
Resize 80% twice.
Paste as a new image.
Open a scrap paper.
Resize 80%.
Now on your frame layer,
click inside the frame with
your magic wand tool.
Selections modify,
expand by 5.
Paste your paper as a new layer
on the frame.
Selections invert & press delete.
Move the paper layer under the frame layer.
Open a tall grass element.
Resize 50%.
Paste on side by the frame between
the two layers.
Press delete.
Open baby's breath element.
Rotate right.
Resize 50%.
Paste to the side slightly &
underneath the grass layer.
Open a cloud element.
Resize 25%.
Paste along the top of the frame
above the paper layer.
Press delete.
Select none.
Add a drop shadow to the grass,baby's breath
& frame layer.
2,2,50,5 Black
Open a circle wordart element.
Resize 60%
Paste as new layer.
Move to the bottom layer of the tag.
On your main tube, resize 75%.
Paste as new top layer on the tag.
Add a drop shadow to the tube.
2,2,50,5 Black
Merge the layers together.
Resize 88%.
Add artist copyright info & name.
Save as png.
Thanks for trying my tutorial.
Two More Examples:
Friday, June 1, 2012
9:49 PM | Edit Post
Flowers In Her Hair
This tutorial was written
by Sarah Fiack on
June 1,2012
Any resemblance to another
tutorial is purely coincidental.
I am using a tube by Zindy S.D. Nielsen.
The tube is available at her
store.
Supplies:
Tube of choice
Mask SpawnsFSMask59 by Spawn
Blog
Plugin: Xero Porcelain
Open a 600x250 new image.
Open up your tube of choice.
Fill the new image with a darker
color of choice.
Add a new raster layer.
Fill this layer with a lighter color
of your original fill color.
On the 2nd fill layer, apply the mask
SpawnsFSMask59.
Merge group.
On your main tube, resize 75%.
Copy & paste on the side of your tag.
Add a drop shadow to the tube.
2,2,50,5 black.
Image Canvas Size 650x550.
Select your freehand selection tool.
Make sure in your layer palette,
the 2nd fill layer is selected.
Point to point.
Add(Shift) Feather 0
On the side of your tube, draw out
a slanted vertical rectangle using your selection
tool.
Right click on your layer palette,
promote selection to layer.
Paste your tube a 2nd time in the
selection.
Press delete.
Select none.
Select your regular selection tool.
If needed, select excess of your main tube
to remove it.
Press delete.
Select none.
Do the canvas size again this time with the
original size of your image 600x250.
Okay now back on the two rectangle layers.
On the tube layer, in your layer palette,
change the blend mode to Overlay.
Merge the tube & the color layer under it
together. Apply Xero Porcelain plugin.
Softness 109
Strength & Brightness 128.
Apply.
Duplicate the rectangle layer once..
Move to the right of the original rectangle.
This should give you two slanted rectangle
layers side by side.
Add a new raster layer to the top of
the layer palette.
Fill with the darker color.
Select with your magic wand.
Selections modify contract by 4.
Press delete.
Select none.
Adjust add noise uniform 25.
Add the earlier drop shadow to the frame layer.
Merge layers together.
Add artist copyright info & name.
Save as png.
Thanks for trying my tutorial.
Labels:Forum Style,FTU,Tutorial,Women | 0
comments
5:37 PM | Edit Post
For a challenge in the Dreamscape Imaging yahoo group, we had to use 1 scrap & create two tags.
I really liked how my tags came out so thought I would share them.I used the scrap Serenade In Blue by
A Space Between. You can find the FTU scrap here.
For tag 1 I used the artwork of Janna Prosvirina. You can purchase the same tube at DSI.
For tag 2 i used the artwork of Zindy S.D. Nielsen. You can purchase the tube at her
store.
Labels:Angel,Fantasy,Tag,Words | 0
comments
12:29 PM | Edit Post
Lemonade Girl
This tutorial was written
by Sarah Fiack on
June 1,2012
Any resemblance to another
tutorial is purely coincidental.
I am using a tube by Maryline Cazenave
which you can purchase at
CDO
Supplies:
Tube of choice.
Scrap of choice.
I’m using one by designs by sarah
called Sweet Lemonade.
It is available at
PMTWS
VixMask127 Blog
Open a 600x600 new image.
Open up your tube & scrap supplies.
Choose a smaller rectangle frame.
Resize 80%.
Paste as a new layer.
Position at the top of your tag.
Click inside the frame with your
magic wand tool.
Selections modify expand by 2.
Paste a paper of choice as a new
layer.Selections invert & press delete.
Move the paper under the frame layer.
Select none.
Open a wordart element.
Resize 50%.
Paste on the center of the frame.
Add a drop shadow to the wordart
& frame layers.
2,2,50,5 black.
Open a round flower element.
Resize 20%.
Paste on both ends of the frame.
On your main tube, resize 88%.
Paste on the bottom layer of the tag.
Position up by the frame.
Add a drop shadow to the tube.
2,2,50,5 black.
Open a fence element.
Resize 70%.
Paste near the bottom of the tag
behind your main tube.
Open standing flowers element.
Resize 25%.
Paste along the fence 4-5 times.
I had the flower layers behind the fence so
they appear to be coming up behind it.
Open a cupcake element.
Resize 25%.
Paste on both ends of the fence element.
Add a drop shadow to the cupcake layers.
2,2,50,5 black.
Open a lemonade drink.
Resize 20%.
Paste by one of the cupcake elements.
Also add the same drop shadow to the drink.
Paste a scrap paper of choice as a new
bottom layer.
Apply VixMask127.
Merge group.
Resize all layers 88%.
Merge layers visible.
Add artist copyright info & name.
Save as png.
Thanks for trying my tutorial.
Subscribe to:
Comments
(Atom)
TOUs
I do not allow resizing of my tags, timelines or wallpapers. All of my creations are for PU only unless otherwise stated. Nor are they to be altered in any way either.
Categories
- Abstract (22)
- ACDivas (2)
- Ad (1)
- addictive pleasures (3)
- ADI (2)
- Adriennes Design (7)
- Adult (8)
- Alicia Mujica (61)
- Amber (6)
- Amy Marie (222)
- Andrea Gibson (1)
- Angel (97)
- Animals (469)
- Animation (107)
- Anime (11)
- AORK (10)
- AOTW (8)
- Apocalyptic (5)
- Art-Content (1)
- Asian (8)
- Attitude (57)
- Authors (9)
- Autism (5)
- Autumn (39)
- award (3)
- Baby (1)
- BAS (1)
- BCA (7)
- BCS (28)
- Bella Caribena (2)
- birthday (3)
- Birthstone (10)
- Blaque Heart Designz (11)
- BLT DeZignZ (11)
- book suggestions (6)
- Cajoline (1)
- Calendar (2)
- Carnival (1)
- Carpe Diem (6)
- Cars (4)
- Casino (3)
- CCD (12)
- CCS (18)
- CDO (1545)
- Celestial Scraps (2)
- Celinart Pinup (1)
- Chaos Priestess (73)
- Charity (29)
- Chasing The Blues (2)
- Chelloenix Blog (1)
- Chichi (65)
- Children (30)
- Christmas (173)
- Cluster Frame (44)
- Color (6)
- Comic (6)
- copyright (2)
- Country (33)
- Crafty (2)
- Crazed Creations (1)
- Creative Misfits (3)
- CRM (24)
- Crowe (17)
- Crystal's Creations (20)
- CSBC (76)
- CU (12)
- cupcake (60)
- Cupcakes (44)
- CUPU (4)
- Cute (207)
- DAH (97)
- Dees"SIGN Depot (65)
- Devil (1)
- Dia De Los Muertos (2)
- Digital Chaos (61)
- Doodle by Design (41)
- Dreams (63)
- DSI (2)
- Easter (49)
- ELF (14)
- EliasC. (25)
- Elli's Creations (2)
- Emo (29)
- emotion (27)
- Extras (81)
- Fairy (186)
- Fall (182)
- Family (21)
- Fantasy (326)
- Farrah (4)
- Feature Tutorial (3)
- Food (165)
- Forum Style (38)
- Foxy's Designz (92)
- Freeks Creations (35)
- Freya (5)
- Friends (20)
- Friendship (14)
- FTU (122)
- Garv (20)
- Gimptastic (146)
- Gingerscraps (2)
- Girly (125)
- Goldwasser (8)
- Gothic (352)
- Gothic Inspirations (12)
- Guest CT (28)
- Halloween (222)
- Hania's Design (9)
- Happy (15)
- Happy New Year (8)
- Heartfelt Perfections (2)
- Help 4 Casper (2)
- Hollywood (4)
- Honored Scraps (230)
- Hungry Hill (171)
- Ilonka's Design (1)
- Inspiring (8)
- Irish Princess Designs (118)
- Jensen (106)
- Jose Cano (1)
- Karmalized (108)
- Kids (12)
- Kissing Kate (4)
- Kizzed by Kelz (81)
- Ladyhawwk (306)
- LaReina Designz (1)
- Layout (6)
- Learning (4)
- Life (98)
- LML Designs (1)
- Love (233)
- Magic (33)
- Mardi Gras (2)
- MellieBeans (11)
- Mental Health (5)
- Mermaids (67)
- MicroTut (19)
- Misc (6)
- Misticheskaya (25)
- Monsters (1)
- Monti's Scraps (22)
- Moon (56)
- MTA (18)
- Music (60)
- Mystery (1)
- Mystical Scraps (184)
- Nature (220)
- Nerd/Geek (1)
- New Years (10)
- Nocturne (30)
- Norella (3)
- Ocean (143)
- Overlays (10)
- Pagan (59)
- Paranormal (1)
- Patriotic (15)
- Peace (4)
- Phone Wallpaper (10)
- Photo (4)
- Pimp'd Designz (3)
- Pimpin Pspers Warehouse (3)
- Pink Paradox (1)
- Pinterest (1)
- Pirates (4)
- Poems (1)
- Poetry (11)
- Poser (4)
- Positive (7)
- Presents (2)
- Promo (25)
- PS (1)
- PSP (3)
- PTU (20)
- PU (1)
- Queen Uriel (45)
- Quickpages (14)
- Rac (9)
- Rebecca Sinz (175)
- Rebel Designz (123)
- Rene Kunert (27)
- Retro (7)
- Rissa's Designs (8)
- RMQ (47)
- Robot (2)
- Sale (3)
- Sams Scraps (1)
- Savage Dezines (2)
- Schnegge (14)
- School (21)
- Sci-fi (3)
- Scrap (23)
- Scrappin with lil ole me (1)
- Scraps of enchantment (1)
- Selina Fenech (13)
- Sexy (150)
- SGRowe (3)
- Sissys Sassitude (3)
- Snowmen (2)
- SophisticatSimone (9)
- Spazz (17)
- Special Friends (2)
- Sports (12)
- Spring (162)
- St Patty's Day (36)
- St. Patricks (1)
- starlite & soul (5)
- Steampunk (26)
- Summer (110)
- summerween (1)
- Sweet (3)
- SWLOM (1)
- Tag (44)
- Taggers Delight (7)
- tagging (1)
- Tasha's Playground (88)
- Tech (4)
- Template (11)
- Thanksgiving (12)
- Thoughts (103)
- Timeline (210)
- Timelines (70)
- Tiny Turtle (4)
- TKDezigns (39)
- Tony T (3)
- Tonya (3)
- Toon (1)
- TPP (8)
- Travel (1)
- Treasured Scraps (7)
- Tresured Scraps (26)
- Tutorial (220)
- UYA (6)
- Valentine's Day (102)
- Verymany (65)
- Vi NIna (1)
- Vintage (112)
- Wallpaper (469)
- WDDesignz (38)
- Western (2)
- Whisprd Desginz (10)
- Wicked Diabla (18)
- Wicked Princess (173)
- Winter (139)
- WITW (1)
- Women (188)
- Wordart (12)
- Words (57)
- Zaric (3)
- Zindy (66)
- Zodiac (2)
- Zombies (11)
Followers
Blog Archive
-
▼
2012
(158)
-
▼
June
(21)
- Dream A Little Dream
- Tiny Blessings
- Haunting You
- Ice Cream Cutie
- Sounds Of Freedom
- Be Yourself
- Angel Whispers
- Lorenzo Sperlonga Forever Angel Tag
- Cupcake Fairy FTU Scrap
- Renee Lavoie Tag
- Beach Days
- Never Too Late
- Original
- Keeper Of The Secrets
- Beauty With A Gothic Heart
- Pastel Mermaid
- Lady Cupcake
- Clear Reality
- Flowers In Her Hair
- 1 Scrap Two Tags
- Lemonade Girl
-
▼
June
(21)


