Friday, September 27, 2013
12:51 PM | Edit Post
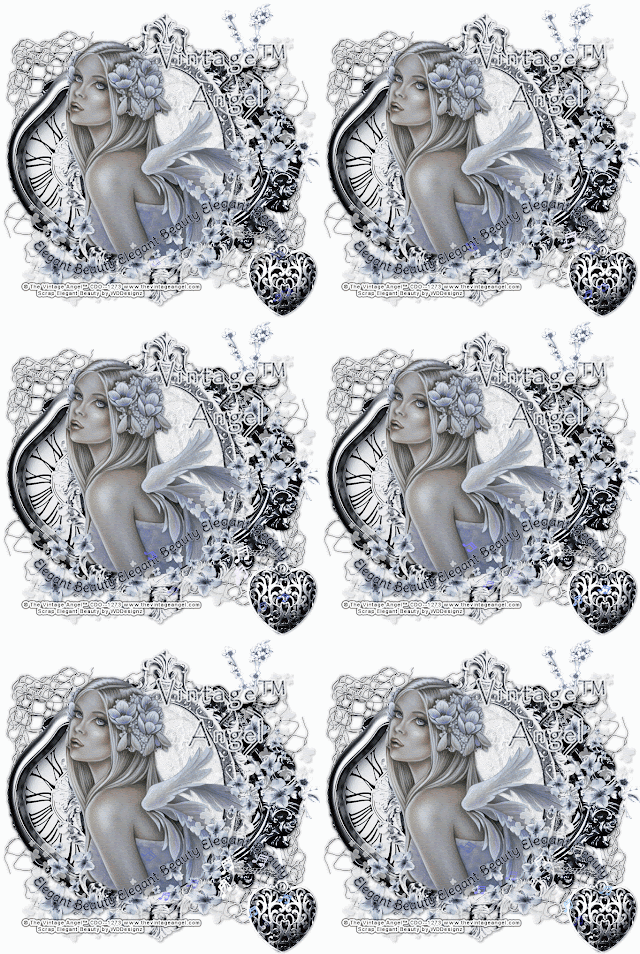
Elegant Beauty
This tutorial was written
by Sarah Fiack on
Sept 27th, 2013
Any resemblance to another
tutorial is purely coincidental.
I am using a tube by The Vintage Angel™
This tube is available at
CDO
I am also using Elegant Beauty
scrap by WDDesignz which can also be purchased
at CDO.
Animation 227
by Simone Scrappy Bit Of Fun
here
Open a 700x700 new image with
a white background.
Open up your tube and scrap
supplies.
Choose two frames -
1 horizontal and 1 vertical.
Copy & paste the horizontal
frame first.
Click inside the frame with your
magic wand. Selections modify
expand by 5. Paste a paper of choice
as a new layer. Selections invert
& press delete button. Select none.
Move the paper underneath the frame.
Now copy and paste the vertical frame.
You want it on top & in center of the
previous frame. Click inside the frame
with your magic wand. Selections modify
expand by 5. Paste a 2nd paper of choice
as a new layer. Selections invert
& press delete button. Select none.
Move the paper underneath the frame.
Keep selected.
Paste your tube of choice as a new
layer between the two layers of the vertical
frame. Duplicate the tube once. Move the
copy layer to above the vertical frame layer.
Back on the original tube, press delete.
Select none.
On the copy tube layer,erase parts
showing past the frame which you
do not want to show.
Add a drop shadow to the frame layers
and the original tube layer.
2,2,50,5 black.
Open a clock element.
Resize 70%. Position above the
1st frame on the left side of the tag.
You want it to appear to be coming out
from behind the top frame layers.
Open a ribbon key element. Resize 70%.
Paste as a new layer. Position on your tag
across from the clock - opposite side.
Add the above drop shadow to this layer.
Open a scattered flower element.
Resize 80%. Paste along the top layer on
the bottom of the tag. My element comes up
on the right side of the tag .Add the earlier drop
shadow to the layer.
Open a corner netting element. Copy and paste
on a bottom corner of the tag ( left or right side ).
Duplicate the layer once - Mirror & flip the copy layer.
Open a wordart of choice. Resize 70%
Paste as a new layer. Position near the bottom
of the tag on the top layer.
Add a drop shadow to the layer.
Open a necklace element. Move underneath
the top frame layers. You want the charm
to appear on the bottom of your tag -
out from underneath the frame layers.
Open a vertical branch. Resize 70%. Paste on the right side of the
tag above the net layer. You want it to come up at the top of the tag.
Merge the layers visible except
for the white background.
Duplicate the merged layers once.
On the bottom layer, adjust blur
Gauassian blur 3.00
Crop to desired size.
Add artist copyright information
& name to the tag.
If you are not animating,
you can save the tag here &
will not need a white background on it.
If you are animating, continue and merge visible.
In Animation shop, open animation of choice.
I changed the color of the animation I am using.
To do this, click on your animation -
Edit select all. Animation - replace a color.
Select the color you are replacing in the animation. On the 2nd box,
choose a color from your tag
to replace the color.Tolerance is 20.
Copy your tag as copy merged. Now go to Animation shop
and paste as a new animation.
Duplicate for the required number of frames
as your animation has.
For the animation I am using, it has 16
frames. This means I have to duplicate
the tag image for a total of 16 frames.
To duplicate, hold down Ctrl and repeatedly
press the L button.
Down on the bottom right corner of AS,
it will show how many frames you have.
Once you have all the frames needed,
edit - select all.
Now on your animation, select all - copy.
Drag onto your tag image.
Select all - view animation.
If happy, save as gif.
Thursday, September 26, 2013
10:24 AM | Edit Post
Amy Marie has a Mega collab Breast Cancer Awareness kit available in her store.
Several members of the CT ( myself included) have contributed to the scrap
as well.
You can find the mega kit in her store.
Several members of the CT ( myself included) have contributed to the scrap
as well.
You can find the mega kit in her store.
Labels:Amy Marie,BCA,Charity,Scrap | 0
comments
Tuesday, September 24, 2013
9:42 PM | Edit Post
Constellation Dream
This tutorial was written
by Sarah Fiack on
September 24th, 2013
Any resemblance to another
tutorial is purely coincidental. I am
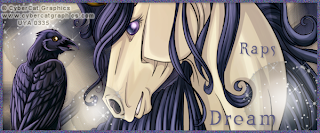
using a PTU tube by CyberCat Graphics.
It is available at UYA Here
Plugins:
Mura's Meister Copies
Eye Candy 5 Nature: Squint
Xenofex 2 Constellation
Open a 600x250 new image.
Open up your tube of choice.
Paste your tube as a new layer.
Position as wanted on the image.
Duplicate the layer.
Add a drop shadow to
the top tube layer.
2,2,50,5 Black.
On the bottom layer, apply
the plugin Mura's Meister
Copies Wallpaper rotate
default settings.
Make sure you have the bottom
layer selected in your layer palette.
Selections - select all
Now select your wallpaper
layer on your layer palette.
Image - crop to selection.
Repeat the select all
of the bottom layer.
Now select the top tube layer.
Crop to selection.
On the wallpaper layer,
apply Adjust Blur - Motion blur.
Angle 50 Strength 100
Now apply the plugin
Eye Candy 5 Nature: Squint
Setting: Dream Sequence
Effects
Edge effects
Enhance more
Effects -Artistic Effects
Balls & Bubbles
Shape: Single ball or bubble selected
Surface: Opacity 20
Shininess 34 Gloss 15
Click okay.
Resize this layer 70%
Duplicate twice. Position one
on the left side behind your tube.
Position the other one right side
in front of your tube.
Duplicate this bubble once.
Resize again 70%. Position on
the left bottom side in front of your tube.
On each of the bubble layers, apply the
plugin Xenofex 2 Constellation
Setting Low Denisty Stars default settings.
Make sure Keep original image box is checked.
Merge layers. Add a new raster layer.
Fill with a color of choice from your tag.
Select this layer with your magic wand tool.
Selections modify contract by 5.
Press delete button. Select none.
Adjust add noise.
Uniform 35.
Add the earlier drop shadow to the border.
Select your font tool.
Choose a font of choice.
Type out a single word which
fits your tag. Position on the
bottom right side of the tag.
Convert to raster.
Add the earlier drop shadow to it as well.
Merge the layers visible.
Add artist copyright and name to the tag.
Save as png. Thanks for trying my tutorial.
Labels:Animals,Fantasy,Forum Style,FTU,Tutorial | 0
comments
Sunday, September 22, 2013
4:56 PM | Edit Post
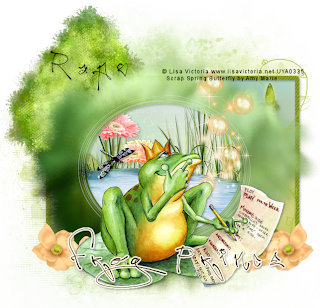
Frog Prince
This tutorial was written
by Sarah Fiack on
September 22nd, 2013
Any resemblance to another
tutorial is purely coincidental. I am
using a PTU tube by Lisa Victoria called
the Frog Prince's Plan. It is available
at UYA here
I am using the PTU scrap
Spring Butterfly by Amy Marie available
in her store.
Mask by Moonbeams & Spiderwebs
MB and SW Mask19
Blog
Plugin
EyeCandy 4000 Gradient glow
Open a 700x700 new image.
Open up a tube and scrap supplies
of choice.
Choose a circular/oval frame of choice.
Copy and paste as a new layer.
Click inside the center of the frame
with your magic wand tool.
Selections modify expand by 10.
Paste a paper of choice as a new layer.
Selections - invert & press delete.
Move the paper underneath the frame layer.
Open a pond element.
Paste as a new layer between the frame
& paper layer. Position as wanted & press delete.
Open flowers of choice. Paste underneath the
water layer. You want them to appear behind
the water in the frame. Press delete.
Select none.
Add a drop shadow to the frame & flower
layers.
2,2,50,5 Black.
Open your tube of choice.
Resize 70% if needed to.
Paste as new top layer on your tag.
Move to center bottom of your frame.
Add the above drop shadow.
Open a rectangle frame. Resize 85%
or as needed.
Paste on bottom layer of the tag.
Click inside the frame with your magic wand.
If selecting more than one area, hold down shift
button while selecting.
Selections modify expand by 3.
Paste a paper of choice. Selections invert
& press delete.
Select none.
Move the the paper layer underneath the
frame layer.
Add a drop shadow to the frame
layer.
2,2,50,5 Black.
Open a tree element. Paste on the left side
of the tag above the rectangle frame.
Open bubbles element. Mirror.
Paste behind your main tube & position
so the bubbles appear to be coming up
from your tube.
Open a string doodle. Mirror.
Paste on the right side of the tag
below your circular frame layers.
Open two flowers. You want just the petals
or flowers without stems. Resize 50%.
Paste on both sides of your tube. You
will need to mirror once for this.Merge the
flower layers together & move below your tube
layer in your layer palette.
On the bottom layer of your tag, paste a
scrap paper of choice. Apply the mask
MB and SW Mask19.
Merge group.
Move over just slightly.
Merge layers visible.
Crop to desired size on your tag.
Add a wordart or text of choice to the tag.
I added a gradient glow to my text using
EyeCandy 4000 Gradient glow
Settings fat glow width 3.00
Add artist copyright information & name.
Save as a png. Thanks for trying my tutorial.
Labels:Animals,Fantasy,Tutorial | 0
comments
Friday, September 20, 2013
8:01 PM | Edit Post
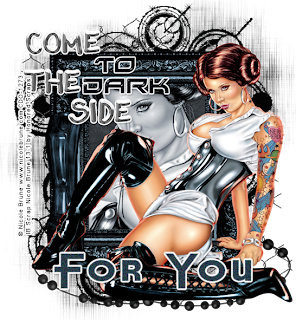
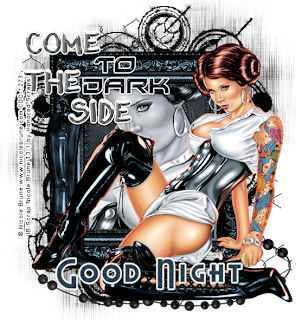
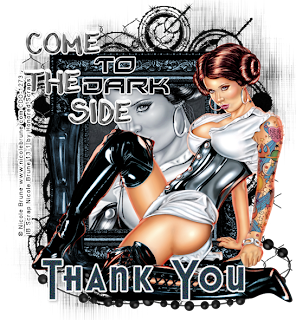
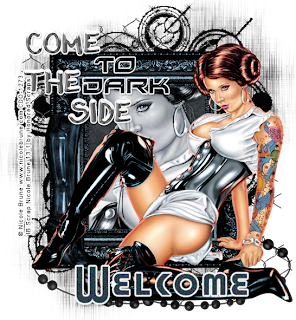
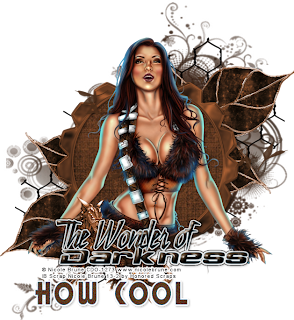
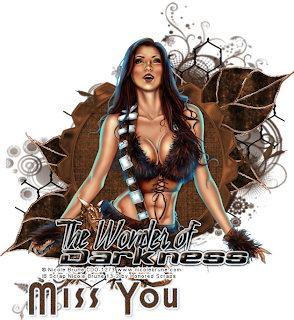
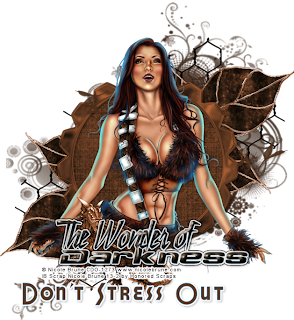
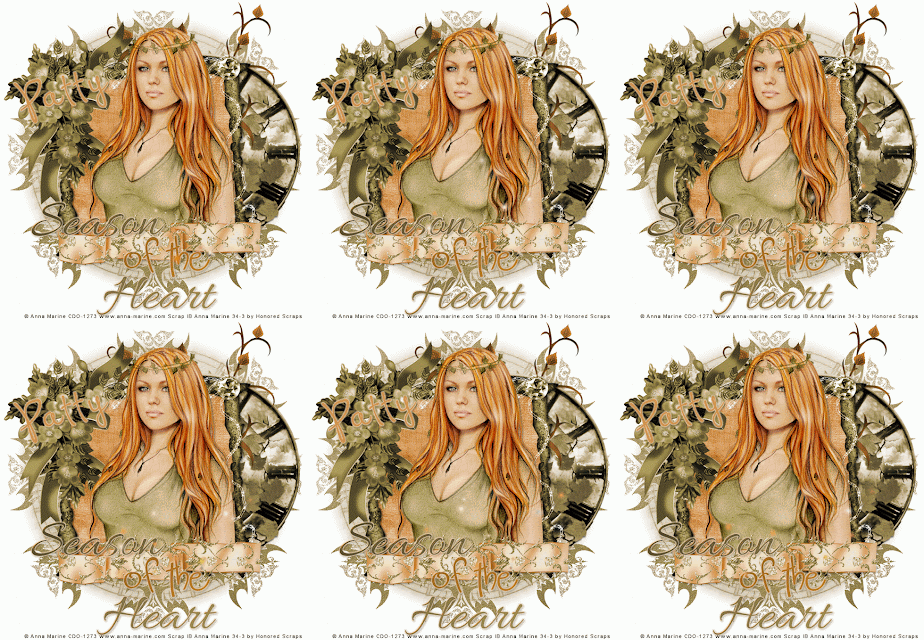
Two sets of snag tags featuring artwork by Nicole Brune and two Inspired by scrapkits by Honored Scraps.
Tubes and scraps are available at CDO.
Tubes: Nicole Brune 13-1 & 13-2
Scraps: Inspired by scrap Nicole Brune 13-1 &
Inspired by scrap 13-2
Tubes and scraps are available at CDO.
Tubes: Nicole Brune 13-1 & 13-2
Scraps: Inspired by scrap Nicole Brune 13-1 &
Inspired by scrap 13-2
Labels:Extras,Fantasy,Sexy | 0
comments
Tuesday, September 17, 2013
2:41 PM | Edit Post
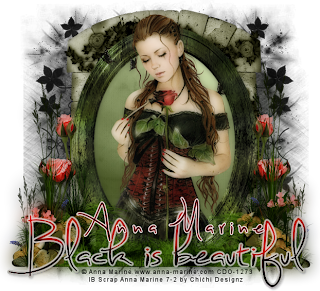
Beautiful Black
This tutorial was written
by Sarah Fiack on
September 17th, 2013
Any resemblance to another
tutorial is purely coincidental.
I am using a tube by Anna Marine .
This tube is available at
CDO
I am also using the PTU scrap IB Anna Marine 7-2
by Chichi Designz which can also be purchased at
CDO.
Mask:
MC_Mask9 by Melissaz Creationz
Blog
Plugins:
EyeCandy4000 Gradient Glow
Xero Porcelain
Open a 700x700 new image.
Open up your tube and scrap supplies.
Choose a frame of choice.
Resize 75%.
Copy and paste as a new layer.
Select your magic wand tool.
Click inside the frame once to
select it. Selections modify -expand
by 10.
Paste a paper of choice as
a new layer.Selections invert
& press delete button.
Move the paper underneth the
frame layer. Keep selected.
Paste your tube between the two
layers. Duplicate once. Move the tube
copy layer to the top in your
layer palette.
Back on the original tube, press
delete. Select none.
Now on the tube copy layer,
erase any parts of the tube which
you don't want visible past the frame.
Add a drop shadow to the frame
& original tube layer.
2,2,50,5 black.
Open an archway element.Resize 80%.
Paste behind the frame layers.
Open a grass/plant scenry layer.
Paste in front of the previous layers
at the bottom of the tag. You want the
frame to appear to be "sitting" in the grass.
Duplicate the scenry layer once.
Move the original scenry layer to bottom
of the tag - underneth the archway layer.
Adjust blur - gauassian blur 10.
Open a stemmed rose or flower.
Resize 50%. Mirror once. Paste on a side
underneth the scenry layer. Duplicate once
& mirror again to the other side.
Open a wordart of choice. I am using one
which was provided in the scrap I chose.
Paste as a new layer & position near the
bottom of the tag.
Apply a gradient glow to the wordart using
EyeCandy4000 Gradient Glow.
Setting fat - glow width 3.00
Also apply a drop shadow to the wordart.
Paste a paper of choice on the bottom
of the tag - underneth the previous layers.
Apply the mask MC_Mask9.
Merge group.
Resize this mask by 80%.
Merge layers visible.
Apply the plugin Xero Porcelain
Softness 73
Strength and Brightness 128
Crop image to desired size.
Add artist copyright information
& name. Save as png.
Thanks for trying my tutorial.
Thursday, September 12, 2013
11:37 AM | Edit Post
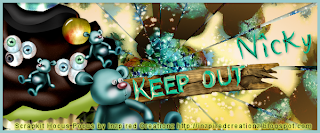
Keep Out
This tutorial was written
by Sarah Fiack on
September 12th, 2013
Any resemblance to another
tutorial is purely coincidental.
I am using the PTU scrap
Hocus Pocus by Inzpired Creationz
available at PMTWS
Plugins Xero: Bad Dream
Xero Soft Vignette
VM Distortion Broken Mirror
Open a 600x250 new image.
Open up your scrap supplies of choice.
Click your new image with your magic
wand tool. Paste a paper of choice
as a new layer. Selections invert
& press delete.
Paste your cupcake of choice
as a new layer. Position as wanted
on the tag. I moved mine to the left
side of the tag. Press delete.
Open a teddy bear element.
Resize 50%. Paste as new layer
by the cupcake element.
Select none.
Add a drop shadow to the cupcake
and bear layers. 2,2,50,5 black.
Open a wooden sign. Resize 70%
or as needed. paste to right side
& slightly behind the previous
element layers. You want it sticking out
from the cupcake and bear.
Duplicate the paper layer once.
Make sure the duplicate layer is selected
in your layer palette. Apply the plugin
Xero: Bad Dream default settings
Now apply the plugin Xero
Soft Vignette
Gradient shape Elliptical
Effect type foreground colour
Pattern type Solid
Repeats width Height all 0
Strength 255
On the same duplicate layer,
apply VM Distortion Broken Mirror
default settings.
Add the earlier drop shadow to the layer.
Merge layers. Add a new raster layer.
Fill with a color of choice from your tag.
Click this layer with your magic wand tool.
Selections modify contract by 5.
Press delete button. Ta da instant border.
Select none.
Add a drop shadow to the layer.
To make the avatar:
Open a 150x200 ( or desired size ) new image.
Click this image with your magic wand.
Copy your merged layer & paste onto your
avatar as a new layer. Selections invert
& press delete.Select none.
Move the bottom layer to the top
in your layer palette. Fill with a color
of choice - I used same color for border
of tag.
Click the layer with magic wand tool.
Selections modify contract by 5.
Press delete.
Select none.
Bingo you have an avatar.Make sure
to add a drop shadow.
Add copyright information &
name to both. Save as png.
Thanks for trying my tutorial.
Labels:cupcake,Forum Style,Halloween | 0
comments
Wednesday, September 11, 2013
1:48 PM | Edit Post
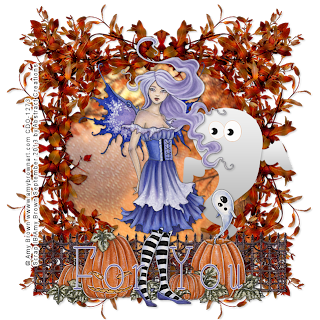
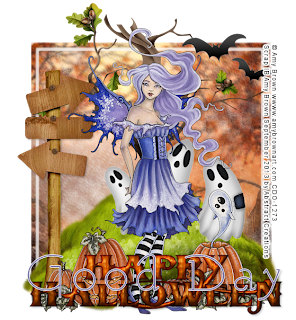
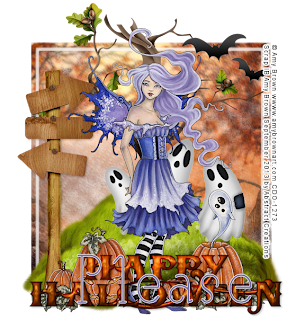
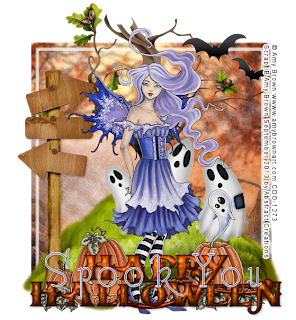
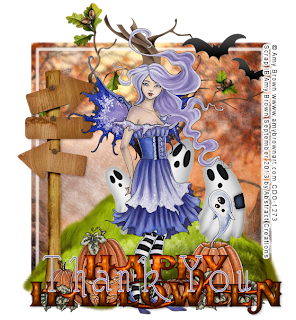
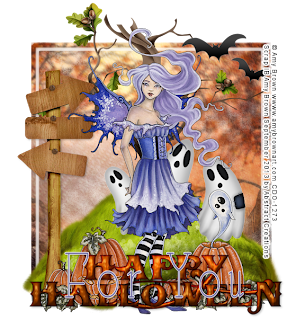
Two sets of snag tags featuring the CDO Amy Brown September 2013 Bonus Tube
available during this month.
available during this month.
Labels:Extras,Fairy,Halloween | 0
comments
9:50 AM | Edit Post
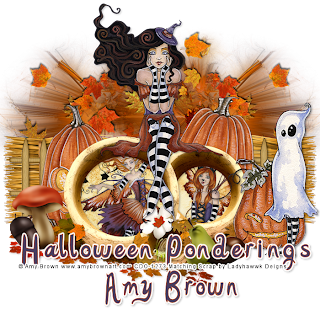
Halloween Ponderings
This tutorial was written
by Sarah Fiack on
September 11th, 2013
Any resemblance to another
tutorial is purely coincidental.
I am using a scrap tube combo
available at CDO. The tubes are
by Amy Brown and the scrap is
by Ladyhawwk Designs.
Plugin
EyeCandy 4000 Gradient glow
Open a 700x700 new image. Open up your 3 tubes, 2
images and scrap supplies.
Open a frame with 2 frames on it. I am using
one with 2 circle frames.Resize 80% and 88% once
each. Paste as a new layer. Move down slightly
on your tag.
Select your magic wand tool. Click inside each
of the frames with the tool. Selections modify
expand by 5. Paste an image into each frame.
1 image = 1 frame.
Selections invert & press delete.
Select none.
Copy and paste your tube as a new layer.
I resized this layer 89% but it may vary on your tube.
Position so it appears to be sitting on top
of the frame layers.
Add a drop shadow to the tube and frame layers.
2,2,25,5 black.
On a different tube, copy the pumpkin layer.
Paste as a new layer - making sure this layer
is below the previous layers.
Position as wanted. I have my pumpkins coming out
from behind and side of the frames.
Open a fence element.
Resize 88% twice. Paste behind the
pumpkin layer.
Open a hay bale element. Resize 60%.
Paste behind one side of the fence.
Duplicate the bale layer & mirror.
This should give you hay bales behind
the fence on both sides.
Now add the earlier drop shadow
to the pumpkins and fence layers..
On your 3rd tube, select a pumpkin & character layer.
Resize 70%. Paste as a new layer on a side of your
tag. I mirrored this layer & positioned it on the right
side of the tag. You want this as one of the top layers.
Also add the former drop shadow.
Open a leaf blur element. Paste as new layer.
Move down and to the left slightly. Duplicate
once & mirror. Merge the two layers together.
Flip this layer.
Move this layer to the bottom layer of the tag
and coming up from behind the hay bales.
Open acorn elements. Resize 50%. Paste along the
bottom half of the tag as wanted. Open a mushroom and
repeat - positioning by one of the acorns. Do the same with
a piece of fruit - positioning this one by the other acorn.
Add wordart or text of choice. to your tag. I positioned
mine near the bottom of the tag. I did add an
EyeCandy 4000 Gradient glow to my text but that is
optional. Make sure you add a drop shadow.
Merge layers visible.
Add artist copyright information and name.
Save as png.
Thanks for trying my tutorial.
Monday, September 9, 2013
3:21 PM | Edit Post
Season Of The Heart
This tutorial was written
by Sarah Fiack on
September 9th, 2013
Any resemblance to another
tutorial is purely coincidental.
I am using a tube by Anna Marine .
This tube is available at
CDO
I am also using the PTU scrap IB Anna Marine 34-3 by Honored Scraps
which can also be purchased at CDO.
Tresemask 0015
Blog
Animation 261B
by Simone Scrappy Bit Of Fun
here
Plugin EyeCandy4000 Gradient Glow
Animation Shop
Open a 700x700 new image.
Open up a tube and scrap supplies.
Choose a frame of choice and paste
as a new layer.
Select your magic wand tool.
Select inside the frame with the magic wand.
Selections modify expand by 10.
Paste a paper of choice as a new layer.
Selections invert & press delete.
Move the paper layer underneath
the frame layer.
Paste a tube of choice between
the two layers. Duplicate once -
move the copy layer to top of
your layer palette.
Back on the original, press delete.
Select none.
On the tube copy layer, erase any parts
showing past the frame which you do not want
visible.
Add a drop shadow to the original tube
and frame layers. 2,2,50,5 Black.
Open a tree element.
Paste on the bottom layer & position
near the top right side of the tag.
Open a ribbon. Resize 60%.
Paste along the bottom of the frame.
Open a doodle. Paste on top of the ribbon.
Add the above drop shadow to the ribbon layer.
Open a clock face element.Paste underneath
the tree layer & on the right side of the tag.
You want it partially visible on the side.
Open a corner plant element.
Paste on the top left corner of the frame.
Paste a paper of choice as a new layer
on the bottom layer of the tag.
Apply the mask Tresemask 0015.
Merge group. Resize this layer 95%.
Open a wordart of choice. I am using one
which comes with the scrap.
Resize 70%. Paste as new top layer of the tag.
Apply the plugin EyeCandy 4000
Gradient Glow - color of choice.
Setting glow width 3.00
Merge layers.
Crop to desired size.
Add artist copyright information & name.
To animate, put a white background on the
bottom
layer of the tag.
In Animation shop, open animation of choice.
Copy your tag as copy merged. Now go to
Animation shop
and paste as a new animation.
Duplicate for the required number of frames
as your animation has.
For the animation I am using, it has 21
frames. This means I have to duplicate
the tag image for a total of 21 frames.
To duplicate, hold down Ctrl and repeatedly
press the L button.
Down on the bottom right corner of AS,
it will show how many frames you have.
Once you have all the frames needed,
edit - select all.
Now on your animation, select all - copy.
Drag onto your tag image.
Select all - view animation.
If happy, save as gif.
Labels:Animation,CDO,Fall,Honored Scraps,Love,Tutorial | 0
comments
11:14 AM | Edit Post
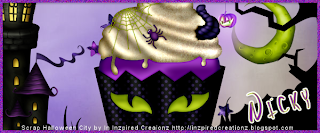
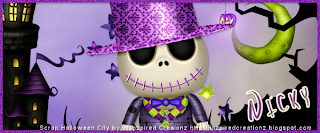
Halloween City
This tutorial was written
by Sarah Fiack on
September 9th, 2013
Any resemblance to another
tutorial is purely coincidental.
I am using the PTU scrap
Halloween City by Inzpired Creationz
available at PMTWS
Open a 600x250 new image.
Open up your scrap supplies.
On your new image, select with
your magic wand tool.
Paste a scrap paper of choice
as a new layer. Selections invert
& press delete.
Open a tree/grass element.
Resize 80% or as needed.
Paste as a new layer on
top of the paper layer.
Press delete.
Open a haunted house element.
Resize 80%. Paste as a new layer
on the opposite side of the tree.
Select none.
Add a drop shadow to the house
& tree layers. 2,2,50,5 Black.
Open stars element. Resize 50%
Rotate 90 either direction.
Click on the paper layer.
Paste the stars as a new layer.
Open a crescent moon element.
Resize 25%. Paste as a new layer
beside the stars.
Choose a character tube from
the scrap. Paste as new layer.
Position in the center of your tag
& as the top layer.
For me, I did one with a black cat cupcake
and one with a skully dude.
Drop shadow the character.
Add a new raster top layer.
Fill with color of choice from tag.
Select this layer with your magic wand.
Selections modify contract by 5.
Press delete.
Select none.
On the border you just made,
Adjust add noise - uniform 45.
Add the earlier drop shadow as well.
Merge layers visible.
Add copyright information and name.
Save as png.
Thanks for trying my tutorial.
Labels:cupcake,Forum Style,Halloween,Tutorial | 0
comments
Friday, September 6, 2013
1:00 PM | Edit Post
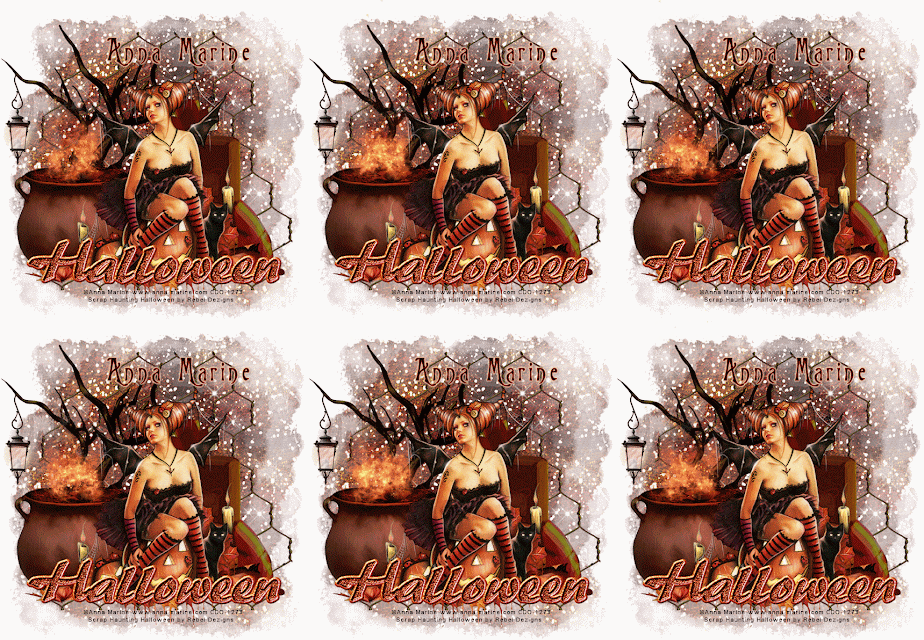
Halloween
This tutorial was written
by Sarah Fiack on
September 6th, 2013
Any resemblance to another
tutorial is purely coincidental.
I am using a tube by Anna Marine .
This tube is available at
CDO
I am also using the PTU scrap Haunting Halloween by Rebel Dezigns
which can also be purchased at CDO.
Mask by Becky mask022
Here
Animation 301
by Simone Scrappy Bit Of Fun
here
Open a 700x700 new image.
Open up your tube and scrap supplies.
Copy and paste your tube as
a new layer.
Open a tombstone element.
Paste as a new layer. Position
this layer behind your tube on the
right side.
Open leaves element ( laying down flat)
Mirror the leaves & paste between the two
layers. Position at the bottom of your tube.
Add a drop shadow to your tube and
tombstone layers. 2,2,50,5 black.
Open a cauldron element. Resize 60%.
Paste underneath the leaves layer on the
left side of your tag. You want it to appear t
be "on" the leaves.
Open a tree element.
Paste on the bottom layer behind the cauldron
layer. Add a drop shadow to the cauldron.
Open a hanging light. Resize 30%. Paste on
the tag. Position so it appears to be hanging from
a tree branch.
Open a barb wire element.
Paste on the bottom layer of the tag.
Paste a paper of choice as a new layer.
Make sure it is on the bottom layer of the tag.
Apply the mask Becky mask022.
Merge group.
Copy and paste a wordart of choice.
I am using one which comes with the scrap.
Position on your tag near the bottom.
Merge layers.
Crop to desired size.
Add artist copyright information & name.
To animate, put a white background on the bottom
layer of the tag.
In Animation shop, open animation of choice.
Copy your tag as copy merged. Now go to Animation shop
and paste as a new animation.
Duplicate for the required number of frames
as your animation has.
For the animation I am using, it has 21
frames. This means I have to duplicate
the tag image for a total of 21 frames.
To duplicate, hold down Ctrl and repeatedly
press the L button.
Down on the bottom right corner of AS,
it will show how many frames you have.
Once you have all the frames needed,
edit - select all.
Now on your animation, select all - copy.
Drag onto your tag image.
Select all - view animation.
If happy, save as gif.
Labels:Animation,CDO,Halloween,Rebel Designz,Tutorial | 0
comments
Wednesday, September 4, 2013
1:40 PM | Edit Post
Available in the Amy Marie store.
Quickpages use the PTU scrap Jewels available in
Full or tagger size
Quickpages use the PTU scrap Jewels available in
Full or tagger size
Labels:PTU,Quickpages | 0
comments
Tuesday, September 3, 2013
8:12 PM | Edit Post
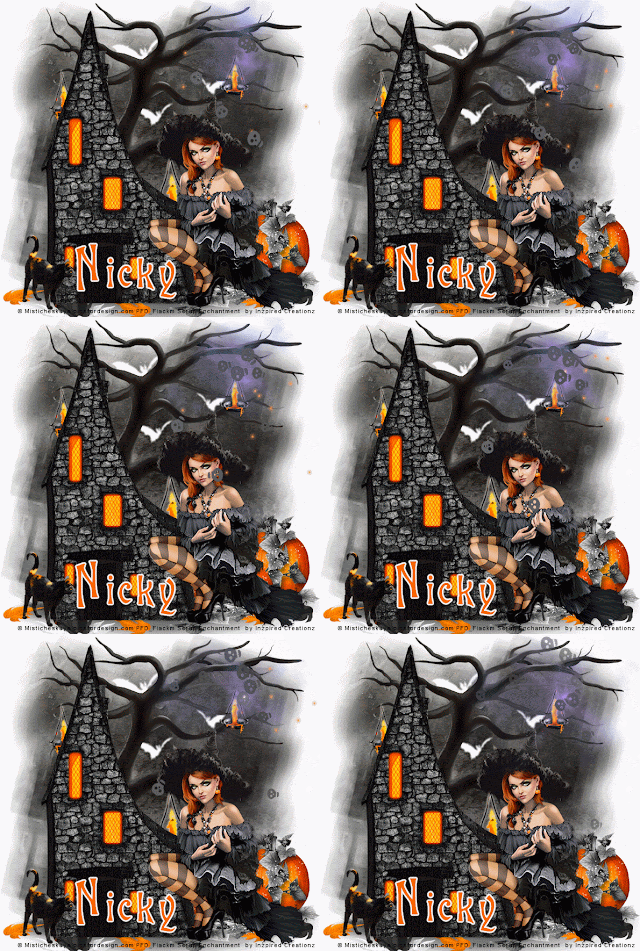
Hallows Eve House
This tutorial was written
by Sarah Fiack on
Sept 3rd, 2013
Any resemblance to another
tutorial is purely coincidental.
I am using a tube by Misticheskaya
This tube is available at
Picsfordesign
I am also using PTU scrap Enchantment
by Inzpired Creationz & is available at
PMTWS
Animation 180
by Simone Scrappy Bit Of Fun
here
Mask
DBV Mask 133
Blog
Open a 700x700 new image.
Open up your tube and scrap supplies.
Paste a scrap paper of choice as
a new layer. Apply the mask DBV Mask 133.
Merge group.
Open a grass element.
Paste as a new layer and position
at the bottom of the tag.
Open a haunted house element.
Paste as a new layer onto your image.
Position so it appears to be on the grass.
Open a tree element.
Paste this layer underneath and behind
the haunted house.
Open pumpkins element.
Resize 60%. Mirror.
Position behind and to
the side of the house.
Copy and paste your main tube
as a new layer. Position on the right side
of the tag near the bottom.
Open leaves element.
Paste as a new layer. Position at the bottom
of the tag. Make sure this layer is underneath
the house layer.
Open a bat element. Resize 50%.
Paste above the mask layer and underneath
the tree layer. You want the bats to appear
to be flying in the tree/sky.
Open a cat element. Resize 50% & 80% once each.
Paste by a corner of the house.
Merge layers visible.
Resize 80%.
Add artist copyright information and name.
If you are not continuing with animation,
then you can save your tag now.
If you are continuing, then add a white
background layer to the tag.
Copy merged into Animation Shop. (AS).
Paste as a new animation.
In Animation shop, open animation of choice.
I resized the animation I am using. Animation -
resize. I chose Percent and did an 80% resize on it.
For the animation I am using, it has 26
frames. This means I have to duplicate
the tag image for a total of 26 frames.
To duplicate, hold down Ctrl and repeatedly
press the L button.
Down on the bottom right corner of AS,
it will show how many frames you have.
Once you have all the frames needed,
edit - select all.
Now on your animation, select all - copy.
Drag onto your tag image.
Select all - view animation.
If happy, save as gif.
Labels:Animation,Halloween,Tutorial | 0
comments
8:56 AM | Edit Post
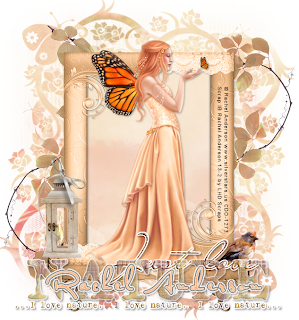
Nature's Lantern
This tutorial was written
by Sarah Fiack on
Sept 3rd, 2013
Any resemblance to another
tutorial is purely coincidental.
I am using a tube by Rachel Anderson
This tube is available at
CDO
I am also using Inspired by Rachel Anderson 13-2
scrap by LHD Scraps which can also be purchased
at CDO.
TreseMask 0046 Here
Plugin:EyeCandy 5 Nature Fire
Open a 700x700 new image.
Open up your tube and scrap supplies.
Choose a frame of choice.
Resize 75% or as needed.
Copy and paste as a new layer.
Select your selection tool.
Draw a rectangle selection shape
around the center of your frame.
Paste a paper of choice as
a new layer. Selections invert
& press delete. Select none.
Move the paper underneath the
frame layer.
Paste your tube as a new layer
making sure it is the layer above
the frame layer.
Open a metal decorated bar element.
Resize 60%. Paste underneath the
frame layers near the bottom. You do want
it visible on the sides and from underneath
as well.
Open a lantern element.Resize 40%.
Paste on a bottom left corner of the tag.
Use your freehand selection tool. Draw around
the center of the lantern.Add a new raster layer.
Apply the plugin EyeCandy 5 Nature Fire
Setting small candle - default.
On your selection & layer, selections
invert & press delete.
Select none.
Open a leaf doodle. Rotate - free rotate
right 90. Resize this layer 80%.
Paste on side of choice of the tag.
Make sure this layer is beneath
the previous layers.
Duplicate this layer - mirror & flip.
Open a bird element. Resize 30%.
Paste on the side of the tag across
from the corner with the lantern.
Open a wordart of choice. I am using one
provided in the scrap I am using.
Paste as a new layer & position near
the bottom of the tag.
Add drop shadows to the layers
as needed.2,2,25,5 black.
Paste a paper of choice on the bottom layer.
Apply the mask TreseMask 0046.
Merge group.
Merge layers visible.
Crop your tag to desired size.
Add artist copyright information and name
Save as png.
Thanks for trying my tutorial.
Subscribe to:
Posts
(Atom)
TOUs
I do not allow resizing of my tags, timelines or wallpapers. All of my creations are for PU only unless otherwise stated. Nor are they to be altered in any way either.
Categories
- Abstract (22)
- ACDivas (2)
- Ad (1)
- ADI (2)
- Adult (8)
- Alicia Mujica (61)
- Amber (4)
- Amy Marie (222)
- Angel (97)
- Animals (458)
- Animation (107)
- Anime (11)
- AORK (10)
- AOTW (8)
- Apocalyptic (5)
- Art-Content (1)
- Asian (8)
- Attitude (53)
- Authors (9)
- Autism (5)
- Autumn (26)
- award (3)
- Baby (1)
- BCA (7)
- BCS (28)
- Bella Caribena (2)
- birthday (1)
- Birthstone (10)
- BLT DeZignZ (11)
- book suggestions (6)
- Cajoline (1)
- Calendar (2)
- Carnival (1)
- Carpe Diem (6)
- Cars (4)
- Casino (3)
- CCD (12)
- CCS (18)
- CDO (1540)
- Celestial Scraps (2)
- Celinart Pinup (1)
- Chaos Priestess (72)
- Charity (29)
- Chasing The Blues (2)
- Chichi (65)
- Children (30)
- Christmas (163)
- Cluster Frame (24)
- Color (6)
- Comic (6)
- copyright (2)
- Country (29)
- Crafty (2)
- Creative Misfits (3)
- Crowe (17)
- Crystal's Creations (20)
- CSBC (76)
- CU (8)
- cupcake (58)
- Cupcakes (43)
- CUPU (1)
- Cute (196)
- DAH (11)
- Dees"SIGN Depot (64)
- Devil (1)
- Dia De Los Muertos (2)
- Digital Chaos (61)
- Doodle by Design (17)
- Dreams (63)
- DSI (2)
- Easter (45)
- ELF (14)
- EliasC. (19)
- Emo (28)
- emotion (27)
- Extras (79)
- Fairy (181)
- Fall (176)
- Family (21)
- Fantasy (319)
- Farrah (4)
- Feature Tutorial (3)
- Food (145)
- Forum Style (38)
- Foxy's Designz (92)
- Freeks Creations (35)
- Freya (5)
- Friends (18)
- Friendship (14)
- FTU (120)
- Garv (15)
- Gimptastic (146)
- Gingerscraps (2)
- Girly (121)
- Goldwasser (4)
- Gothic (335)
- Gothic Inspirations (12)
- Guest CT (28)
- Halloween (190)
- Hania's Design (9)
- Happy (15)
- Happy New Year (8)
- Heartfelt Perfections (2)
- Help 4 Casper (2)
- Hollywood (4)
- Honored Scraps (230)
- Hungry Hill (171)
- Inspiring (7)
- Irish Princess Designs (118)
- Jensen (106)
- Jose Cano (1)
- Karmalized (108)
- Kids (12)
- Kissing Kate (4)
- Kizzed by Kelz (81)
- Ladyhawwk (306)
- LaReina Designz (1)
- Layout (6)
- Learning (4)
- Life (94)
- LML Designs (1)
- Love (224)
- Magic (28)
- Mardi Gras (2)
- MellieBeans (11)
- Mental Health (5)
- Mermaids (63)
- MicroTut (19)
- Misc (6)
- Misticheskaya (10)
- Monti's Scraps (22)
- Moon (51)
- MTA (18)
- Music (57)
- Mystical Scraps (184)
- Nature (213)
- Nerd/Geek (1)
- New Years (9)
- Norella (3)
- Ocean (131)
- Overlays (10)
- Pagan (54)
- Paranormal (1)
- Patriotic (15)
- Peace (4)
- Phone Wallpaper (10)
- Photo (3)
- Pimp'd Designz (3)
- Pimpin Pspers Warehouse (3)
- Pink Paradox (1)
- Pinterest (1)
- Pirates (3)
- Poetry (11)
- Poser (4)
- Positive (7)
- Presents (2)
- Promo (25)
- PS (1)
- PSP (3)
- PTU (20)
- PU (1)
- Queen Uriel (34)
- Quickpages (14)
- Rac (9)
- Rebecca Sinz (156)
- Rebel Designz (123)
- Rene Kunert (27)
- Retro (7)
- Rissa's Designs (8)
- RMQ (47)
- Robot (2)
- Sale (3)
- Sams Scraps (1)
- Savage Dezines (2)
- Schnegge (14)
- School (20)
- Sci-fi (3)
- Scrap (23)
- Scrappin with lil ole me (1)
- Selina Fenech (12)
- Sexy (148)
- SGRowe (3)
- Snowmen (2)
- SophisticatSimone (6)
- Spazz (17)
- Special Friends (2)
- Sports (11)
- Spring (160)
- St Patty's Day (34)
- Steampunk (26)
- Summer (96)
- Sweet (3)
- SWLOM (1)
- Tag (44)
- Taggers Delight (7)
- tagging (1)
- Tasha's Playground (88)
- Tech (4)
- Template (10)
- Thanksgiving (11)
- Thoughts (101)
- Timeline (210)
- Timelines (70)
- Tiny Turtle (4)
- TKDezigns (17)
- Tony T (3)
- Tonya (2)
- Toon (1)
- TPP (8)
- Treasured Scraps (7)
- Tresured Scraps (26)
- Tutorial (218)
- UYA (6)
- Valentine's Day (95)
- Verymany (57)
- Vi NIna (1)
- Vintage (110)
- Wallpaper (396)
- WDDesignz (38)
- Western (2)
- Whisprd Desginz (10)
- Wicked Diabla (18)
- Wicked Princess (128)
- Winter (131)
- WITW (1)
- Women (188)
- Wordart (3)
- Words (54)
- Zaric (3)
- Zindy (63)
- Zodiac (2)
- Zombies (11)


