


Saturday, July 27, 2013

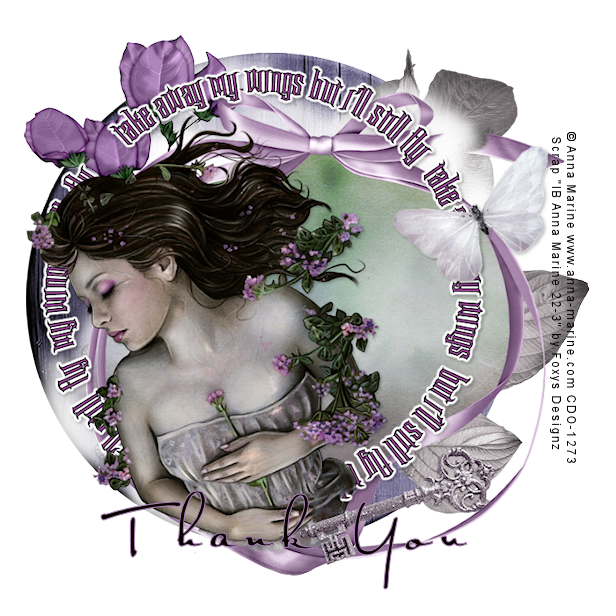
Ballerina Blue
This tutorial was written
by Sarah Fiack on
July 27th, 2013
Any resemblance to another
tutorial is purely coincidental.
I am using a tube by Anna Marine .
This tube was a bonus tube for the month of
November 2011.
CDO
I am also using Inspired by Anna Marine - Bonus Nov 11
scrap by Rebel Dezigns which can also be
purchased
at CDO.
Mask by Tresemask0033
Blog
Plugins
EyeCandy 4000 Gradient Glow
Mura's Meister Copies
Open a 700x700 new image
Open up your tube & scrap
supplies.
Paste your tube of choice as a
new layer. Apply the plugin
Mura's Meister wallpaper rotate.
Default settings.
Effects - Art Media Effects
Brush strokes Settings:
Brush: Bristle 160 Width 5 Opacity 50
Strokes: Length 10 Denisty 25
Lighting: Angle 102 Color white
Adjust Blur -Gauassian 3.0
Apply the mask Tresemask0033
to the same layer.
Merge group.
Open one of the bonus clusters
which come with the scrap.
Or if using a different scrap,
you can use a corner element.
Paste your tube as a new layer.
Position as wanted on the tag.
Add a drop shadow to the tube
& cluster layers.
2,2,50,5 Black.
Open a scattered bubbles element.
Resize 80% or as needed.
Paste as a new layer.
Rotate -free rotate - right 90.
Move this layer to just above the mask
layer in your layer palette.
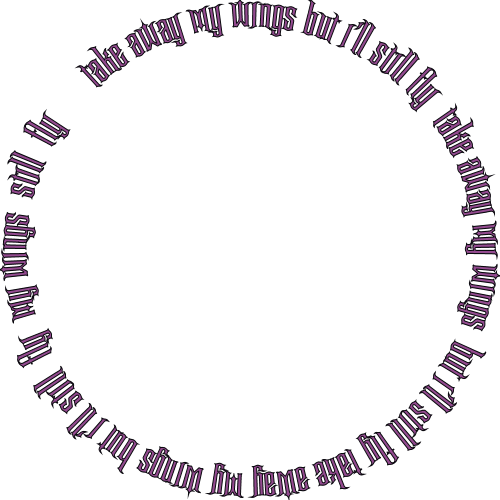
Select your font tool. Choose a font
which fits your tag. Type out text of
choice. I am using " Ballerina Blue"
Convert to raster.
Duplicate this layer once.
On the original text layer, apply
Mura's Meister Copies plugin
Tiling Angle - tile gap set to 1.
Apply the mask Tresemask0033
to the same layer.
Merge group
On your layers box, change the
blend mode on the masked text
layer to hard light.
Now on the text copy layer, apply
the plugin EyeCandy 4000 Gradient Glow
Glow width 3.00 - Fat
Repeat again this time with Black Halo.
Merge layers visible.
Crop to desired size.
Add artist copyright info & name.
Save as png.
Thanks for trying my tutorial.
Friday, July 26, 2013

Peace Out
This tutorial was written
by Sarah Fiack on
July 26th, 2013
Any resemblance to another
tutorial is purely coincidental.
I am using a tube by Pinuptoons .
This tube was a bonus tube for the month of
March 2013.
CDO
I am also using Inspired by Pinuptoons March 2013
scrap by Foxys Designz which can also be purchased
at CDO.
Plugin
EyeCandy 4000
Open a 700x700 new image
Open up your tube and scrap supplies.
Select your preset shapes.
You want a peace sign one.I don't remember
where I found mine originally.
Draw out the preset shape t
a desired shape. Objects -
align - center in canvas.Convert
to raster.
Select your shape using your
magic wand tool. Now open a
paper of choice. Paste as a
new layer. Selections - invert
& press delete button on keyboard.
Select none. Merge the two shape
layers together.
On the shape layer,
Effects -3D effects
Inner Bevel - Option 6
Default settings
Using your magic wand again, select
the inside areas of the peace sign.
Paste a 2nd paper as a new layer.
Selections invert - delete button.
Move the paper layer underneath
the shape layer.
Keep selected.
Paste your tube as a new layer
between the two above layers.
Duplicate the tube once.Move the copy
to the top layer in your palette.
Back on the original, press delete button.
Select none. On the tube copy layer,
erase any parts you don't want seen on
the frame.
Add a drop shadow to the shape layer
& original tube layer.
2,2,50,5 Black.
Open a button ribbon element.
Paste on a side of the shape layer.
Duplicate once & mirror.
Select your ellipse shape option
on your tools. Stroke a color of choice
& Fill hidden. Stroke set to 2.00 or 3.00.
Draw out a circle to go around
your current tag.
Keep as vector.
Select your font tool & font of choice.
Choose a color for fill that compliments
your tag colors.
Position your cursor on the vector circle
until you get A) symbol so you can type
on a curve.
Type your text around the circle as wanted.
Once you are happy with your text, go to your
layer palette, and click on the + symbol by this layer
to reveal the layers within it.
Click on the eye to hide the circle layer.
Convert these layers to raster.
Now on your text, apply EyeCandy 4000
Gradient Glow -Black Halo glow widith 3.00
Repeat this time applying the glow fat to the text.
Move the text layer to below your tube copy layer.
Open a kiss element. Resize 50%.
Paste on the tag where you would like
this element. I positioned mine along the words.
Merge layers visible.
Add artist copyright information & name.
Save as png.
Thanks for trying my tutorial.
Thursday, July 25, 2013

Autumn Fae
This tutorial was written
by Sarah Fiack on
July 25th, 2013
Any resemblance to another
tutorial is purely coincidental.
I am using a tube by Amy Brown .
This tube was a bonus tube for the month of
November 2012.
CDO
I am also using Inspired by Amy Brown November 2012
scrap by Babycakes which can also be purchased
at CDO.
MB & SW Mask 38
Blog
Plugin: Mura's Meister Copies
Open a 650x650 new image.
Paste your tube of choice
as a new layer.
Apply Muras Meister Copies
Default settings
Wallpaper Rotate to the tube.
Effects Art Media -
Brush strokes
Softness 20
Brush: Bristles 160 Width 5 Opacity 50
Strokes: Length 10 Denisty 25
Lightninig: Angle 102 Color white
Click okay
Adjust - Blur -Motion Blur
Angle 5 Strength 100
Image - flip this layer
Duplicate this layer once.
On the bottom layer mirror.
Position layers if needed to hide any
openings.
Merge the two layers together.
Apply the mask MB & SW Mask 38.
Merge group.
Duplicate the mask layer once.
On the bottom layer, apply Gauassian blur
Radius 10.
Paste your tube again as a new layer.
Make sure it is on the top layer of your
tag.
Select a wordart from the scrap. Paste as a new
layer near the bottom of your tag. Add a drop shadow
to the wordart & tube layers.
2,2,50,5 Black
Paste a standing vertical flower element.
I am using a layer which came with the tube
I chose. You can also use ones from
the scrap.
Position to the side & slightly behind your tube.
Open a branch element.
Resize 50%.
Position by a side of the wordart.
Make sure this layer is below the wordart layer.
Open a hanging lantern element.
Resize 50% & 80% once each.
Position on the tag so it appears to be
hanging from somewhere on the wordart.
Merge layers visible.
Resize 88%. Add artist copyright and name
to the tag. Save as png.
Thanks for trying my tutorial.
Wednesday, July 24, 2013

Crystal Ball
This tutorial was written
by Sarah Fiack on
July 19th, 2013
Any resemblance to another
tutorial is purely coincidental.
I am using a tube by Selina Fenech.
This tube was a bonus tube for the month of
June 2013.
CDO
I am also using Inspired by Selina Fenech June 2013
scrap by Babycakes which can also be purchased
at CDO.
Mask MB & SW Mask32
Blog
Plugin
Eye Candy 5 Impact
Open a 700x700 new image.
Choose a flower doodle element
& paste as a new layer.
Select your freehand selection - make sure it is
set to freehand selection type.
Draw around the center of the doodle.
Paste a paper of choice as a new layer.
Selections invert & press delete.
Select none.
Move this paper underneath the doodle layer.
Merge the two layers together.
Duplicate once. On the copy layer,
Rotate - free rotate - right 90
Mirror & move to the right side.
You want the two layers to form
a sort of Left facing L shape.
Open a standing single flower element.
Paste as a new layer on the opening side
of the two layers. Position so that it comes across
to the vertical right side layer.
On your layer palette, move this layer
down below the L layer.
Merge the two layers together.
Use your freehand selection again
& select around the center of the layer.
Paste a paper as a new layer.
Selections invert & press delete.
Move the paper below the layer.
Press your tube of choice as a new layer
between the paper & frame like layer.
Duplicate once.
Move the copy to the top in your layer palette.
Back on the original, press delete.
Select none.
On the tube copy layer, erase any parts
you don't want showing on your frame.
Add a drop shadow to your frame &
original tube layers.
2,2,50,5 Black.
Open a corner flower arrangement element.
Paste as a new layer.
Rotate - free rotate -90 right.
Position on left side of the tag behind
your tube copy layer.
Flip. Duplicate once &
flip the copy one.
I erased the large part of the ribbon sticking
out on both but that is optional.
Now open a vertical flower arrangement.
Rotate -free rotate - left 90.
Paste on the bottom right corner of the tag.
Keep this as a top layer for now.
I again erased a ribbon part but that is entirely optional.
Open a key element.
Resize 60%.
Paste on the upper right corner.
Add a drop shadow to the layer.
Open a crystal ball element.
Paste as a new layer.
Select your freehand selection again.
Draw around the inner edge of the ball part.
Paste your tube as a new layer.
Selections invert & press delete.
Merge the two together. Keep selected.
Apply the plugin Eye Candy 5 Impact
Glass - watery setting default.
Select none.
Resize 70% & position as wanted on the tag.
Paste a paper of choice as a bottom layer.
Apply the mask MB & SW Mask32.
Merge group. Resize this mask layer 105%.
Merge layers together.
Resize if wanted.
Add artist copyright info & name.
Save as png.
Thanks for trying my tutorial.
Thursday, July 18, 2013

Pass The Paper
This tutorial was written
by Sarah Fiack on
July 18th, 2013
Any resemblance to another
tutorial is purely coincidental.
I am using a tube by The Vintage Angel™
which you can purchase at
CDO
I am also using Pass The Paper
scrap by Rebel Dezigns which can also be purchased
at CDO
Mask Beckymask022
Here
Plugin
Alien Skin Xenofex 2 Crumple
Open a 700x700 new image with white background.
Open up your tube & scrap supplies.
Select a frame of choice.
Paste as a new layer onto your image.
Click inside the frame with your
magic wand tool. Selections modify
expand by 15.
Paste a paper of choice as
a new layer. Selections invert &
press delete button.
Move this paper underneath the
frame layer.
Paste your tube as a new layer.
Position as wanted on the tag
between the two layers.
Duplicate once & move to
the top layer.
Back on the original tube layer,
press delete. Select none.
Hide this layer for now.
Now on the tube copy layer, erase
any parts showing on the bottom
part of the frame. You want the illusion
of the tube being inside the frame.
Once you are done, unhide the original
tube layer. Add a drop shadow to the layer
& the frame layer as well.
2,2,50,5 black.
Open a dollie element.
Paste near the top left corner of the tag.
Move to the bottom layer. You want it coming
out around the edge of the tag. Duplicate
once - mirror & flip the copy so that it is
on the bottom right corner of the tag.
Open a key element.
Resize 60%.
Paste on the bottom right corner
of the frame.
Open a flower.
Resize 25%.
Paste on the top part of the key.
Add a drop shadow to both key & flower layers.
Open a heart element.
Resize 40%.
Paste along the key element.
Paste a wordart of choice as a new layer.
Position along the bottom of the frame.
I am using one which came with the scrap.
Add the above drop shadow to the words.
Paste a paper of choice above the
white background layer.
Apply the Beckymask022
Merge group.
Resize this layer only 110%.
Add artist copyright information & name.
We're going to add the animation now. If you don't
wish to do the animation, you can save your tag now.
To continue with animation, see below.
Merge layers together EXCEPT for the paper layer
inside your frame. Keep this layer unmerged as it is the
one we are using.
Alien Skin Xenofex 2 Crumple
Setting Subtle
Crumple size 93.00
Crumple force 25
Highlight Brightness 5.00
Highlight size 10.00
Highlight color white
Light boost 35
Apply the above to the paper layer.
Copy merged and paste as a new animation
into your Animation Shop (AS).
Return to PSP, undo the effect to the paper.
Apply again but this time click random seed once.
Repeat the copy merged & this time paste after
current frame in AS.This should be your 2nd frame.
Return to PSP. Undo and apply again clicking
random seed again. Repeat with copy merged &
paste after
current frame in AS.This should be your 3rd frame.
Repeat the above one more time for a 4th frame.
Once you have all your frames, select all
animation - Frame properties. Change to 15.
View animation. If you are happy with the tag,
save as gif.
Thanks for trying my tutorial.
Tuesday, July 16, 2013

Flying Emo
This tutorial was written
by Sarah Fiack on
July 16th, 2013
Any resemblance to another
tutorial is purely coincidental.
I am using a tube by Sin
which you can purchase at
CDO
I am also using Emo No Mo
scrap by LHD Scraps which can also be purchased
at CDO
Trese Mask Tresemask0019
Blog
EyeCandy5 Nature
Animation Shop
Open a 650x650 new white image.
Open up your tube of choice as well.
Add a new raster layer.
Fill with black or color of choice.
Apply Tresemask0019
Merge group.
Paste your tube of choice.
Add a drop shadow to the tube
layer. 2,2,50,5 black.
Open a skull element of choice.
Resize 50%.
Paste as a new layer & position
was wanted on the tag.
Choose a lollipop element of choice.
Resize 70%. For the one I used, I
erased the stick. This is entirely optional.
Paste as a new layer & position as
wanted on the tag.
Open a cross bones element.
For the one I am using, it is a lollipop.
I erased the stick part. Resize 25%.
Paste 4 times on the tag. I position one
per circle of the mask. So that it appears
to be holding the mask onto the background.
Crop your tag to desired size.
Merge layers except your tube.
Choose your font tool & select
a font of choice.
Add text as wanted. I used the words
" Flying Emo ".
Position along the bottom part of your tag.
Add artist copyright information & name to tag.
If you are not going to animate, then save your tag here.
To animate please continue.
Choose your freehand selection.
Draw around where you want the smoke to be.
Plugin: EyeCandy5 Nature
Setting: Small Streaming Coffee
On Basic Wispy type
Smoke direction 99
Column Length 165.13
Puff size 9.58
Expansion -10
Waver 57
Roughness 60
Overall capacity 78
Click okay
Select none.
Copy merged & paste as a new animation
in your Animation Shop (AS).
Return to PSP. Undo the smoke.
Make sure your earlier selection
is back as well.
Choose the effect again - and click random once.
Select none.
Copy merged & paste after current frame in
your AS.
Repeat the above one more time.
You want a total of 3 frames in AS.
Each frame should of had the random seed
clicked once.
In AS, select all, Animation -
Frame Properties - change to 15.
View animation.
If you are happy, save as a gif.
Thanks for trying my tutorial.
Friday, July 12, 2013

Smiley Girl
This tutorial was written
by Sarah Fiack on
July 9th, 2013
Any resemblance to another
tutorial is purely coincidental.
I am using a tube by Anna Liwanag
which you can purchase at
CDO
I am also using Smile scrap by TK Dezigns
which can also be purchased
at CDO.
Mask by me
WLC_Smileymask here
Animation Shop
Open a 700x700 new image
with a white background.
Open up your tube & scrap supplies.
Choose a frame of choice.
Resize 80% if needed.
Move the frame down slightly
on your tag.
Click inside the frame with
your magic wand tool.
Selections modify expand by 5.
Paste a paper of choice as
a new layer.
Selections invert & press delete.
Select none. Move the paper
underneath the frame layer.
Add a drop shadow to the
frame layer.
2,2,50,5 black.
Paste a tube of choice as
a new layer.Position as wanted
along an edge of the frame.
Paste a paper of choice as a new
layer above the white background.
Apply the mask WLC_Smileymask.
Merge group.
Choose ellipse preset shape tool
Make sure the Draw Ellipse shape is selected.
On your Materials palette, make sure both
squares are black or color of choice.
Draw out an ellipse shape about the size
of the eye on the mask. Convert to raster.
Duplicate once & mirror.
Merge together to the mask.
Now select the rectangle preset shape.
Draw out a rectangle for the mouth.
Convert to raster.
Move underneath the mask layer.
If needed,erase any parts showing past
the mask.
Add artist copyright information & name to tag.
We're going to start the animation process. If you don't wish to
animate, you can skip that part.
Open a smiley element.
Resize 70%
Paste on top of a corner by the frame.
Copy merged and paste in Animation Shop (AS) as
a new animation.
Now back in PSP, move the smiley down
slightly onto the frame. Copy merged into
AS and paste after current frame.
This should give you frame 2.
Back in PSP, move the smiley up slightly
& over to the side as well. Copy merged
& paste again - this should be frame 3.
You want to keep this up moving the smiley
up & down & across the frame for a total of 6
frames in AS. I ended with the smiley on a bottom corner
diagonal from the one I started at.
Now in AS, selct all -Animation - Frame properties
to 25.
Edit select all - copy - paste as a new animation.
Edit select all -animation - reverse frames.
Select all - copy.
Back on the original set of frames, select frame 6 -
paste after current frame.
Select frame 7 & delete only this frame.
This will take your total frames from 12 to 11.
Select all - view animation.
If you are happy with it, save as gif.
Thanks for trying my tutorial.
Tuesday, July 9, 2013
Among The Stars

This tutorial was written
by Sarah Fiack on
July 9th, 2013
Any resemblance to another
tutorial is purely coincidental.
I am using a tube by Enamorte
which you can purchase at
CDO
I am also using Inspired by Enamorte10-3
scrap by Babycakes which can also be purchased
at CDO.
Trese mask0002
Blog
Plugin
Xero Softmood
Open a 700x700 new image.
Open up a tube & scrap supplies.
Choose a frame of choice.
Paste as a new layer.
Click inside the frame with
your magic wand tool.
Selections modify expand
by 8.
Paste a paper of choice as a
new layer. Selections invert
& press delete button.
Move the paper layer underneath
the frame layer.
Paste your tube as a new layer
between the two layers.
Position as wanted.
Press delete.
Select a closeup layer of the tube.
Mirror if needed. Paste across from
your original tube.
Press delete.
Select none.
Merge the closeup layer & the
frame background layers together.
Apply the plugin Xero Softmood
Haziness 125
Glow Red 199
Brightness -18
Contrast 11
Add a drop shadow to the frame
& tube layers.
2,2,50,5 black.
Open a scattering of stars.
Resize 75%.
Paste as a new layer above the
paper layer.
Add the above drop shadow to it.
On your layer palette, change the blend
mode to screen.
Add a fill layer on the bottom layer.
Fill with a color of choice from your tag.
Apply the mask Trese mask0002.
Merge group.
Paste a wordart of choice as a new layer.
Position on the bottom part of your tag.
Add artist copyright info & name.
Save as png.
Thanks for trying my tutorial.
Monday, July 8, 2013

Zoom Butterfly
This tutorial was written
by Sarah Fiack on
July 8th, 2013
Any resemblance to another
tutorial is purely coincidental.
For this tutorial, I’m using
a tube by Arthur Crowe
You can find the tube at
his store.
Supplies:
Tube Of Choice
Scrap of Choice I am using a PTU
scrap called Little Wish by
AmyMarie's Scraps
BeckyMask022
You can download the mask here
Open a 700x700 new image with a white background.
Open up a frame of choice.
Paste as a new layer.
Click inside the frame with your
magic wand tool.
Selections modify expand by 8.
Paste a paper of choice as a new layer.
Selections invert & press delete.
Move the paper underneath the frame layer.
Open a closeup of your tube.
Resize 80% or as needed.
Paste between the two layers.
Press delete button.
Select none.
Add a drop shadow to the tube closeup
& frame layers. 2,2,50,5 black.
Merge the three layers together.
Move to the left & up slightly.
Duplicate this layer & mirror.
Move the copy down slightly to create
a staggered look.
Merge the two frame layers together.
Resize this layer 90%.
Open a swing element.
Paste on the left side & move this layer
underneath the two frame layers in your
layer palette. You want the seat part of the swing
visible below the left side frame.
Open a flower like lamp. Resize 80% twice or as needed.
Image & flip. Position to appear to be on swing.
Open your main tube up. Resize 85%.
Paste as a new layer & position in the center
of the tag.
Add the earlier drop shadow to it.
Open a honey barrel. Reszie 70%.
Paste by one of the bottom frame corners.
Paste a standing grass element as a new layer.
Position behind the honey barrel.
Duplicate the grass once & mirror.
Move this layer in your palette to below the swing
layer. Open a flower element.
Paste by the honey barrel. Move this layer
just below the barrel. I did flip the element I used
to change how it sat on the tag.
Open a honey-combed felt element.
Paste as a new layer. Position on the bottom
behind the other layers. You want it peeking out
near the bottom of the swing.
Duplicate once - flip & then mirror. This one will
peek out near the top.
Open a staggering of flying butterflies.
Paste as a new layer on top of your tag.
Add the earlier drop shadow to it.
Paste a paper of choice on the bottom layer.
Apply Beckymask022.
Merge group.
Resize 105% this layer.
Duplicate the mask once.
Merge the two layers together.
Merge layers visible.
Resize 88%.
Add artist copyright info & name.
If you don't wish to animate, then save now.
Just add a butterfly element to the barrel or where
you would like to have it.
Paste a butterfly element of choice.
Resize this layer 60%.
Rotate free rotate 25 left.
Paste the butterfly as a new animation into
AS. ( Animation shop )
In AS, Effects
Insert Image Transition.
Effect Zoom
Transition length 2.5
Frames per second 7
Click okay.
This will give you a lot of frames!
Now copy your tag over to AS.
Paste as a new animation.
Ctrl + L to get more frames.
You will have to keep doing L over
& over to get a total of 18 frames.
Once you have 18 frames, edit select all.
Now on the butterfly animation, select all & copy.
Then drag over to the main tag. Make sure to position
as you want it.
Once all positioned, select all
Animation - Frame properties to 20.
Select all - view animation.
if you are happy, save your tag.
Thanks so much for trying my tutorial.
Sunday, July 7, 2013

Castle Fairies
This tutorial was written
by Sarah Fiack on
July 7th, 2013
Any resemblance to another
tutorial is purely coincidental.
I am using 2 tubes by Rachel Anderson
which you can purchase at
CDO
I am also using Inspired by Rachel Anderson 19-3
scrap by ChiChi Designz which can also be purchased
at CDO.
Open a 700x700 new image.
Open up your scrap supplies
& tubes of choice.
Choose a circle frame.
Paste as a new layer onto your image.
Click inside the frame with your magic
wand tool.
Selections modify expand by 2.
Paste a scrap paper as a new layer.
Selections invert & press delete.
Move the paper layer underneath
the frame layer.
Open a castle like building.
Position as wanted on the tag between
the paper and frame layers.
Press delete.
Selet none.
Select a 2nd circular frame.
Paste as a new layer above the
1st circle frame.
Add a drop shadow to both
of the frame layers and the castle layer.
2,2,50,5 black.
Oepn a carraige element.
Paste as a new layer in bottom front
of the tag.
Add the above drop shadow to it.
Open a sparkle trail element.
Paste on the left side & slightly behind
the carriage.
Open a flower cluster. Resize as needed.
For the one I am using I resized 50 & 70%
once each. Paste in front of one side of the carriage
wheels. Duplicate & mirror. You want flowers in
front of each of the wheels.
Open a row of flowers.
Resize 70% or as needed.
Paste in front of the carriage & flower clusters.
Open clouds element.
Resize 70% Paste behind the castle layer
& to the side slightly. You want the clouds to appear
to be coming from behind the castle.
Open up your tubes if they are not already open.
Paste on on the bottom right side of the tag.
I positioned the standing one on the side of the tubes
I used.
For the 2nd tube, I reiszed 80 & 88% once each.
I then positioned the tube to appear to be sitting
on top of the carriage. She is also facing the 1st tube.
Add the earlier drop shadow to both of the tubes.
Open a flower trail element.
Paste as a new layer as the top layer on the tag.
Open a dragonfly element. Resize 50% & 80% once
each. Paste as wanted on the tag near the top of the tag.
Add the earlier drop shadow to the element.
Add artist copyright information & name.
Save as a png.
Thanks for trying my tutorial.
Saturday, July 6, 2013

Blue Note
This tutorial was written
by Sarah Fiack on
July 6th, 2013
Any resemblance to another
tutorial is purely coincidental.
I am using a tube by Jennifer Janesko
which you can purchase at
CDO
The tube I am using I purchased from CILM
when they were open.
I am using an Inspired by scrap
by Honored Scraps. It is IB Scrap Jennifer
Janesko 12-1 and also available at CDO.
Mask MB &SW33 found here
Blog
Plugin:
Eye Candy 5 Impact - Glass
Open a 650x650 new image.
Open a frame of choice from
the scrap you are using.
Copy & paste as a new layer.
Click inside the frame with your
magic wand tool. Selections modify
expand by 5.
Paste a paper of choice as a new layer.
Selections invert & press delete.
Move the paper layer underneath
the frame layer in your layer palette.
Paste your tube as a new layer between
the two layers. Duplicate once. Move the tube
copy layer above the frame layer & X out for now.
Back on the original tube, press delete.
Select none. Hide this one
Un'X the copy tube. Lower the opacity
so that you can see some of the frame
through the tube.
Erase parts as needed so it appears to
be coming from "inside" the frame.
Once you are happy, put opacity back to 100
& unhide the original tube layer.
Add a drop shadow to the original tube & frame layers.
2,2,50,5 Black.
Open a table element.
Paste as a new layer.
Move the bottom half of the tag.
Now move this layer to underneath all the
previous layers.
This should give the look of the frame layers
being on or standing or leaning against the table.
Open a piano keys element.
Resize 80%.
Paste as a new layer. Position on the bottom
half of the tag.
Move the layer to above the table layer.
You do want the keys below your frame layers.
Paste a paper as a new layer on the bottom
layer of the tag.
Apply the mask MB & SW 33
Merge group. Duplicate once & mirror.
Merge the two mask layers together.
Apply the mask layer.
Eye Candy 5 Impact - Glass
Setting Clear - default settings
Open glowing orbs element.
Resize 80%.
Paste as a new layer behind the
2nd tube layer.
Add the earlier drop shadow as well.
Open a flower element.
Resize 75% & mirror.
Position as wanted on a side of the tag.
Erase part of the stem if needed to give illusion
of the flower being behind items when they
in fact are not.
Merge all layers visible.
Add artist copyright information & name.
Save as png.
Thanks for trying my tutorial.
Friday, July 5, 2013
Snag tags using art by Selina Fenech & PTU Inspired by Anna Marine kit by Foxys Designz. Both can be found at
CDO. Enjoy the snags!


CDO. Enjoy the snags!


Monday, July 1, 2013

Remember Fairy
This tutorial was written
by Sarah Fiack on
July 1st, 2013
Any resemblance to another
tutorial is purely coincidental.
I am using a tube by Selina Fenech
which you can purchase at
her store.
The tube I am using I purchased from CILM
when they were open.
I am also using Inspired by Selina Fenech 36-3
scrap by Ladyhawwk Designs which can also be purchased
at CDO.
Animation Shop
Open up a 700x700 new image.
Open up a tube of choice.
Choose a frame element.
Paste as a new layer.
Select your magic wand tool.
Select an empty area of the frame with the wand.
Hold shift button down & continue selecting various areas.
Selection modify - expand by 3.
Paste a paper of choice as a new layer.
Selections invert & press delete. Select none.
Move the paper underneath the frame layer.
Choose a curved flower element
from your scrap. Paste as a new layer.
Copy & paste your tube as a new layer.
Arrange in front of the flower layer.
Open a flower cluster element.
Resize it 75%.
Paste as a new layer. Arrange in bottom front
corner of the tag. Duplicate once & mirror.
Open a flower of choice.
Resize 70%. Paste on one side of the tag.
You want it below the previous flower layers & partially
hidden behind the cluster.
At this point, drop shadow your frame,
tube, & flower layers.
2,2,50,5 black.
Open a sparkle glow stream element.
Resize 80% & 95% once each.
Paste along the front of the clusters.
Then paste a wordart element on top of the glow.
Open a small round frame.
Paste as a new layer.
Position on your tag an upper corner.
Move to the bottom layer in your layer palette.
You want part of it peeking out in the upper
corner of the frame.
Duplicate & mirror the frame once.
Now open a bow of choice.
For the one I am using I resize 70% twice.
Paste on one of the upper corners of the 1st frame.
Now if you don't wish to animate, you can stop here.
Add artist copyright information & name.
Save as you want.
To animate please continue below.
First, add a white background to your tag.
Also, add artist copyright info & name to tag.
Hide any layers in the way of this except the main frame.
Make sure you have the paper layer selected in your layer palette.
Selections - select all - float - defloat.
Paste your tube again as a new layer.
Move slightly to a side of choice.
Back on the paper layer, selections invert.
Now the tube & press delete.
Select none.
Lower the opacity on the tube layer all the way to zero.
Unhide all layers & copy merged.
Now in Animation shop.
Paste as a new animation.
Go back to psp.
Raise the opacity on the tube layer to 20.
Copy merged & paste after current frame.
Repeat back to psp.
Opacity to 40. Paste again into AS as the 3rd frame now.
Keep doing this with raising the opacity in 20 increments.
You should get 6 frames in Animation shop.
Frame 1 -0 opacity
Frame 2 - 20 opacity
Frame 3 - 40 Opacity
Frame 4 - 60 Opacity
Frame 5 - 80 Opacity
Frame 6 - 100 Opacity
Select all - copy - minimize.
Paste the copy as a new animation.
Select all - Animation - Reverse frames.
Select all & Copy.
Back to original animation.
Paste after current frame.
Select frame 7 in all the frames & delete this frame.
After this you should have 11 frames total.
Select all - Frame Properties set to 25.
View animation. If happy, save as a gif.
Thanks for trying my tutorial.
Subscribe to:
Posts
(Atom)
Zone Award
