


Sunday, May 31, 2020
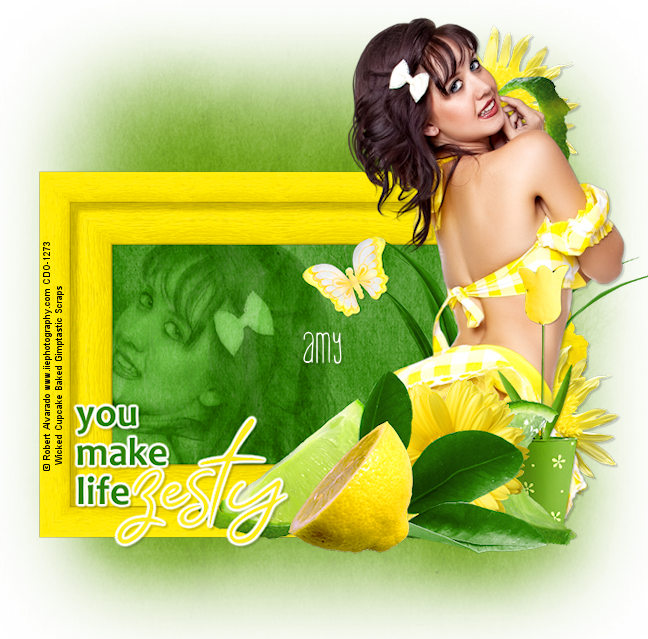
CT tag featuring the gorgeous
pinup art of Robert Alvarado
using his tube 7-2. I am also
showcasing the oh so refreshing
IB Jessica Dougherty 3-1
Scrap by Gimptastic Scraps.
Don't be afraid to add a little
zest to your life. It can add
excitement to your day
and/or relationship. Sometimes zest can
add another dimension we
didn't realize we were missing.

Saturday, May 30, 2020
CT timeline featuring the wonderful art of
Julia Spiri using her tube 11-2.
I am also showcasing the very pretty
IB Julia Spiri 11-2 Scrap by
Perfect weather for this
fairy to be outdoors. She loves
to explore her woods & visit
her woodland critter friends.
They have lots of adventures
playing outside & looking for food.
Sometimes, she gives them rides
around the woods as she flies.


Thursday, May 28, 2020
CT tag featuring the fantastic art of
Barbara Jensen using her tube 73-1.
She comes with lots of layers for her
& her sweet bunny.
I am also showcasing the oh so pretty
scrap Sew Pretty by Karmalized.
Sometimes, our favorite stuffed
friends need a little tlc.
All of the loves they receive can
sometimes cause holes & wear on them.
Nothing a little needle & thread can't fix.
So they can keep on being your
cherished cuddle friend.


Friday, May 22, 2020

This tutorial was written on May 9,2020.
Any resemblance to another
tutorial is purely coincidental.
I am using the tubes
No More & Beauty and Decay by Zindy
Textures: Magic Realm by Devirose
Mask: 170 InsatiableDreams
Mask is unavailable right now
Plugins:
Mura's Meister:Copies
VM Natural: Splash!
Funhouse
Open up a 700x700 new image.
Open up your tubes & textures of choice.
Copy & paste your tube as a new layer onto your
blank canvas.
Choose your preset shape tool.
Set your Foreground/Stroke to Black or a dark color
from your tube. Hide the Background/Fill color option for now.
On the Preset shape tool, set the width to 5.00.
I used a Rounded Rectangle shape.
Draw out a vertical rectangle approximately the same size
of your tube vertically. The one I used is 280x545.
This may vary depending on the tube you are using.
Dupclicate the tube layer once. On the Original tube layer,
apply the Mura's Meister:Copies - Wallpaper Rotate to the layer.
Add a new raster layer. Fill with black or the same dark color
you used for the shape.
Select your magic wand tool. Click inside the shape layer to select it.
Selections Modify - Expand by 3. Invert
Select one at a time the tube, tube copies layer & the fill layer.
Press delete on each layer.
Select none.
On the original tube layer, apply the plugin
VM Natural Splash! with default settings.
Right click on your tag & copy merged.
Paste as a new layer. Reize the merged layer 93%.
Move to the left so that its partially off of your previous layers.
Copy & paste a texture of choice as a new layer.
Arrange so the texture layer covers the merged layer.
In your layer palette, make sure the merged layer is selected.
Selections - Copy, float, defloat. Selections invert.
Press delete on the texture layer. Select none.
Change the blend mode on the texture layer to Overlay - or whichever
looks good on your tag.
Duplicate the Merged layer once. Mirror this layer & move it below
the previous tag layers. Repeat the above steps except use a 2nd texture
of choice. Merge layers together.
Select your Font tool. Choose a font of choice & a color of choice for it. I did
a very light grey & used the words Mental Torment. Apply the plugin Mura's Meister Copies: H-Tile(random rotate line). Click OK.
Apply a drop shadow of choice. to the text layer. Change the blend mode
to overlay.
Select the merged layers in your layer palette.
Selections - Float -Defloat. Selections Invert.
Press delete on the text layer.
Select none.
Copy & paste your 2nd tube of choice as a new layer.
Position along the bottom of your tag.
I did resize mine 88%.
Add a drop shadow to the tube.
Back to your text tool.
Type out your words once again.
This time do them in one of the colors from the textures you used.
Position the colored wording along the bottom of your tag near
the 2nd tube. Apply the plugin Mura's Meisters: Copies
Afterimage(sphere random) Default settings.
Add a drop shadow of choice to the wording.
Add a new raster layer above the bottom/background layer of your tag.
Fill with black or a color of choice.
Apply the mask I used or one of choice.
I did check the Invert Mask option.
Merge Mask Group.
On your Mask layer, apply the plugin Funhouse: Heizenberg's
Mirror with default settings.
Go to your Effects Menu
Edge Effects - Enhance.
Merge the layers visible. Copy & paste a texture of choice as a new layer.
I used one I had already used previously.
In your Layers Palettes, select the merged layer.
Selections - Float - Defloat Invert
Press delete on the texture layer. Select none.
Change the blend mode on the texture to Soft Light
& lower the opacity to 55. Merge down.
I resized my tag 95% but that is optional.
Crop tag to desired size.
Add copyright information & name.
Save as png.
Thanks for trying my tutorial.
CT tag featuring the beautiful art of
Anna Liwanag using her May 2020 Bonus
tube. She can be yours with a $10 purchase
of her regular tubes this month. I am
also showcasing the oh so lovely
IB Anna Liwanag May 2020
Scrap by Ladyhawwk Designs.
She is ready for days spent by the shore.
Feet in the sand & a hat for the wind.
Summer air filled with the fragrance
of sweet blooms & ocean air. She is
just waiting for her friends to join her.


CT tag & wallpaper featuring the art of
Dean Yeagle using his tube 52-3. I am
also showcasing oh so pretty scrap
Honored Garden by Karmalized Scraps.
The wallpaper is 1920x1080 &
available here for download.
Her garden is full of blue blooms
in various shades. It makes her
smile to walk outside among them.
Blue is the best color after all.


Tuesday, May 19, 2020
CT tag & wallpaper featuring the adorable art
of Julia Spiri using her May 2020 bonus tube.
These two sweeties can be yours with a $10
purchase of her regular tubes this month.
I am also showcasing the oh so pretty
IB Julia Spiri May 2020 Scrap
by Kizzed by Kelz. The wallpaper
is 1920x1080 & available to
download here. Her favorite
fox friend loves to cuddle.
She can't deny him snuggles
when they see each other.


CT timeline featuring the whimsical
art of Cuddly Rigor Mortis. I am
using her tubes 118-1 & 118-3
I am also showcasing the oh so
spooky scrap IB Ken Morton
88-3 Scrap by Wicked Princess.
These two friendly ghosts just want
to go trick or treating with you.
They don't understand why they
can't enjoy the treats as well.
When did ghosting become about
scaring people & playing tricks?


Monday, May 18, 2020
CT tag featuring the wonderful art of
Rebecca Sinz using her tube Stranded.
I am also showcasing the beautifully
dark scrap Deliberate Descent
by Chaos Priestess. As the world
falls apart, how does one keep
going? How do you pick yourself
up and make yourself move on?
By refusing to give up & refusing to
accept your own defeat. The world may
be in chaos, but you are still breathing
& living. Time to battle on in life.


Saturday, May 16, 2020

This tutorial was written on May 16,2020
Any resemblance to another
tutorial is purely coincidental.
I am using the tubes 143-1 & 143-2
by Cuddly Rigor Mortis
Textures: 3 Large Textures by blackyaisa
Plugins:
Mura's Meister Copies
VM Stylize
Toadies
Neology
EyeCandy4000 Gradient Glow
Open a 700x700 new image.
Open 2 tubes & 2 textures of choice.
On your Materials palette, set your Foreground/
Stroke color to white. Hide the Background/fill color for now.
Select your Rectangle Preset Shape tool.
Set your Stroke Width to 7.00
Make sure you select the square shape to draw out.
Draw out a square about 265x265. Move to one
side of your new image.
Convert the layer to Raster.
Duplicate the layer once & mirror.

Rename the two square layers like this:
Square1
Square2 ( for the copy layer )
This will help us keep layers straight during the tutorial.
Under the Square1 layer, Copy & paste the 1st texture of choice
as a new layer. Repeat with the 1st tube of choice as well. I did
resize each of the tubes 77% but this may vary on tag & tubes used.
Select the inside of the Square1 layer with your Magic Wand tool.
Selections - modify - expand by 2. Selections Invert.
Select each of the Texture & tube layers one at a time in the layer palette
& press delete on your keyboard. Select none.
Rename the tube & texture layers as this:
Texture1
Tube1
Repeat the above with the 2nd texture & tubes under the Square2 layer.
Rename the layers as
Texture2
Tube2
Apply a drop shadow of choice to both of the Square layers.
On Tube2 layer, I changed the blend mode to Soft Light.
Tube1 got the blend mode Screen.
Right click on your tag & Copy Merged.
Paste as a new layer.
Move the layer underneath the previous layers.
It's ok if its slightly higher than the previous layers.
Apply the plugin Toadies Blast n Blur with default settings.
Also apply Toadies Grey removingBoost -default settings.
Now use the plugin VM Stylize -Square Blur -Default.
Duplicate the Copy Merged layer once. Image - Flip.
Apply the plugin Neology -Transparent Bullseye -Default.
Go to Effects - Edge Effects -Enchance Add a drop shadow to the layer.
Select your font tool. Choose a font of choice. I chose
the color black but that may vary on your tag.
Type out a single word. Convert to Raster layer.
Apply the plugin Mura's Meister Copies: Tiling.
Be sure to change the Tile Gap to 2.00. Click apply/ok.
Move this layer above the Copy Merged layer.
Change the blend mode to Soft Light or one of choice.
With each of your tubes, resize 40% & 70% or as needed.
Copy & paste as new layers on your tag. You want them above the previous
layers. Position as wanted on your tag. Make sure to apply a drop shadow of
choice to each of the two tubes.
On the Materials Palette, unhide the Background color.
Select the texture colors making 1 for Foreground & the 2nd one for Background color.
Now, select your Font tool. Type out a single word about the Square layers.
I did a Green word on the Blue Square layers & a Blue word above the Green square layers.
I used the words Adorable Bullseye but feel free to put wording of choice.
Position the words along the bottom of the Square layers.
I did apply an EyeCandy4000 Gradient Glow - Fat w/ 3.00 Glow width.
That is optional. Apply a drop shadow to each of the two words.
Merge visible.
Crop to desired tag size.
Add artist copyright to your tag & name of choice.
Save as png.
Thanks for trying my tutorial.
Thursday, May 14, 2020
CT tag & wallpaper featuring the stunning art of
Goldwasser using her tube Sabrina.
I am also showcasing the wonderful
scrap Sabrina by Bella Caribena.
The wallpaper is 1920x1080 &
available here for download.
“All shadows of clouds the sun cannot hide
like the moon cannot stop oceanic tide;
but a hidden star can still be smiling
at night's black spell on darkness, beguiling”
― Munia Khan


Wednesday, May 13, 2020
I did this for a tag challenge in Misfits.
Thought I would share since I made
the wordart I used on my tag.
Cluster is available here
by sylly creationz. For my tag,
I used the art of Barbara Jensen
featuring her tube 95-1 American Gothic.
Wordart is snaggable & below the tag.


Tuesday, May 12, 2020
CT timeline featuring the wonderful art of
Anna Marine using her tube 41-3.
I am also showcasing the oh so fun
IB Anna Marine 41-3 Scrap
by Kizzed by Kelz.
Have fun playing the games at
the local casino. Just be sure not
to turn into a zombie while
you gamble. Don't lose your
humanity as your win and/or
lose your money.


Sunday, May 10, 2020
CT tag featuring the beautiful art of
Verymany. I am also showcasing the
wonderful & oh so pretty scrap
Leona by Wicked Princess Scraps.
She has just opened her own store!
& this scrap is the 1st permanent
residence to move in!
Every woman needs reminding sometimes
that they are special & that they do matter.
Take time to make sure the women
in your life know this - at all ages.


Saturday, May 9, 2020
CT tag featuring the whimsical art of
Cuddly Rigor Mortis using her May
2020 Bonus Tube. This delightful
drink can be yours with a $10
purchase of her regular tubes.
I am also showcasing the wonderful
Cuddly Rigor Mortis May 2020
Ib Scrap by Ladyhawwk Designs.
There is nothing like relaxing on the
beach sipping a tropical drink.
Put a flower in your hair &
stick your feet in the waves
as you sip.Oh bartender,
I'll have another please.


This tutorial was written on May 9,2020.
Any resemblance to another
tutorial is purely coincidental.
I am using the tube 61-3 by Dave Nestler
Mask: DBV Mask 110
Available Here
Textures119 by sanami276
available here
Open up a 700x700 new image.
Open up your tube of choice &
textures that you are using for the tutorial.
A Black & white tube works best for this tutorial.
On the Materials Palette, hide the Background/Fill
color square. On the Foreground/Stroke set color to white.
Select your Preset Rectangle Shape tool. Set the Width at 7.00.
Draw out a Rectangle shape about the size of 288x114 or a desired size.
Convert to Raster layer.
Duplicate the shape two more times. Adjust the location of each of the layers.
I did mine to resembles stairs. Do not merge the 3 rectangle layers.
Rename each of the Rectangle layers like this:
Original Rectangle : Rect1
Copy 1: Rect2
Copy 2: Rect3

Arrange in your Layers Palette so that it goes
Rect 1
Rect 2
Rect 3
Make sure you have Rect 1 selected in the palette box.
Select inside the Shape with your Magic Wand.
Selections - Modify - Expand by 2.
Selections - Invert
Paste your texture of choice as a new layer.
Press delete on your keyboard. Select none.
Make sure you move the texture layer underneath the
shape layer.
That should remove the excess of the texture around the
outside of the shape.
Add a Drop Shadow of choice to the shape layer.
Select Rect2 & repeat above but with a different texture.
Do the same with Rect3 & a 3rd texture. I went for different
colors showing in each Rectangle shape of the textures.
Rename your texture layers based on which Rectangle layer they are under.
My layers are like this:

Copy & paste your tube as a new layer.
Paste above the other layers.Duplicate the tube three times.
Hide the original tube layer for now.
Move each of the tube copy layers above one of the
textre layers.
Working with each of the Rect layers one at a time, select with your Magic Wand again.
Selections - Modify - Expand by 5. Invert.
Select the tube copy layer that is just under the shape layer. Press delete on your keyboard. Select none.
Repeat with the other two shape layers & the tube copy layers.
Once you have tube layers inside each of the shape layers,
rename the tube copy layers as such:
Tube1
Tube2
Tube3
For the original tube ( top layer) I named it Top Tube to avoid any confusion.

I changed the blend modes on the 3 tube layers to Overlay. This may vary depending
on the tube & textures that you are using.
Selecting the Top Tube layer, change the blend mode on this layer also to Overlay.
Duplicate the Top Tube, Change the blend mode to Normal on this layer.
Lower the Opacity to 38.
Select a 4th texture (or repeat one of the previously used ones) & paste as a new layer underneath the above layers.Apply Mask & merge group. I did resize the mask layer 96%.
Type out words of choice using your text tool. I used black for my wording color.
I chose the words SUMMER HEAT but choose words that fit your tag.
Convert the words to raster. Duplicate 2x
Move each of the word layers to just under each of the Rect layers.
Lower the opacity to about 65 on each of the wording layers.
Crop your tag to desired size. Add artist copyright informaion & a name.
Save as png. Thanks for trying my tutorial.
Friday, May 8, 2020
CT tag & wallpaper featuring the whimsical
art of Cuddly Rigor Mortis using her tube 45-3.
I am also showcasing the wonderful
Cuddly Rigor Mortis 45-3 IB
The wallpaper is 1920x1080 &
available for download here.
Everyone loves to enjoy s'mores outdoors.
They make camping and other adventures
even more fun! They are the perfect
warm & gooey outdoor treats sometimes.


Subscribe to:
Posts
(Atom)
Zone Award
