


Thursday, January 30, 2014
Two CT tags featuring the beautiful Winter In My Heart by Robin McQuay which is available at
Digital Chaos.
I also used the PTU scrap Winter Walk by WDDesignz available at ZindyZone


Digital Chaos.
I also used the PTU scrap Winter Walk by WDDesignz available at ZindyZone


2 new CT Tags featuring the wonderful Alicia Mujica Antoinne Valentine Tube which is
available in her Saint Valentine's Special Edition 3 pack in her store.


available in her Saint Valentine's Special Edition 3 pack in her store.


Tuesday, January 28, 2014

This tutorial was written
by Sarah Fiack on
January 28,2014
Any resemblance to another
tutorial is purely coincidental.
For this tutorial, I’m using a tube
by Robin McQuay. You can find this tube
for purchase at Digital Chaos
Plugins:
Mura's Meister Copies
DSB Flux - Blast
Xero Porcelain
Open a 600x250 new image.
Open up your color image.
I am using one that is nearly
all purple. You can choose
one of choice.
Select your new image
with your magic wand tool.
Copy and paste a
layer of your image.
Position on the tag to
a side.I moved mine to
the left side.
Selections invert & press
delete button on keyboard.
Select none.
Take your selection tool.
Draw around the face
of your image layer.
Selections -modify
expand by 2.Invert.
Press delete.
Select none.
Select a section from your
original image with your
selection tool.
Copy - paste as a new
image.
Go to your Materials palette.
Select the new image in your
pattern box for both matieral
boxes.
Select the ellipse preset
shape tool Make sure it is
set to circle. Width 0.00
Make sure you are selected
on the bottom layer of the tag.
Draw out a smaller circle.
Convert to raster.
Apply the plugin Mura's Meister
Copies -Wallpaper rotate
(default). Apply the wallpaper
plugin twice if you need too.
On the same layer, Effects
Art Media Effects - Brush strokes.
Default - change color to white.
Duplicate the tube image layer.
On the original layer, apply the
plugin DSB Flux - Blast.
Direction right Percentage 64
On the duplicated tube
image layer, apply
a drop shadow.
Effects -3D effects- drop shadow
2,2,25,5 Black.
Select your paint brush tool.
Select the paing dot size
Round 05.
Make sure your Stroke box
on the materials palette is
set to black.
On the opposite side of
the tube image on your tag,
draw out a doodle design
on your tag.
Convert to raster.
Lower the opacity on the doodle
to 20%.
Merge layers visible.
Add a new raster layer.
Fill with black or color of
choice.
Click this layer with your
magic wand tool. Selections
modify -contract by 4.
Press delete.
Select none.
Merge visible again.
Apply the plugin Xero Porcelain.
Softness 50 Strength & Brightness 128.
Add artist copyright information.
Add name for tag.
Save as png.
Thanks for trying my tutorial.
New CT tag featuring the beautifully dark art of Robin McQuay.You can purchase this beautiful tube at Digital Chaos. I also used the beautiful matching scrapkit The Raven by WDDesignz which is also available at Digital Chaos.


Monday, January 27, 2014


Saturday, January 25, 2014
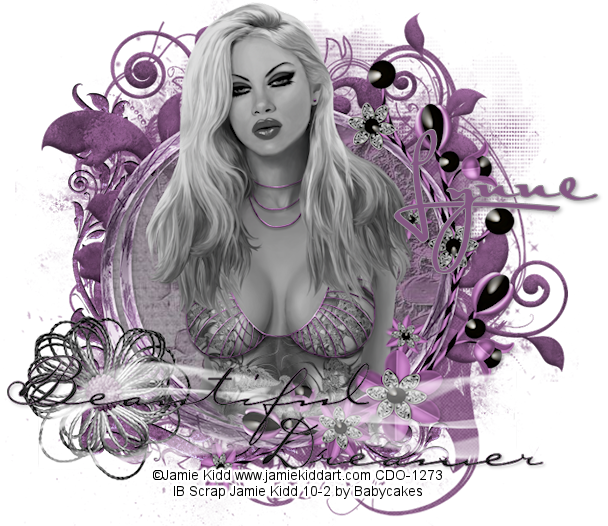
Today I played with 2 Inspired by scraps which are available at CDO.
For the first tag, I used the artwork of Jamie Kidd and matching
IB Scrap Jamie Kidd 10-2 by Babycakes.


For the second tag, I used the artwork of Deacon Black and matching IB scrap
Deacon Black 107-2 by WDDesignz.


For the first tag, I used the artwork of Jamie Kidd and matching
IB Scrap Jamie Kidd 10-2 by Babycakes.

For the second tag, I used the artwork of Deacon Black and matching IB scrap
Deacon Black 107-2 by WDDesignz.


2013.png)
I did this template as a tag challenge in CDO Group. I figured we are all siggie piggies
so I would go along that route for the template lol.
Here is a preview of the template

and you can dowload it here
You are welcome to use in challenges just be sure
to send them to my blog to find it.
Here is also a tag I did with the template. I used 2 piggies on it by Maxine Gadd
and a matching IB Scrap by Ladyhawwk Designs. You can find both available at
CDO.

Friday, January 24, 2014
New PTU Cluster Pack featuring the PTu scrap Elegance by Amy Marie.
You can purchase this pack in her store.


You can purchase this pack in her store.


Thursday, January 23, 2014
New tag featuring the art of Robin McQuay. I absolutely love her art.It speaks with such emotion.
For this tag, I used the tube Deceive Me With Your Lies which is available at Digital Chaos
I am also using the matching PTU scrap Deceive Me by WDDesignz also available at Digital Chaos


For this tag, I used the tube Deceive Me With Your Lies which is available at Digital Chaos
I am also using the matching PTU scrap Deceive Me by WDDesignz also available at Digital Chaos


New Inspired by Maryline Casenave 35-2 by Monti's Scraps releasing soon at CDO. This adorably sweet scrap matches the equally sweet tube by Maryline Cazenave. This scrap pairs so wonderfully well with the tube. Defintely a must have if you are a fan of cupcakes :)


Wednesday, January 22, 2014

This tutorial was written
by Sarah Fiack on
January 22,2014
Any resemblance to another
tutorial is purely coincidental.
I am using a tube by Sue Miller.
You have to purchase this tube at
UpYourArt to use it.
VixMask 309
which you can find here
Open a 700x700 new imge.
Open up a tube & image of choice.
On your materials palette, hide
the fill color box.
Select a color of choice for the stroke
box from your tube.
Select your font tool.
Set width to 3.00
Choose chunky type font.
Set size to desired size.
Type out text of choice.
Makre sure caps lock is on also.
Enlarge if needed.
Convert to raster.
Holding shift button down,
select inside each letter
of the word with your magic
wand tool.
Selections - modify -expand by 1.
Paste your image as a new layer.
You may need to paste it twice if
it won't fill the word.
Selections - invert & press delete
on your keyboard. Select none.
Move the image layer under the
letter layer.
Making sure you are
still on the image layer, Adjust
Hue & saturation -change both
to 0. This greyscales the image.
Paste your tube as a new layer.
Make sure this layer is above
your word layers.
Resize to 70%.
Now I used my freehand selection
tool to select around one of the swans.
I then copied and pressed delete.
I pasted the swan again as a new layer.
This gave me the swans on two different
layers and allows me to move them
independently of one another.
I positioned one swan along the top
of the word and one along the bottom
of the word. Drop shadow both the
swan layers.
2,2,25,5 black.
On your materials palette,
select both boxes to be the same color
from your tube.
Select preset shape tool. I chose a heart
shape but its up to you.
Draw out a medium shape. Convert to
raster. Move this layer to under the
word layers. Positon it roughly in
the center of the word.
If needed, fill with the color on your
materials palette.
Now change the material palette
boxes to black.
Select the rectangle preset shape tool.
Draw out a thin narrow horiztonal
rectangle. Convert to raster.
Make sure this layer is below all
the previous layers.
Select your font tool.
Choose a font of choice.
Make sure width is 0.00.
Add the words "the of" to the tag.
I put "the" above the heart &
"of" beside the heart above the
main word.
Convert each to raster.
Duplicate the backrgound/raster1
layer of the tag. Fill this layer with
a color of choice. Apply the mask
VixMask 309.
Merge group. Duplicate this layer
once & merge down.
Merge layers visible.
Apply the plugin Xero Porcelain
Softness 50
Strength & Brightness 128
Crop to desired size. Add artist
copyright information and name.
Save as png.
Thanks for trying my tutorial.

This tutorial was written
by Sarah Fiack on
January 22,2014
Any resemblance to another
tutorial is purely coincidental.
I am using a tube by Janna Prosvirina
This tube is available at
DAH.
I am also using PTU Love Under The Moon
scrap by WDDesignz which can also be
purchased her store
Whisprd Designz
Animation 4
by Simone Scrappy Bit Of Fun
here
Open a 700x700 new image.
Open up your tube and
scrap supplies.
Choose a frame of choice.
Copy and paste as a new layer.
Position slightly to the left
side of the tag.
Click inside the frame with
your magic wand tool.
Selections -modify -
expand by 8.
Select a scrap paper of choice.
Paste as a new layer.
Selections -invert - press delete
button on keyboard.
Move the paper underneth the
frame layer.
Open an element of scattered
glowing orbs. Paste as a new layer
between the two layers.
Press delete. Select none.
Paste your tube as a new layer.
Position on the right side of the
frame layers.
Add a drop shadow to the tube
& frame layers.
2,2,25,5 black.
Open a square/rectangle frame.
Resize 80%. Image -rotate
free rotate - right 25%.
Move this layer under the
previous layers and position
on the right side of the tag.
Click inside the frame with
your magic wand tool.
Selections -modify -
expand by 8.
Select a scrap paper of choice.
Paste as a new layer.
Selections -invert - press delete
button on keyboard.
Move the paper underneth the
frame layer.
Open two flowers. Resize each one
50%. Paste behind your tube
at the base of the tube..and in front
of the frames.
Open a lantern element. Mirror.
Paste as a new layer. You want this
element to come up from behind the
left hand flower element. Erase any
part of the pole showing past
the flower layer.
Add the earlier drop shadow as well.
Open balloon element. Resize 60%.
Paste behind your tube & position
so the element appears over the
right hand side frame. Add the earlier
drop shadow also.
Open a full moon element.
Resize 70%. Paste as a new layer.
Position this layer behind
the right hand frame & coming out
from behind the top.
Select a wordart of choice. I am
using one which comes with the scrap.
Paste as a new layer - making sure it
is the top layer of your tag. Position on
your tag near the bottom of the tag.
Add the earlier drop shadow to it.
Merge Visible.
Crop your tag to desired size.
Add artist copyright & name for tag.
Now if you don't wish to animate, you
can save your tag now.
To animate, please continue.
Make sure your tag has a white background
on it.
Open your animation in Animation shop.
For the one I am using, I replaced the color.
Edit -select all - animation -replace color.
Select the original color of the animation.
Then select a color of choice that you want
the animation to be. Click okay.
Make sure by checking the frames that all
parts of it changed color. You may need to
apply
again if needed.
Copy your tag as copy merged. Now go to
Animation shop
and paste as a new animation.
Duplicate for the required number of frames
as your animation has.
For the animation I am using, it has 37
frames. This means I have to duplicate
the tag image for a total of 37 frames.
To duplicate, hold down Ctrl and repeatedly
press the L button.
Down on the bottom right corner of AS,
it will show how many frames you have.
Once you have all the frames needed,
edit - select all.
Now on your animation, select all - copy.
Drag onto your tag image.
Select all - view animation.
If happy, save as gif
Sunday, January 19, 2014
I've done four PTU Cluster packs which can be purchased at the Amy Marie store.
The cluster packs are for personal use only. You can also purchase the full scraps at the
store as well.


The cluster packs are for personal use only. You can also purchase the full scraps at the
store as well.


This tutorial was written
by Sarah Fiack on
January 19,2014
Any resemblance to another
tutorial is purely coincidental.
I am using a tube by Selina Fenech.
which you can purchase at
CDO
I purchased the tube from Cilm
when the artist sold there.
I am also using the scrap Fairyworld
by Chichi Designs which you can also
purchase at CDO
Mask MC_Mask14 by
Melissaz Creationz
Blog
Open a 700x700 new image.
Open up your tube and
scrap supplies as well.
Open a grass element.
Paste as a new layer.
Position near the bottom
of the tag.
Open a flower branch element.
Resize 70%.
Paste as a new layer.
Position down on the grass layer.
Open a flower pot element.
Paste as a new layer.
Position on the bottom right
side of the tag.You want it
to be on the grass & flower
elements.
Copy and paste your tube as
a new layer. Position so the
tube is sitting on top
of the flower pot.
Open a tree element.
Paste as a new layer.
You want this layer under
the grass layer on the tag.
Position slightly to the left
of the flower pot layers.
Add drop shadow to the
layers: tube,flower pot,tree,
flower branch.
2,2,25,5 black.
Open a bear element.
Resize 25%.
Paste as a new layer.
Position by the bottom of
the flower pot on a side
of choice.
Open a horse element.
Resize 60%. Paste as a new
layer beside the tree.
Add the earlier drop shadow
to the horse.
Open a wordart of choice.
I am using one from the scrap.
Resize 80%.
Paste as a new layer.
Position near the bottom of
the tag. Add the earlier drop
shadow to the tag.
Paste a paper of choice as
a new layer. Make sure it
is below the previous
tag layers.
Apply the mask MC_Mask14.
Merge group.
Resize this layer 95%.
Merge layers visible.
Crop to desired size.
Add artist copyright information
& tag name.
Save as png.
Thanks for trying my tutorial.
Friday, January 17, 2014
New CT Tag featuring the wonderful art of Anna Marine and the perfect matching Inspired by Scrap
Anna Marine 50-2 by Abstract Creations. The scrap pairs perfectly with the tube.
You must purchase both at CDO to use them.


Anna Marine 50-2 by Abstract Creations. The scrap pairs perfectly with the tube.
You must purchase both at CDO to use them.


Thursday, January 16, 2014


I did a calendar template for a tag challenge today. Thought I would share the template. It's done for February 2014 but you can easily change it around if you want.It's not perfect but hey its my first one lol. I also have a snag of a finished calendar as well.
Download Here
and here is the snag

Download Here
and here is the snag

Wednesday, January 15, 2014

This tutorial was written
by Sarah Fiack on
January 15,2014
Any resemblance to another
tutorial is purely coincidental.
I am using a tube by Alicia Mujica
This tube is available at
CDO.
This artist has left the company.
I am also using Alicia Mujica Exclusive 2B
IB scrap by Hungry Hill which can also be
purchased at CDO.
Plugin:
Eye Candy 4000
Open a 700x700 new image.
Open up your tube
& scrap supplies of choice.
Open felt circle element.
Paste as a new layer.
Open two felt flower elements.
Resize each 25%.
Paste each flower on the
side/edge of a felt circle.
Paste your tube as a new
layer. You want it in the center
of the felt circles.
Open a leaf element.
Resize 75%. Paste behind
your tube layer.
Image-rotate-free rotate
-left 25.00
Add a drop shadow to the
tube & leaf layers.
2,2,25,5 black.
Open a doodle element.
Resize 75%. Paste
under the felt circles.
Rotate - free rotate
25.00 right.
Merge the felt circle
& doodle layers together.
Duplicate the merged layer
once.
On the original layer, adjust
Gauassian blur -10.00
Effects - Texture Effects -Blinds
Width 5.00 Opacity 20
Horizontal checked Color black.
Adjust - rotate -free rotate
left 5.00
Merge the two layers together.
Choose your font tool.
Choose colors for your text in
your materials palette.
Choose a fat font and size of choice.
Type out text of choice. I am using
" Be Colorful ".
Convert text to raster.
Apply the plugin Eye Candy 4000
Gradient Glow
Setting Fat Glow width 3.00
Effects -3D effects
Bevel effect 10 -default settings.
Add the earlier drop shadow
to the text layer.
Merge layers visible.
Crop to desired size.
Add artist copyright information &
name for tag.
Save as png.
Thanks for trying my tutorial.

This tutorial was written
by Sarah Fiack on
January 15,2014
Any resemblance to another
tutorial is purely coincidental.
I am using a tube by Caron Vinson
This tube is available at
CDO
I am also using All You Need Is Love
scrap by WDDesignz which can also be
purchased at CDO.
Open a 700x700 new image.
Open up your tube and
scrap supplies.
Open a vertical oval frame.
Resize 88% & 85% once each.
Rotate -free rotate -right
90.00.
Click inside the frame with
your magic wand tool.
Selections - modify -expand
by 3.00.
Select a paper of choice.
Copy and paste as a new
layer. Selections - invert
& press delete button on
your keyboard. Select none.
Move the paper under the
frame layer.
Paste your tube as a new
layer. Make sure it is above
the paper & frame layers in
your layer palette.
Open a ribbon key element.
Resize 70%. Copy and paste
as a new layer. Position on
the right side of the frame.
Add a drop shadow to the
following layers:
Tube, ribbon, & frame.
2,2,50,5 Black.
Open a flower heart element.
Resize 88%.
Paste as a new layer. Move this
layer underneth the
frame & paper layer.
Erase the bottom part of the
flower heart element.
Open stacked baskets element.
Resize 50% & 70% once each.
Mirror the element.
Paste as a new layer. Position on
your tag to the left & slightly behind
of your main tube.
Open a pillow element.
Resize 25%.
Paste as a new layer &
position in front
of the basket layer.
Oepn a hanger element.
Mirror. Resize 40%.
Paste behind the pillow layer.
Open a rectangle tag/label.
Resize 50%. Paste so it
appears to be coming from behind
the right side of the baskets.
Add the earlier drop shadow to
the basket,pillow and label layers.
Open scattered beads element.
Resize 50%.
Paste as a new layer and move down
to around the basket/label layers.You want
the beads behind the main tube
and pillow labels.
Open two jar elements.
Resize 25%. Paste beside
and behind to the right of
the pillow element.
Open a wordart element.I am
using one provided by the scrap.
Paste as a new layer above
the previous layers.
Add the earlier drop shadow
to the layer.
Merge layers visible.
Crop to desired size.
Add artist copyright information
and name for tag.
Save as png.
Thanks for trying my tutorial.
Sunday, January 12, 2014

This is a timeline tutorial. But you could easily
convert to a forum style tag.
This tutorial was written
by Sarah Fiack on
January 12th, 2014
Any resemblance to another
tutorial is purely coincidental.
I am using 1 tube by Cris DeLara
which you can purchase at
TPP
No scrapkit needed.
Dingbat font of choice.
I used the font KR All Sport
Plugins:
Muras Meister Copies
VM Natural -Acid Rain
VM Stylize- Motion Trail
Toadies -Glasswork Gray
UnPlugged Tools -REM Lotus
Open a timeline size image.The size
for this is 851x315.Open your tube
of choice.
Fill with a dark color from your tube.
For mine I am using black.
Select your ellipse preset shape tool.
Make sure the circle shape is selected
on the settings.
On your Materials palette,
X out the stroke box as we don't
need it at the moment.
Select a color from the tube for
your fill box. I am using red.
Draw out a smallish circle
on your image. Convert to
raster.
Apply the plugin effect
Muras Meister Copies.
Tiling Angle. Change tile gap
to 2 for this.
Click Okay.
Change the color on your
materials palette for the
fill. I am using a light
purple.
Draw out a large
circle to take up most
of the center of the timeline.
Objects - align -center in canvas.
Convert to raster.
VM Natural Plugin
Acid Rain -default settings
VM Stylize Motion Trail
default settings
Duplicate the circle layer
once. Make sure the
copy layer is selected in your
layer palette.
Apply the plugin Toadies
Glasswork Gray - default settings. Click Apply.
Resize this layer 75%.
Merge the two circles together.
Plugin UnPlugged Tools
REM Lotus -default
Round button -default
Take your tube & paste onto
the circle image you've been
working on.
Resize the tube 60%.
Go to effects - 3d effects-cutout
default settings. Make sure both
colors are set to black. Click okay.
Paste your tube again. Resize 65%.
Position on the left side of the circle.
You want it partly over the circle
and partly off it.
Add a drop shadow to the 2nd
tube layer and the large circle layer.
2,2,50,5 black.
Now click on the multiple
circle layer of the timeline.
Select your font tool and a
font of choice. I am using a sports
dingbat font.
On your Materials palette, select
the fill box to a white or similar color.
Also make sure stroke is set at 0.0
on font settings. Font size to 14 or
as wanted.
For the dingbat I wanted, I did
a Capital E to get bowling icon.
Enlarge if needed. Convert to raster.
Do an icon on each side of the main circle.
Merge the two icons together.
Change the blend mode in your layer
palette to soft light.
Select your rectangle preset shape
tool. Change the fill box on materials to
black. Make sure the rectangle shape is
selected.
Draw out two rectangles on the upper
right side of the timeline. Make one
wider and slightly longer than the
other one. Convert to raster &
merge the two layers together.
Select your font tool.
Choose the white color again.
Select a font you like for your tag.
Add a word per rectangle which fit
yours. I am using Bowling & Strike
for mine.
Merge layers visible.
Add a new raster layer.
Fill with color of choice
from your tag. This is for
the border.
Click the layer with your
magic wand tool.
Selections -contract by 4.Press
delete button on your keyboard.
Select none.
Add artist copyright for the
company timelines. Some companies
vary on their timeline rules.
Make sure to add a name as well.
Save as png or jpeg.
Thanks for trying my tutorial.
Saturday, January 11, 2014

This tutorial was written
by Sarah Fiack on
January 11th,2014
Any resemblance to another
tutorial is purely coincidental.
I am using 1 tube by Jonathon Earl Bowser
This tube is available at CDO
I am also using the PTU scrap A Green Desire
by Hungry Hill
which is available
at CDO.
FTU mask by Trese
Trese Mask046
Open a 700x700 new image.
Open up your tube and scrap
supplies.
Open a doorway/window type
element. Resize 80%.
Copy and paste as a new layer.
Open a balcony element.
Resize 60%. Paste as
a new layer. Position on the
window at the base of it.
Add a drop shadow to the
balcony. 2,2,25,5
black.
Copy your tube of choice.
Paste as a new layer. Position
this layer between the window
and balcony layers.
Add the earlier drop shadow.
Open a vertical vine element.
Resize 80%. Mirror.
Paste as a new layer.
Arrange this layer above the
window layer in your layer palette.
Open a hanging curtain element.
Resize 80%. Paste as a new layer
making sure it is below the
window layer. You also want it
to be behind the window.
Open an angel statue. Resize 20%.
Paste as a new layer making sure it
is above the balcony layer.
Position on your tag by a bottom corner
of the balcony.
Open a hanging lantern element.
Resize 40%.
Paste as a new layer. Position so it
is hanging with the vertical vine.
Add the earlier drop shadow to the
lantern.
Open a flower element.
Resize 20% & 60% once each.
Paste three times along the vine.
Make sure one of the flowers is on the
vine and end of the hanger for the lantern
layer. You want it to appear to be hanging
from the flower & vine.
Open a bird element.
Resize 25% and 50% once each.
Paste as a new layer.
Position on a left top part of the balcony.
Open a column element.
Resize 50% twice.
Paste underneth the balcony layer.
Move this layer to the left side of
the balcony. You want it partially visible
& partly behind the balcony.
Open a glitter doodle element.
Flip this element. Paste as a
new layer. Move this layer to below all
the previous layers.
Open a dark colored scrap paper of choice.
Paste as a new layer & move in your
layer palette, to below your previous tag
layers.
Apply the mask Trese Mask046.
Merge group.
Now open a light colored scrap paper.
Paste this layer below the first mask.
Apply the same mask.
Adjust - Blur - Gauassian blur 5.00
Go to effects - texture effects-
texture. Apply a cobblestone or stone
like texture - default settings.
Duplicate this mask layer once.
Merge the two light colored mask
layers together. Resize the layer 103%.
Merge layers visible.
Crop to desired size.
Add artist copyright information
& name for tag.
Save as png.
Thanks for trying my tutorial.
Friday, January 10, 2014


Subscribe to:
Posts
(Atom)
Zone Award
