Tuesday, January 31, 2012
7:36 PM | Edit Post
Sharing a tag I did using the artwork of Scott Blair. I used a FTU scrap for AIDS by Seven's Scrap. The Scott Blair tube is a charity tube to help raise funds for his brother Garrett Blair, of CDO. This tube is available at PTE.


Labels:Charity,Extras,FTU,Tag | 0
comments
1:38 AM | Edit Post

Sharing a tag I did tonight.I used a tube by Rachel Tallamy available at UYA.
I used a cluster frame by Alikas Scraps.
I really love how it came out. Just wanted to share as I am working on being more
positive and uplifting in life.
Labels:Angel,Thoughts | 0
comments
Sunday, January 29, 2012
6:47 PM | Edit Post
Sharing a tag I made tonight. I used the artwork of Meg Baker
available at PSPTUBESTOP.I just love this tube. It really reminds me of my hubby Brian & I.We've been through a lot but
our relationship is still great.

available at PSPTUBESTOP.I just love this tube. It really reminds me of my hubby Brian & I.We've been through a lot but
our relationship is still great.

Labels:Love,Tag,Valentine's Day | 0
comments
Saturday, January 28, 2012
4:24 PM | Edit Post
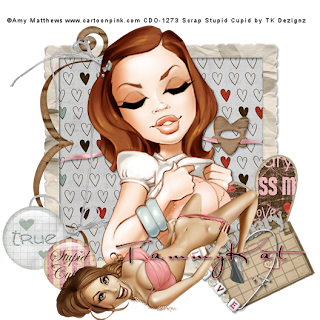
Crafty Love
This tutorial was written
by Sarah Fiack on
January 28, 2012
Any resemblance to another
tutorial is purely coincidental.
For this tutorial, I’m using
2 tubes by Amy Matthews.
You can purchase the tubes at
CDO
Supplies:
Tubes of choice
Scrap of choice.
I’m using one by TK Dezigns
Called Stupid Cupid
It is available at Pimp My Tags
with Scraps
Here
Open a 600x600 new image.
Open up your tube, tube closeup & scrap
supplies.
Choose a frame of choice
& open.
Copy & paste as a new layer
onto your new image.
Click inside the frame with
your magic wand tool.
Selections modify expand
by 5.
Paste a scrap paper of
choice as a new layer.
Selections invert &
press delete.
Move the paper layer under
the frame layer.
Paste your tube closeup
between the two layers.
Duplicate the tube once.
Move the tube copy layer
up to the top in the layer
palette.
Back on the original tube
layer, press delete.
Select none.
On the tube copy layer,
erase the parts of the tube
showing past the bottom
part of the frame.
Add a drop shadow to
the bottom tube &
frame layers.
2,2,50,5 Black
Open a calendar type element.
Resize 60%.
Rotate free rotate
left 25
Paste along the bottom of the
tag.
Open a metal heart element.
Resize 50%
Paste the heart on the
calendar element.
Add the earlier drop shadow
to the heart.
Open another heart element.
Resize 50%
Paste behind the other side
of the calendar.
Open a ribbon of choice.
Resize 68% or as needed.
Paste under the frame layer.
You want it visible on either
side of the original tube layer.
Add the earlier drop shadow also.
Open two buttons.
Resize the first one 60%
Paste on a corner of the frame.
On the 2nd button, resize 50% & paste along the first button.
On your 2nd tube, resize 75%
Paste along the bottom of your
tag as wanted.Now I used a different tube than the
closeup but it is up to you. i just found it worked better on
the tag.Open a bow element, like an archery bow. Paste
under the button layers.
Merge layers visible.
Resize 88%.
Add copyright info & name.
Save as png.
Thanks for trying my tutorial.
Labels:CDO,Love,Tutorial,Valentine's Day | 0
comments
Thursday, January 26, 2012
1:27 AM | Edit Post
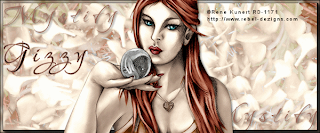
Mystify
This tutorial was written
by Sarah Fiack on
January 25, 2012
Any resemblance to another
tutorial is purely coincidental.
For this tutorial, I’m using a
tube by Rene Kunert
You can purchase it at
CDO.
Supplies:
Tube of choice
FTU Animation glitterbug
by Missy of Divine Intentionz
Blog
Animation Shop
Plugin: Mura's Meister Copies
Star Cluster
AAA Frames Foto Frame
Open a 600x250 new image.
Open a tube of choice.
Copy & paste your tube
as a new layer on the image.
Duplicate the tube once.
On the bottom layer,apply
the plugin Mura's Meister
Copies -Star Cluster
Default Settings.
Back on the 2nd tube
layer, add a drop shadow.
2,2,50,5 Black
Select your font tool.
Using a font which works well
with your tube, type out a word
of choice. I used Mystify.
Convert the word to raster.
Duplicate it once.
Position the word layers on
the tag as wanted.
Drop shadow both layers.
Merge the bottom two layers
together; make sure
you don't merge your
main tube layer.
On the merged layer,
apply AAA Frames plugin
Width set to 5
Copy the merged layer into
AS. Ctrl L for as many frames
as the animation you are using.
I did 16 frames.
On the animation I am using
I select all & resize the animation
by 60. This varies on the animation
& your tag.
On the tag in AS, select all
On the animation, select all & copy.
Drag the animation onto the tag.
Back on the animation,
undo drag. Repeat the above
but drag onto tag in a different
position of the tag.
I did one on the left & one on the right.
Now back in PSP,
Add copyright info & name
to your tag.
Merge this layer with your
main tube layer.
Copy into AS & paste as
a new animation.
Ctrl L to the same number of
frames as your animated tag image.
Copy the all the frames &
drag onto your main animation tag.
Make sure you drag where you want
the tube on the tag.
Once done, View animation.
If happy, save as wanted.
If not, fix and adjust as needed.
Thanks for trying my tutorial.
Labels:CDO,Forum Style,FTU,Magic,Tutorial | 0
comments
Monday, January 23, 2012
10:04 PM | Edit Post
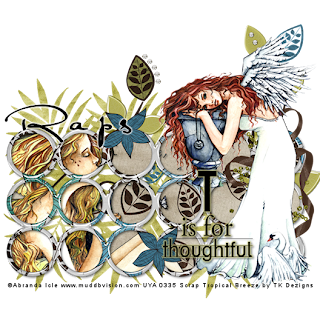
Thoughtful
This tutorial was written
by Sarah Fiack on
January 23,2012
Any resemblance to another
tutorial is purely coincidental.
For this tutorial, I’m using
2 tubes by Abranda Icle Sisson.
You can purchase the tubes at
UYA
Supplies:
Tubes of choice
Scrap of choice.
I’m using one by TK Dezigns
Called Tropical Breeze
It is available at Pimp My Tags
with Scraps
Here
Wordart by Tlc Creations
Blog
Plugin: EyeCandy4000 Gradient Glow
Open a 600x600 new image.
Open up your tubes & scrap
supplies for the tag.
Choose a frame.
I am using a multi circle
frame.
Resize 80% or as needed.
Copy & paste the frame
onto the new image.
Using your magic wand,
click inside the frame.
If using a frame like I
am, hold shift button down
to select inside multiple frames.
Selections modify expand by 2.
Paste a scrap paper of choice.
Selections invert & press delete.
Move the paper layer under the
frame layer.
Keep the frame selected.
Paste your first tube between
the paper & frame layers.
Press delete.
Select none.
Add a drop shadow to
the frame & tube layers.
2,2,50,5 Black
Merge the three frame layers
together.
Open your 2nd tube & resize
80 or as needed.
Paste along the side of
your frame.
Open a ribbon element.
If needed, rotate right 90.
Paste behind & slightly to
the side of your 2nd tube.
Open a leaf tree branch.
Paste on the bottom layer of
the tag.
Position so that it comes out
the top above the tag.
Open a flower element.
Resize 25.
Paste 2-3 times along the frame.
Oepn a fern like leaf element.
Resize 75%
Paste on the opposite side of
your 2nd tube.
Position the layer in the layer
palette to bottom layer.
Arrange at the end of the frame.
Duplicate once & flip.
You want fern at the top & side
of the frame along with the
bottom & side.
Merge the two fern layers together.
Duplicate two more times.
Move the copy layers along the
back of the tag.
Open a wordart of choice.
For the one I am using I resized
by 50 twice.
I also added a gradient glow to
the wordart.
EyeCandy 4000 Gradient Glow
Fat ( color from tag )
glow width 3
Add the earlier drop shadow to
the wordart.
Merge layers visible.
Resize 88%
Add copyright info & name.
Save as png or jpeg.
Thanks for trying my tutorial.
Labels:Angel,Nature,Thoughts,Tutorial | 0
comments
Saturday, January 21, 2012
9:12 PM | Edit Post

Baked With
This tutorial was written
by Sarah Fiack on
January 21,2012
Any resemblance to another
tutorial is purely coincidental.
For this tutorial, I’m using
a tube by Cuddly Rigor Mortis.
This tube is the January bonus tube
& is only available during the month
of January 2012 with purchase.
You can find the tube at CDO
Supplies:
Tube of choice
Scrap of choice.
I’m using one by TK Dezigns
Called Hey Sugar
It is available at Pimp My Tags
with Scraps
Here
Plugin: EyeCandy 4000
Gradient Glow
Open a 600x600 new image.
Open up your tube & scrap
supplies.
Open a frame of choice.
Click inside the frame with
your magic wand tool.
Selections modify expand by 5.
Paste a paper of choice as
a new layer. Selections invert
& press delete.
Move the paper under the
frame layer.
Select none.
Open your main tube.
Resize 85% or as needed.
Paste as a new layer by the
bottom of the frame.
Add a drop shadow to
the frame & tube layers.
2,2,50,5 Black
Open a cookie trim element.
Resize 70%
Rotate 20 right.
Paste behind and to the side
of your main tube.
Duplicate it two more times.
Also rotate each of them the same.
You want to position them near one
another.
Merge the three layers together.
Open a measuring cup element.
Resize 60%
Position on the opposite side
of the trim elements.
Open some heart candies.
Position them in front of your tube
& the measuring cup.
Open a heart doodle.
Resize 70%
Free Rotate right 20
Paste the doodle at the top
behind the frame.
Open a whisk element.
Mirror the whisk.
Resize 70%
Paste behind at the bottom
of your tube.
Add the earlier drop shadow
to the whisk.
Open a wordart from the scrap
or one of choice.
I am using one which came with
the scrap.
I added a gradient glow
to the wordart.
EyeCandy 4000
Gradient Glow
Fat glow width 3
Merge layers together.
Resize 88%
Add copyright info & name.
Save as png or jpeg.
Thanks for trying my tutorial.
Labels:CDO,cupcake,Cupcakes,Food,TKDezigns,Tutorial,Valentine's Day | 0
comments
4:43 PM | Edit Post
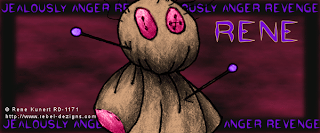
Voodoo
This tutorial was written
by Sarah Fiack on
January 21, 2012
Any resemblance to another
tutorial is purely coincidental.
For this tutorial, I’m using a
tube by Rene Kunert
The tube is now FTU &
available here.
Supplies:
Tube of choice
Grunge Forum Mask by Lithium
Flower Creations
Animation Shop
Plugins: Richard Rosenman Scanlines
Open a 600x250 new image.
Open up your tube of choice.
Fill the new image with black
or a dark color of choice.
Add a new raster layer
& fill with a 2nd color of choice
from your tube.
Apply Forum Mask Grunge
to the 2nd fill layer.
Merge group.
Select a font tool and
a font of choice.
I used a second color from
the tube for my font color.
Above the mask,
type out words of choice.
Position as wanted along the mask
layer.
Duplicate the word layer once.
Move down to the bottom of
the tag.
Merge the two word layers together.
Before we animate,
add copyright info & name
to the tag.
Now back on the masked layer,
open the scanlines plugin.
Spacing 1
Thickness 1
Luma -255
Shift 0
Noise 0
Color of choice
Click okay
Copy merged into AS.
Back in PSP, undo the
plugin.
Now apply the plugin again
adjusting the spacing to 5
Repeat the above for a total of
4 frames.
Frame 1 spacing 1
Frame 2 spacing 5
Frame 3 spacing 10
Frame 4 spacing 15
Once all set,select all
& view animation.
If you like it, save as gif.
Thanks for trying my tutorial.
Labels:Animation,Forum Style,FTU,Gothic,Rene Kunert,Tutorial | 0
comments
Friday, January 20, 2012
10:51 PM | Edit Post

Wildest
This tutorial was written
by Sarah Fiack on
January 13,2012
Any resemblance to another
tutorial is purely coincidental.
I am using a tube by The Vintage
Angel.This tube is available at
CDO
Plugins: Mura's Meister Copies
Xero Radiance
Xero Porcelain
EyeCandy4000 Gradient Glow
Open a 600x250 new image.
Open a tube of choice.
Fill the new image with
a color of choice from your
tube.
Copy & paste your tube
as a new layer. Position
along one of the sides
of the new image.
Duplicate the tube once.
On the bottom tube layer,
apply Mura's Meister Copies
Wallpaper plugin
default settings.
You want it to cover & fill
your new image completely.
Now apply Xero Radiance
to the copies layer.
Strangeness 128
Charm 50
Truth 128
Beauty 255
On the same layer, apply
Xero Porcelain
Softness 112
Strength & Brightness 128
Now add a drop shadow to
the main tube layer.
2,2.50, 5 Black
Add a new raster top layer.
Fill with black or a dark color
from your tag.
Click this layer with your magic wand.
Selections modify contract by 3.
Press delete.
Select none.
Now add a quote or wordart
of choice to the tag.
I added a gradient glow to
the text I used.
EyeCandy 4000 Gradient Glow
Fat setting glow width 3.
I also did the same drop shadow
as earlier.
Merge layers.
Add copyright info & name.
Save as png or jpeg.
Thanks so much for trying my tutorial.
Labels:Animals,Forum Style,FTU,Tutorial | 0
comments
Monday, January 16, 2012
3:02 PM | Edit Post
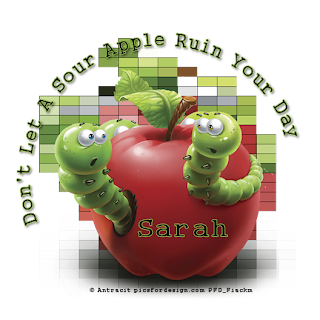
Sharing a tag I did today. This goes along with my trying to
be more positive. You can purchase this tube at PFD. I really like the saying I added to this tag and how it came out.
Labels:Positive,Thoughts | 0
comments
Friday, January 13, 2012
10:27 PM | Edit Post
I have been given the Zone Groups Copyright Safe Tutorial Writer Award. I originally earned this on my previous blog Shadows Creations. It still means a lot to me to have it. I am honored to display this on my blog. I pride myself on being fully copyright aware & safe in all my psp creations.
Labels:award,copyright | 1 comments
Thursday, January 12, 2012
4:08 PM | Edit Post
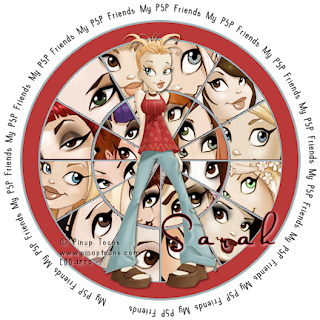
I did this tag today.
Really like how it turned out.
So thought I would post it on here.
I only used tubes & a template
by Dark Angel's Scrap World
which you can find here
Really like how it turned out.
So thought I would post it on here.
I only used tubes & a template
by Dark Angel's Scrap World
which you can find here

Labels:Friends,FTU | 1 comments
Wednesday, January 11, 2012
11:25 PM | Edit Post
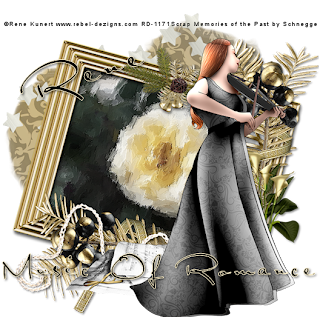
Music Of Romance
This tutorial was written
by Sarah Fiack on
January 11, 2012
Any resemblance to another
tutorial is purely coincidental.
For this tutorial, I’m using a
tube & photo by Rene Kunert
The tube is now FTU &
available here.
Supplies:
Tube of Choice
Scrap of choice
I am using one called
Memories Of The Past
by Schnegges Scraps
Blog
It is a FTU Scrap
Plugin
Xero Porcelain
Heart Mask by me
Download
Open a 600x600 new image.
Open your tube, photograph of
choice and scrap supplies.
Choose a frame of choice.
Copy & paste as a new layer.
Click inside the frame with
your magic wand tool.
On your photograph of choice,
resize 50% if needed.
Paste into your frame as a new layer.
Selections invert & press delete.
Select none.
Move the photo layer under
your frame layer.
Add a drop shadow to the
frame.
2,2,50,5 Black
Back on the photo layer,
duplicate it once.
On the top photo layer,
Effects - Art Media Effects -
Brush Strokes
Softness 20 Length 10 Denisty 25
Brush 160,5,50 Angle 102 Color of choice.
On the bottom photo layer
Xero Porcelain
Softness 79
Strength 128 Brightness 128
Back on the top photo layer,
lower the opacity to 75
on this layer.
Merge the photo layers with the
frame together.
Resize the layer 90%
Rotate free rotate 15 right.
Copy & paste your tube
of choice.
Position as wanted on the frame.
Open music paper from scrap.
Resize 75%
Position under the tube layer but
coming out from behind the tube.
Open a flower bundle.
Resize 50%
Paste on the other side of the
tube along the frame.
You also want this layer to come
from behind the main tube.
Open a twig bundle.
Mirror it once if needed
Paste along the music sheets
but arrange behind this layer.
Duplicate the bundle once.
Rotate right 90
Paste along side the earlier flowers
but behind this layer.
Open a string necklace element.
Paste along the first twig bundle
layer.
Add a drop shadow to the
layers so far if you haven't yet
2,2,50,5 Black.
Open a cluster of stars.
Paste once behind & above the top of the frame.
You want the layer under the frame but the stars
to appear above the frame.
Duplicate once & move the stars
alongside one side of the frame.
Paste a paper of choice on the bottom
layer of the tag as a new layer.
Merge group.
Position as wanted on the tag.
Merge layers together.
Add wordart as wanted to the tag.
Resize all layers 88%.
Add copyright info & name.
Save as png.
Thanks for trying my tutorial.
Labels:Love,Music,Rene Kunert,Tutorial | 0
comments
Tuesday, January 10, 2012
5:08 PM | Edit Post
Hello! I'm Sarah aka Shadows Creations. I've decided to revamp
and change things up. My Shadows Creations blog will remain up
but from now on this is my new home. I've been given the nickname
Wicked Little Cupcake and it stuck lol.
I just love it! So I decided I needed a new home with it :)
I'll be posting tutorials, scraps and random things on here.
I am trying to be more positive and wanting to post things which
make one think & stop for a moment. That's the idea anyways we'll
see how it goes.

Labels:Thoughts | 0
comments
5:07 PM | Edit Post
I'm late in making one but nothing
felt right for me this year.
Tonight my oldest son & I
made one together.
The resolution is to be more
positive in life about things.
This will help both of us in
a lot of way.So what are your
resolutions for this year?
felt right for me this year.
Tonight my oldest son & I
made one together.
The resolution is to be more
positive in life about things.
This will help both of us in
a lot of way.So what are your
resolutions for this year?

Labels:Thoughts | 0
comments
Subscribe to:
Comments
(Atom)
TOUs
I do not allow resizing of my tags, timelines or wallpapers. All of my creations are for PU only unless otherwise stated. Nor are they to be altered in any way either.
Categories
- Abstract (22)
- ACDivas (2)
- Ad (1)
- addictive pleasures (3)
- ADI (2)
- Adriennes Design (6)
- Adult (8)
- Alicia Mujica (61)
- Amber (6)
- Amy Marie (222)
- Andrea Gibson (1)
- Angel (97)
- Animals (468)
- Animation (107)
- Anime (11)
- AORK (10)
- AOTW (8)
- Apocalyptic (5)
- Art-Content (1)
- Asian (8)
- Attitude (57)
- Authors (9)
- Autism (5)
- Autumn (39)
- award (3)
- Baby (1)
- BAS (1)
- BCA (7)
- BCS (28)
- Bella Caribena (2)
- birthday (3)
- Birthstone (10)
- Blaque Heart Designz (11)
- BLT DeZignZ (11)
- book suggestions (6)
- Cajoline (1)
- Calendar (2)
- Carnival (1)
- Carpe Diem (6)
- Cars (4)
- Casino (3)
- CCD (12)
- CCS (18)
- CDO (1545)
- Celestial Scraps (2)
- Celinart Pinup (1)
- Chaos Priestess (73)
- Charity (29)
- Chasing The Blues (2)
- Chelloenix Blog (1)
- Chichi (65)
- Children (30)
- Christmas (173)
- Cluster Frame (42)
- Color (6)
- Comic (6)
- copyright (2)
- Country (33)
- Crafty (2)
- Crazed Creations (1)
- Creative Misfits (3)
- CRM (23)
- Crowe (17)
- Crystal's Creations (20)
- CSBC (76)
- CU (12)
- cupcake (60)
- Cupcakes (44)
- CUPU (4)
- Cute (205)
- DAH (95)
- Dees"SIGN Depot (65)
- Devil (1)
- Dia De Los Muertos (2)
- Digital Chaos (61)
- Doodle by Design (40)
- Dreams (63)
- DSI (2)
- Easter (49)
- ELF (14)
- EliasC. (25)
- Elli's Creations (2)
- Emo (29)
- emotion (27)
- Extras (81)
- Fairy (185)
- Fall (182)
- Family (21)
- Fantasy (325)
- Farrah (4)
- Feature Tutorial (3)
- Food (165)
- Forum Style (38)
- Foxy's Designz (92)
- Freeks Creations (35)
- Freya (5)
- Friends (20)
- Friendship (14)
- FTU (122)
- Garv (20)
- Gimptastic (146)
- Gingerscraps (2)
- Girly (125)
- Goldwasser (8)
- Gothic (352)
- Gothic Inspirations (12)
- Guest CT (28)
- Halloween (221)
- Hania's Design (9)
- Happy (15)
- Happy New Year (8)
- Heartfelt Perfections (2)
- Help 4 Casper (2)
- Hollywood (4)
- Honored Scraps (230)
- Hungry Hill (171)
- Ilonka's Design (1)
- Inspiring (8)
- Irish Princess Designs (118)
- Jensen (106)
- Jose Cano (1)
- Karmalized (108)
- Kids (12)
- Kissing Kate (4)
- Kizzed by Kelz (81)
- Ladyhawwk (306)
- LaReina Designz (1)
- Layout (6)
- Learning (4)
- Life (98)
- LML Designs (1)
- Love (229)
- Magic (33)
- Mardi Gras (2)
- MellieBeans (11)
- Mental Health (5)
- Mermaids (67)
- MicroTut (19)
- Misc (6)
- Misticheskaya (25)
- Monsters (1)
- Monti's Scraps (22)
- Moon (56)
- MTA (18)
- Music (59)
- Mystery (1)
- Mystical Scraps (184)
- Nature (220)
- Nerd/Geek (1)
- New Years (10)
- Nocturne (27)
- Norella (3)
- Ocean (143)
- Overlays (10)
- Pagan (59)
- Paranormal (1)
- Patriotic (15)
- Peace (4)
- Phone Wallpaper (10)
- Photo (4)
- Pimp'd Designz (3)
- Pimpin Pspers Warehouse (3)
- Pink Paradox (1)
- Pinterest (1)
- Pirates (4)
- Poems (1)
- Poetry (11)
- Poser (4)
- Positive (7)
- Presents (2)
- Promo (25)
- PS (1)
- PSP (3)
- PTU (20)
- PU (1)
- Queen Uriel (43)
- Quickpages (14)
- Rac (9)
- Rebecca Sinz (174)
- Rebel Designz (123)
- Rene Kunert (27)
- Retro (7)
- Rissa's Designs (8)
- RMQ (47)
- Robot (2)
- Sale (3)
- Sams Scraps (1)
- Savage Dezines (2)
- Schnegge (14)
- School (21)
- Sci-fi (3)
- Scrap (23)
- Scrappin with lil ole me (1)
- Scraps of enchantment (1)
- Selina Fenech (13)
- Sexy (149)
- SGRowe (3)
- Sissys Sassitude (3)
- Snowmen (2)
- SophisticatSimone (8)
- Spazz (17)
- Special Friends (2)
- Sports (12)
- Spring (162)
- St Patty's Day (34)
- St. Patricks (1)
- starlite & soul (4)
- Steampunk (26)
- Summer (110)
- summerween (1)
- Sweet (3)
- SWLOM (1)
- Tag (44)
- Taggers Delight (7)
- tagging (1)
- Tasha's Playground (88)
- Tech (4)
- Template (11)
- Thanksgiving (12)
- Thoughts (103)
- Timeline (210)
- Timelines (70)
- Tiny Turtle (4)
- TKDezigns (36)
- Tony T (3)
- Tonya (3)
- Toon (1)
- TPP (8)
- Travel (1)
- Treasured Scraps (7)
- Tresured Scraps (26)
- Tutorial (220)
- UYA (6)
- Valentine's Day (98)
- Verymany (64)
- Vi NIna (1)
- Vintage (112)
- Wallpaper (465)
- WDDesignz (38)
- Western (2)
- Whisprd Desginz (10)
- Wicked Diabla (18)
- Wicked Princess (171)
- Winter (137)
- WITW (1)
- Women (188)
- Wordart (12)
- Words (57)
- Zaric (3)
- Zindy (66)
- Zodiac (2)
- Zombies (11)


