






Sunday, July 7, 2013

Castle Fairies
This tutorial was written
by Sarah Fiack on
July 7th, 2013
Any resemblance to another
tutorial is purely coincidental.
I am using 2 tubes by Rachel Anderson
which you can purchase at
CDO
I am also using Inspired by Rachel Anderson 19-3
scrap by ChiChi Designz which can also be purchased
at CDO.
Open a 700x700 new image.
Open up your scrap supplies
& tubes of choice.
Choose a circle frame.
Paste as a new layer onto your image.
Click inside the frame with your magic
wand tool.
Selections modify expand by 2.
Paste a scrap paper as a new layer.
Selections invert & press delete.
Move the paper layer underneath
the frame layer.
Open a castle like building.
Position as wanted on the tag between
the paper and frame layers.
Press delete.
Selet none.
Select a 2nd circular frame.
Paste as a new layer above the
1st circle frame.
Add a drop shadow to both
of the frame layers and the castle layer.
2,2,50,5 black.
Oepn a carraige element.
Paste as a new layer in bottom front
of the tag.
Add the above drop shadow to it.
Open a sparkle trail element.
Paste on the left side & slightly behind
the carriage.
Open a flower cluster. Resize as needed.
For the one I am using I resized 50 & 70%
once each. Paste in front of one side of the carriage
wheels. Duplicate & mirror. You want flowers in
front of each of the wheels.
Open a row of flowers.
Resize 70% or as needed.
Paste in front of the carriage & flower clusters.
Open clouds element.
Resize 70% Paste behind the castle layer
& to the side slightly. You want the clouds to appear
to be coming from behind the castle.
Open up your tubes if they are not already open.
Paste on on the bottom right side of the tag.
I positioned the standing one on the side of the tubes
I used.
For the 2nd tube, I reiszed 80 & 88% once each.
I then positioned the tube to appear to be sitting
on top of the carriage. She is also facing the 1st tube.
Add the earlier drop shadow to both of the tubes.
Open a flower trail element.
Paste as a new layer as the top layer on the tag.
Open a dragonfly element. Resize 50% & 80% once
each. Paste as wanted on the tag near the top of the tag.
Add the earlier drop shadow to the element.
Add artist copyright information & name.
Save as a png.
Thanks for trying my tutorial.
Saturday, July 6, 2013

Blue Note
This tutorial was written
by Sarah Fiack on
July 6th, 2013
Any resemblance to another
tutorial is purely coincidental.
I am using a tube by Jennifer Janesko
which you can purchase at
CDO
The tube I am using I purchased from CILM
when they were open.
I am using an Inspired by scrap
by Honored Scraps. It is IB Scrap Jennifer
Janesko 12-1 and also available at CDO.
Mask MB &SW33 found here
Blog
Plugin:
Eye Candy 5 Impact - Glass
Open a 650x650 new image.
Open a frame of choice from
the scrap you are using.
Copy & paste as a new layer.
Click inside the frame with your
magic wand tool. Selections modify
expand by 5.
Paste a paper of choice as a new layer.
Selections invert & press delete.
Move the paper layer underneath
the frame layer in your layer palette.
Paste your tube as a new layer between
the two layers. Duplicate once. Move the tube
copy layer above the frame layer & X out for now.
Back on the original tube, press delete.
Select none. Hide this one
Un'X the copy tube. Lower the opacity
so that you can see some of the frame
through the tube.
Erase parts as needed so it appears to
be coming from "inside" the frame.
Once you are happy, put opacity back to 100
& unhide the original tube layer.
Add a drop shadow to the original tube & frame layers.
2,2,50,5 Black.
Open a table element.
Paste as a new layer.
Move the bottom half of the tag.
Now move this layer to underneath all the
previous layers.
This should give the look of the frame layers
being on or standing or leaning against the table.
Open a piano keys element.
Resize 80%.
Paste as a new layer. Position on the bottom
half of the tag.
Move the layer to above the table layer.
You do want the keys below your frame layers.
Paste a paper as a new layer on the bottom
layer of the tag.
Apply the mask MB & SW 33
Merge group. Duplicate once & mirror.
Merge the two mask layers together.
Apply the mask layer.
Eye Candy 5 Impact - Glass
Setting Clear - default settings
Open glowing orbs element.
Resize 80%.
Paste as a new layer behind the
2nd tube layer.
Add the earlier drop shadow as well.
Open a flower element.
Resize 75% & mirror.
Position as wanted on a side of the tag.
Erase part of the stem if needed to give illusion
of the flower being behind items when they
in fact are not.
Merge all layers visible.
Add artist copyright information & name.
Save as png.
Thanks for trying my tutorial.
Friday, July 5, 2013
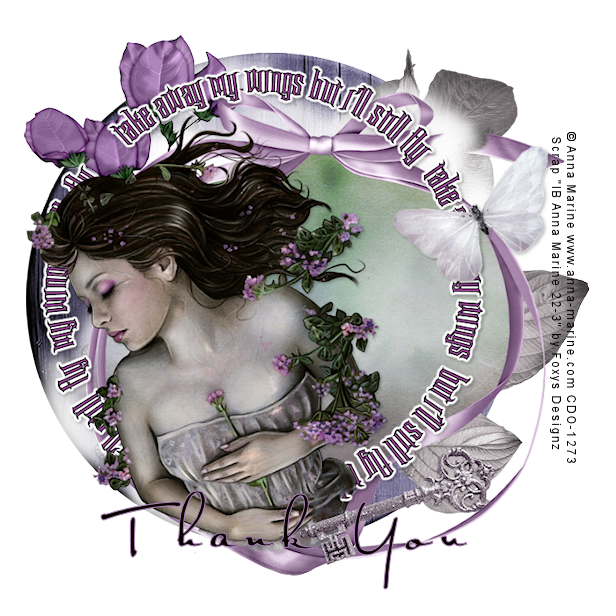
Snag tags using art by Selina Fenech & PTU Inspired by Anna Marine kit by Foxys Designz. Both can be found at
CDO. Enjoy the snags!


CDO. Enjoy the snags!



Monday, July 1, 2013

Remember Fairy
This tutorial was written
by Sarah Fiack on
July 1st, 2013
Any resemblance to another
tutorial is purely coincidental.
I am using a tube by Selina Fenech
which you can purchase at
her store.
The tube I am using I purchased from CILM
when they were open.
I am also using Inspired by Selina Fenech 36-3
scrap by Ladyhawwk Designs which can also be purchased
at CDO.
Animation Shop
Open up a 700x700 new image.
Open up a tube of choice.
Choose a frame element.
Paste as a new layer.
Select your magic wand tool.
Select an empty area of the frame with the wand.
Hold shift button down & continue selecting various areas.
Selection modify - expand by 3.
Paste a paper of choice as a new layer.
Selections invert & press delete. Select none.
Move the paper underneath the frame layer.
Choose a curved flower element
from your scrap. Paste as a new layer.
Copy & paste your tube as a new layer.
Arrange in front of the flower layer.
Open a flower cluster element.
Resize it 75%.
Paste as a new layer. Arrange in bottom front
corner of the tag. Duplicate once & mirror.
Open a flower of choice.
Resize 70%. Paste on one side of the tag.
You want it below the previous flower layers & partially
hidden behind the cluster.
At this point, drop shadow your frame,
tube, & flower layers.
2,2,50,5 black.
Open a sparkle glow stream element.
Resize 80% & 95% once each.
Paste along the front of the clusters.
Then paste a wordart element on top of the glow.
Open a small round frame.
Paste as a new layer.
Position on your tag an upper corner.
Move to the bottom layer in your layer palette.
You want part of it peeking out in the upper
corner of the frame.
Duplicate & mirror the frame once.
Now open a bow of choice.
For the one I am using I resize 70% twice.
Paste on one of the upper corners of the 1st frame.
Now if you don't wish to animate, you can stop here.
Add artist copyright information & name.
Save as you want.
To animate please continue below.
First, add a white background to your tag.
Also, add artist copyright info & name to tag.
Hide any layers in the way of this except the main frame.
Make sure you have the paper layer selected in your layer palette.
Selections - select all - float - defloat.
Paste your tube again as a new layer.
Move slightly to a side of choice.
Back on the paper layer, selections invert.
Now the tube & press delete.
Select none.
Lower the opacity on the tube layer all the way to zero.
Unhide all layers & copy merged.
Now in Animation shop.
Paste as a new animation.
Go back to psp.
Raise the opacity on the tube layer to 20.
Copy merged & paste after current frame.
Repeat back to psp.
Opacity to 40. Paste again into AS as the 3rd frame now.
Keep doing this with raising the opacity in 20 increments.
You should get 6 frames in Animation shop.
Frame 1 -0 opacity
Frame 2 - 20 opacity
Frame 3 - 40 Opacity
Frame 4 - 60 Opacity
Frame 5 - 80 Opacity
Frame 6 - 100 Opacity
Select all - copy - minimize.
Paste the copy as a new animation.
Select all - Animation - Reverse frames.
Select all & Copy.
Back to original animation.
Paste after current frame.
Select frame 7 in all the frames & delete this frame.
After this you should have 11 frames total.
Select all - Frame Properties set to 25.
View animation. If happy, save as a gif.
Thanks for trying my tutorial.
Friday, June 14, 2013

All Lined Up
This tutorial was written
by Sarah Fiack on
June 14,,2013
Any resemblance to another
tutorial is purely coincidental.
For this tutorial, I’m using a tube
by Justsan. It is a FTU tube found at
MTA.
Plugins:
Mura's Meister Copies
Toadies what are you
dsb flux blast
VM Stylize -Motion Trail
Eye Candy 5 Impact Chrome
Open a tube of choice.
No outside scraps are needed for this.
Open a 600x600 new image.
Select a rectangle preset shape tool.
Make sure the square icon is selected.
Also make sure the width is set to 0.00
On your materials pallete, choose both
boxes with a bright color from your tube.
I used yellow for mine.
Draw out a good sized rectangle
on your new image.
Objects - Align -center in canvas.
Convert to raster.
Now select the rectangle icon.
Keep the width set to 0.00
Choose black for both boxes on
your materials palette.
Draw out a vertical thin rectangle on your
square. Convert to raster.
Plugin Mura's Meister Copies
Tiling. Make sure Tile gap is set to 2.
Hit okay or apply.
Select your square layer with your magic
wand tool. Selections - invert.
Back on your black rectangle layer, press delete.
This should give you only rectangles on your
square.
Select none.
Merge the two square layers together.
Duplicate once.
On the bottom layer, apply Toadies
What are you plugin - default setting.
Now apply dsb flux blast -
Direction left
Percentage 20
Now on the Square copy layer, apply
the plugin VM Stylize -Motion Trail
default settings.
Paste your tube as a new layer.
Add a drop shadow to the tube.
2,2,50,5 Black.
Select your ellipse preset shape.
Color black on stroke box on
materials palette
X out the Fill one.
Width 10.00
Draw out a small circle.
Postion on the right side
of the tag. Duplicate twice for a total
of 3 circles. Postion in a vertial row.
Merge the 3 circles together.
Apply the plugin Eye Candy 5 Impact
Chrome - choose Bumper -Shiny Grill
Default settings.
Click inside the 3 circles with your magic wand
tool. Hold shift button down if needed to select
multiple places. Selections expand by 3.
Add new raster layer. Fill with color black.
Select none.
Move this layer underneath the circle layer.
Choose your text tool. Unhide the fill box on
your materials.You want this the same bright
color as earlier. Add text as wanted to
each circle. Make sure to convert to raster
& position as wanted.
Merge layers as visible. Add artist copyright info
& name. Save as png.
Thanks for trying my tutorial.
Wednesday, June 5, 2013
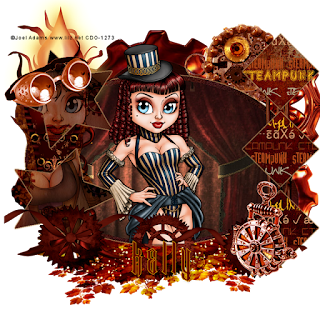
It's been a long time since I made a template. But thought I would share the one I did today.
You can find my older ones on my old blog here. I also did a sample tag using the template.
For that, I used tubes by Joel Adams which you can find at CDO.
I also used a Steampunk scrap by Bibi which you can find at SATC.
Download template

You can find my older ones on my old blog here. I also did a sample tag using the template.
For that, I used tubes by Joel Adams which you can find at CDO.
I also used a Steampunk scrap by Bibi which you can find at SATC.
Download template


Subscribe to:
Posts
(Atom)
Zone Award
