






Sunday, May 13, 2012
Lookie what i got for Mother's Day! I just had to show them off!
I love love love them!! esp the Giant Cupcake Bear!
& Brian got me the cute little bear in bear jammies.
I do love my comfy clothes just like the bear!
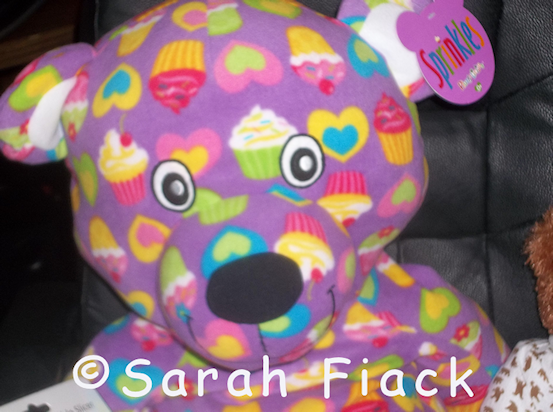
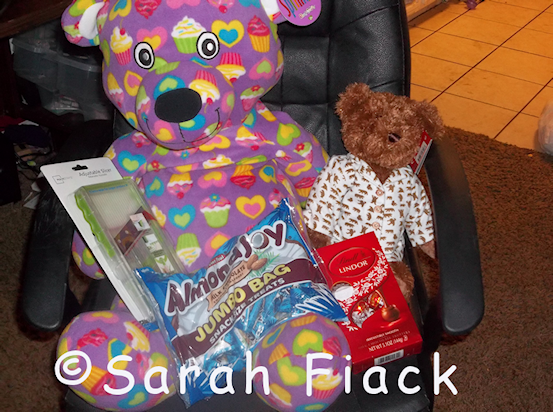
I love love love them!! esp the Giant Cupcake Bear!
& Brian got me the cute little bear in bear jammies.
I do love my comfy clothes just like the bear!


Saturday, May 12, 2012

Puzzle Pieces
This tutorial was written
by Sarah Fiack on
May 11, 2012
Any resemblance to another
tutorial is purely coincidental.
For this tutorial, I’m using a
tube by Rene Kunert
The tube is now FTU &
available here.
Supplies:
Tube of choice
Mask SpawnsFSMask57 by Spawns Forum set Masks
Blog
Plugins VM Distortion Tilomat 2000
AAA Frame Foto Frame
Open a 600x250 new image.
Open a tube of choice.
Fill the new image with black
or a dark color.
Paste your tube as a new layer.
Apply the plugin
Muras meister Copies
Wallpaper rotate default settings.
Duplicate the wallpaper layer once.
X out the copy layer.
On the original wallpaper layer,
Adjust blur Gauassian Blur 15
On the same layer, apply the mask
SpawnsFSMask57.
Merge group.
Adjust add noise
Uniform 25 to this layer.
Now unhide the copy layer we hid earlier.
Apply the plugin
VM Distortion Tilomat 2000 default settings.
Take your selection tool, and select various
squares on this layer. You don't want to select
all of them - just certain ones.
Once you have some selected, press delete
on your keyboard.
This should allow you to see the mask layer
underneath as the selected squares should
disappear.
Okay paste your tube as new layer.
You want this the top layer in your layer palette.
Position on the right side of your tag.
Add a drop shadow.
2,2,50,5 Black
Duplicate the tube once & mirror.
On the tube copy layer apply
Effects 3D Effects Cutout
Offset Vertical 10
Horizontal 10
Attributes 50
Blur 5
Colors : two colors from your tag
Hid the tube copy layer.
Merge the rest of the layers visible.
Apply the plugin AAA Frames Foto Frames
Width set to 5.
Unhide the tube copy layer now.
Add words of choice to match
your tag.
I used the words puzzle pieces but
it is entirely up to you.
Convert text to raster.
Add artist copyright info & name.
Merge layers visible.
Save as png.
Thanks for trying my tutorial.
Thursday, May 10, 2012

No Place Like Home
This tutorial was written
by Sarah Fiack on
May 10,2012
Any resemblance to another
tutorial is purely coincidental.
For this tutorial, I'm using a tube
by Rebecca Sinz. It is available at
her store.
Supplies:
Tube of choice
Scrap of choice.
I’m using a kit called The Orchid
by Dark Yarrow.
It is also available at DAH
Mask Vixbigmask 018
Here
Open a 600x600 new image.
Open up your tube & scrap supplies.
Choose a frame of choice.
Resize 80% or as needed.
Paste the frame as a new layer.
Click inside your frame with your
magic wand tool.
Selections modify expand by 10.
Paste a paper of choice.
Selections invert & press delete.
Move the paper under the frame layer.
Keep selected.
On your tube, resize 85%.
Paste between the two layers on your tag.
Duplicate once.
Move the tube copy layer to the top
in your layer palette.
Back on the original tube layer,
press delete.
Select none.
Now on the tube copy layer,
use your eraser tool
to erase parts of the tube showing
past the frame you don't want.
Add a drop shadow to the frame
& original tube layers on the tag.
2,2,50,5 Black.
Open a house element.
Resize 80%
Paste between the frame & paper layers.
Add the above drop shadow to the house layer.
Open a ladder element.
Resize 70%.
Paste along the right side of the frame.
Open a plant branch.
Resize 70%
Paste on the right side along the ladder.
Duplicate once & mirror.
Move this layer back to along the original branch.
Open grass string element.
Paste on the bottom layer along
the top left side of the frame.
Duplicate once.
Mirror & flip.
Open a grassy ivy element.
Resize 50%
Paste twice along the bottom part of the frame.
You want these layers above the tube
copy layer in your layer palette.
Open a jar element.
Resize 50% twice.
Paste so that it appears to be sitting
on a lower branch of the frame.
I positioned mine on the left side in the ivy layer.
Open flying butterflies.
Resize 70%
Paste on the right side of the tag.
Make this layer underneath your tube copy layer.
On the bottom layer of the tag,
paste a paper of choice.
Apply the mask
Vixbigmask 018
Merge group.
Open a stiching circle frame.
Paste above the background mask layer.
Merge layers visible.
Resize 88%
Paste a wordart from the scrap.
Resize 80% & 88% once each.
Apply EyeCandy 4000 Gradient Glow
to the wordart.
Glow width 3.00 setting Fat.
Also add the drop shadow we used earlier.
Now merge layers visible again.
Add artist copyright info & name.
Save as png.
Thanks for trying my tutorial.
Monday, May 7, 2012

Blessings
This tutorial was written
by Sarah Fiack on
May 7, 2012
Any resemblance to another
tutorial is purely coincidental.
For this tutorial, I’m using a
tube by Renee Lavoie.
You can purchase this tube at
DAH.
Supplies:
Tube of choice
Scrap of choice.
I am using one by Cinnamon Scraps
called Daydreamer. Blog
It was a Facebook Freebie when i got it.
It is now a PTU scrap.
Wordart by create with tlc
Here
Plugin: EyeCandy 4000 Gradient Glow
Open a 600x600 new image.
Open up your tube & scrap supplies.
Choose a frame of choice from
the scrap.
Resize 50% & 45% once each.
Rotate free rotate left 90.
Paste as a new layer.
Click inside the frame with
your magic wand tool.
Selections modify expand by 5.
Open a scrap paper.
Resize 16%.
Paste as a new layer.
Selections invert & press delete.
Move the paper layer under the
frame layer.
Keep Selected.
Paste your tube of choice
between the two layers.
Duplicate the tube layer once.
Move the tube copy layer to
the top in your layer palette.
Now back on the original tube layer,
press delete button.
Select none.
Back to the tube copy layer,
erase the parts of the tube showing
past the frame which you do not want
to be seen.
I did mine so the tube appears to be
coming out of the frame.
Add a drop shadow to the frame
& original tube layers.
2,2,50,5 Black
Open a flower element.
Resize 15% once & 50% twice.
Paste 6 times along the frame
where the bottom of the tube meets
the frame.
Open a brush background element.
Resize 50% twice.
Rotate free rotate left 90.
Paste on both sides of the tag.
Make sure they are on the bottom layer of the tag.
Open a doodle element.
Resize 50% twice.
Rotate free rotate left 90.
Paste on the left side of the tag above
the background layer.
Duplicate once & mirror.
Add a drop shadow to the doodle layers.
Open a 2nd flower.
Resize 15% once & 50% twice.
Paste on a top corner and on a bottom
corner of the frame.
Open a butterfly element.
Resize 15% & 25% once each.
Paste the butterfly on one of the corner
flowers.
Open a wordart of choice.
Resize 50% and 45% once each.
Paste on the bottom part of the frame.
Add a gradient glow to the wordart.
EyeCandy4000 Gradient Glow
setting fat Glow width 3.00
Merge layers visible.
Resize 88%
Add artist copyright information
& name.
Save as png.
Thanks for trying my tutorial.
Saturday, May 5, 2012

PSP ADDICT
This tutorial was written
by Sarah Fiack on
May 5th, 2012
Any resemblance to another
tutorial is purely coincidental.
For this tutorial, I’m using
3 tubes by Keith Garvey.
You can purchase the tubes at
his store.
Supplies
Tube of choice.
Scrap of choice.
I’m using one by TK Dezigns
Called Tech Savvy.
It is part of a collab called Tech Savvy.
It is available at PMTwS
Monti Blinds Mask
Here
Plugins: EyeCandy4000 Gradient Glow
Opena 600x600 new image.
Open up your 3 tubes & scrap supplies.
Open a circle frame.
Copy & paste as a new layer.
Click inside the frame with your
magic wand.
Selections modify expand by 8.
Paste a scrap paper of choice as
a new layer.
Selections invert & press delete.
Select none.
Move the paper layer under the frame layer.
Open a ribbon element.
Paste between the two layers.
Resize 85% twice.
Open a computer monitor element.
Resize 80%.
Paste as a new layer.
Open jewel bead element.
Resize 25%.
Paste twice along the top of the monitor
& along the bottom of the element.
This is just to decorate the monitor some.
Click inside the monitor.
Selections expand by 8.
Add a new raster layer.
Fill this layer with a color of choice.
I did grey to make it look like my psp.
Move this layer under the monitor layer.
Open up two of your tubes.
Resize 60% each or as wanted.
Paste them inside the monitor.
Merge the two tube layers together.
Selections invert & press delete.
Select none.
Open a mouse element.
Resize 50% & 80% once each.
Rotate free rotate right 45.
Paste along the right side & slightly
in front of the monitor.
Open two wordarts from the scrap.
Paste one on top of the monitor.
On the 2nd wordart, resize 70%.
Paste along the bottom part of the monitor.
Apply a gradient glow to both wordart layers.
EyeCandy 4000 Gradient glow Fat
Glow width 3.00
Open your main tube.
I mirrored once but this is entirely optional.
Paste along one side of your tag.
Paste a papr of choice on the bottom layer
of the tag.
Apply Monti Blinds Mask.
Make sure invert is checked.
Merge group.
Resize this layer 115%
Merge layers visible.
Resize 88%.
Add artist copyright info & name.
Save as png.
Thanks for trying my tutorials.
Tuesday, May 1, 2012

Hold Fast
This tutorial was written
by Sarah Fiack on
May 1,2012
Any resemblance to another
tutorial is purely coincidental.
I am using a tube by Christina Lank.
You can purchase this tube at
PSPTUBESTOP
Supplies:
Tube of choice
Plugins Filer Factory E Perfrorator 1
VM Distortion Gear
Open a 600x250 new image.
Open up your tube of choice.
Add a new raster layer to
the new image.
Fill with a color of choice
from the tube. I am using
a muted blue-grey color.
Add another raster layer
& fill with a 2nd brighter
color from your tube.
I used a yellow for this
color.
Paste your tube of choice.
Position on the tag along
the right side.
Add a drop shadow to the
tube.
2,2,50, 5 Black.
Make sure the 2nd color
layer is selected on your
layer palette.
Apply the plugin Filer Factory E
Perfrorator 1 Default settings.
Still on the yellow layer,
apply VM Distortion Gear
Default settings.
Effects -Edge Effects -Enhance
Add a quote or wordart of choice
to the tag. I added a quote on the
opposite side of the tube side.
Convert to raster.
Merge layers visible.
Apply the plugin AAA Frame Foto Frame
Width set to 5
Add artist copyright information & name.
Save as png.
Thanks for trying my tutorial.

You Are Sweet
This tutorial was written
by Sarah Fiack on
April 30,2012
Any resemblance to another
tutorial is purely coincidental.
I am using a tube by Deacon Black
which you can purchase at
CDO.
This artist has retired.
Supplies:
Paint shop pro
Animation Shop
Tube of choice.
Scrap of choice.
I’m using one by Schnegge
called My Lil Teddy.
Mask by Weescottlass WSL Mask49 Here
Animation by Missy of Divine Intentionz
Blog
Open a 600x600 new white image.
Open up your tube & scrap supplies.
Choose a rectangle shaped frame.
Click inside your frame with your magic wand.
Selections modify expand by 10.
Paste a paper of choice.
Selections invert & press delete.
Move the paper under the frame layer.
Select none.
Now open a round frame.
Resize 80%.
Paste as the top layer.
Position to the right side of the tag.
Click inside your frame with your magic wand.
Selections modify expand by 10.
Paste a 2nd paper of choice.
Selections invert & press delete.
Move the paper under the frame layer.
Paste your tube closeup between the
two layers.
Press delete.
Select none.
Add a drop shadow to the
two frame layers.
2,2,50,5 Black
Back on your closeup layer,
change the blend mode in your layer
palette for this layer to Overlay.
Give this layer the above drop shadow also.
Paste your main tube on the left
side of the tag.
You want it in front of both frames partly.
Add the earlier drop shadow also.
Open a book element.
Paste behind your main tube but
in front of the bottom of the frames.
You want it to appear to lay down in front of
the frames.
Open a flower button element.
Resize 60%.
Paste on a top corner of the first frame.
Open a ribbon element.
Resize 80%.
Paste along the top of the 2nd frame.
Open a cupcake element.
Resize 70%.
Paste by 2nd frame & behind the book.
Paste a paper of choice on a bottom layer
of the tag -above the white image.
Apply mask WSL Mask49
Merge group.
Duplicate the layer.
Merge the two layers together.
Merge all layers & resize 88%.
Add artist copyright info & name.
If you don't wish to animate, then save now as wanted.
To Animate:
Open up your animation of choice in Animation Shop.
Copy layers merged into Animation Shop or AS.
Paste as a new animation.
On the tag you just pasted, hold down Ctrl & press L
repeatedly to duplicate it to 17 frames.
Select all.
Now with the animation you are using, select all & copy.
Drag the animation onto the tag where you want it.
View animation.
If you like it, then save as gif.
Thanks for trying my tutorial.
Subscribe to:
Posts
(Atom)
Zone Award
