Friday, April 27, 2012
11:54 PM | Edit Post
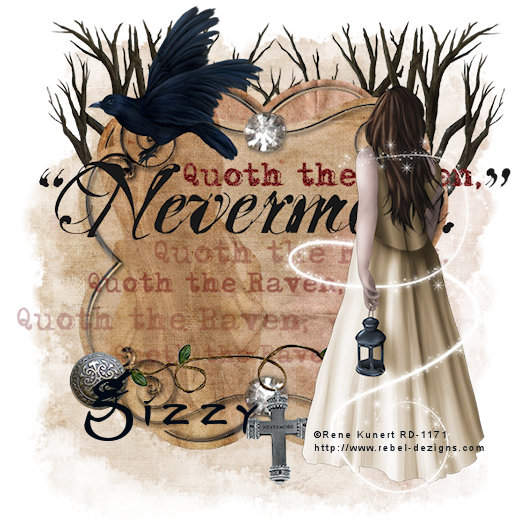
Quote the Raven
This tutorial was written
by Sarah Fiack on
April 27, 2012
Any resemblance to another
tutorial is purely coincidental.
For this tutorial, I’m using a
tube by Rene Kunert
The tube is now FTU &
available here.
Supplies:
Tube of choice
Scrap of choice.
I am using a PTU scrap called Nevermore
by designs by sarah. It is available at
PMTWS
BeckyMask022 Here
Open a 600x600 new image.
Open up your tube, closeup & scrap supplies.
Open up a tag background element.
Paste as a new layer.
Duplicate the tag once.
On the original tag layer, rotate
free rotate 90 left.
Paste your main tube beside it.
Resize the tube 80%.
Open a wordart element.
Paste this between the two
existing layers.
Open a raven element.
Resize 70%
Paste along the top of the tag.
Open a tree element.
Resize 70%
Paste twice along the bottom
layer of the tag. You want two
trees behind the tag layers.
Now select the top tag layer with
your magic wand tool.
Paste your close up as a new layer.
Arrange on one side of tag layer.
Press delete.
Select none.
Now on the close up layer,
on your layer palette.
change the blend mode to soft light.
Open a vine cross element.
Resize 70%.
Position along the bottom of the tag.
You want this layer underneath your main tube
in your layer palette.
Open a button of choice.
Resize 50%
Paste along the end of the vine not
hidden by your tube.
Paste a paper of choice on the bottom
layer of your tag.
Apply mask of choice.
I am using BeckyMask022.
Merge group.
Merge all layers visible.
Resize 88%.
Add artist copyright & name.
Save as png.
Thanks for trying my tutorial.
Labels:FTU,Gothic,Rene Kunert,Tutorial,Women | 0
comments
Wednesday, April 25, 2012
2:02 AM | Edit Post
Lay Your Head
This tutorial was written
by Sarah Fiack on
April 24,2012
Any resemblance to another
tutorial is purely coincidental.
For this tutorial, I’m using
a tube by Janna Prosvirina
You can purchase her tubes at
DAH
Supplies:
Tube of choice
Scrap of choice.
I am using one called Dreamwalkin by
Honored Scraps. It is available
at CDO.
Plugin:
EyeCandy 4000 Gradient Glow
Open a 600x600 new image.
Open up your tube & scrap supplies.
Click inside the frame with your magic wand tool.
Selections modify expand by 5.
Paste a paper of choice.
Selections invert & press delete button.
Move under the frame layer.
Keep selected.
Resize your tube 80%.
Paste between the two layers.
Duplicate once.
Move the tube copy layer to the
top of your layer palette.
On the original tube layer,
press delete.
Select none.
Now on the tube copy layer,
erase the parts showing past the
frame which you don't want visible.
Add a drop shadow to the frame &
original tube layers.
2,2,50,5 Black
Open a circle frame.
Paste on the bottom layer of the tag.
Position behind the rest of the layers.
Oepn a chain link element.
Paste on the bottom layer.
You want this layer underneath the
ciircle frame.
Open pillows element.
Resize 70%
Paste on the bottom part of your tag.
Position under the tube layer in your layer palette.
You want your tube to appear to be laying on the pillows.
Open a jewel element.
Resize 50%
Paste on an upper corner of the frame.
Open a leafy plant element.
Resize 80%.
Paste on the side of the pillows.
Position this layer underneath the pillow layer.
You want the plant to come up behind & above
the pillows.
Now select a flower element.
Resize 80%.
Paste as a new layer & arrange
in front of the leafy plant.
Open a butterfly element.
Resize 20%.
Paste as wanted on the main frame.
Add the earlier drop shadow.
Add text along the top of the tag.
Convert to raster.
Add a gradient glow using
EyeCandy 4000 Gradient Glow.
Setting fat glow width 3.00
Merge layers visible.
Resize 88%
Add artist copyright info & name.
Save as png.
Thanks for trying my tutorial.
Labels:DAH,Dreams,Honored Scraps,Tutorial,Women | 0
comments
Friday, April 20, 2012
7:53 PM | Edit Post

Beauty Within One
This tutorial was written
by Sarah Fiack on
April 20, 2012
Any resemblance to another
tutorial is purely coincidental.
For this tutorial, I’m using a
tube & photo by Rene Kunert
The tube is now FTU &
available here.
Supplies:
Tube of Choice
Photo of Choice
Scrap of choice
I am using one called
For Girls
by Schnegges Scraps
Blog.
Wordart by Word Art World
Blog
Plugin: EyeCandy Gradient Glow 4000
Open a 600x600 new image.
Open up a photo, tube & scrap supplies
of choice.
Select a frame from the scrap.
Copy & paste as a new layer
onto your new image.
Click inside the frame with your
magic wand tool.
Selections modify expand by 8.
Now on your photo, resize if needed.
I resize 70%
Copy & paste as a new layer.
Selections invert & press delete.
Move the layer under the frame layer.
Select none.
Now duplicate the photo image once.
On the copy layer,
Effects - Art Media Effects -Brush Strokes
Default settings
Lower the opacity on this layer to about 80.
Take your main tube.
Resize 80%.
Paste as new layer on side of
your frame.
Add a drop shadow to the tube.
2,2,50,5 Black
Open an element of petals.
Paste twice along the bottom of the tag.
You want them to appear to underneath the frame..
like the frame is on the petals.
Open a tree element.
Paste along the bottom layer of the tag.
Arrange near the top of the tag.
Duplicate once & mirror.
Open a leaf branch.
Resize 80%.
Rotate free rotate right 45.
Now paste like you did the tree element.
Except we want the branch on the bottom part of the tag
& underneath the tree layer in layer palette.
Open a bottle element.
Resize 25%
Paste on one of the petals.
Add the earlier drop shadow to the bottle.
Open a bird element.
Resize 35%
Paste along the top of the frame as wanted.
Arrange so it appears to be sitting on the frame.
Open a mushroom element.
Resize 25%
Paste just under & beside the bottle layer.
Duplicate the mushroom once. & mirror.
Move this layer back beside the original mushroom layer.
Wordart of choice.
Resize 50% twice.
Paste as wanted on tag.
EyeCandy Gradient Glow 4000
Gradient glow setting fat
Glow width 3.00
Merge all the layers visible.
Resize 88%.
Add artist copyright information & name.
Save as png.
Thanks for trying my tutorial.
Labels:FTU,Nature,Rene Kunert,Tutorial,Women | 0
comments
Monday, April 16, 2012
7:33 PM | Edit Post
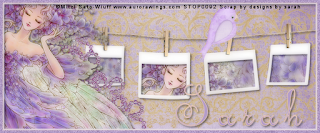
Porcelain In Lavender
This tutorial was written
by Sarah Fiack on
April 16, 2012
Any resemblance to another
tutorial is purely coincidental.
For this tutorial, I’m using a
tube by Mitzi Sato-Wiuff.
You can purchase this tube at
PSPTUBESTOP
Supplies:
Tube of Choice
Scrap of choice
I am using one called
Softly softly lavender
by designs by sarah.
You can purchase the scrap
at PMTWS
Plugins:
EyeCandy 4000 Gradient Glow
Xero Porcelain
Open a 600x250 new image.
Open up your tube & scrap supplies.
Now select your new image with
your magic wand.
Paste a paper of choice as a new layer.
Selections invert & press delete.
Paste a lace element as new layer
on top of the paper layer.
Press delete.
Paste your tube onto the image.
Position on a side of the tag
as wanted.
Also press delete.
Now select none.
Add a drop shadow to the tube.
2,2,50,5 Black
Open a flower element.
Resize 50% twice or as needed.
Paste 5 times along the side of the tube.
Merge the flowers together & move this
layer under the tube.
You want the flowers partly visible appearing
to be behind the tube.
Now open a photograph frame element.
Resize 70%
Paste on the tag above the lace layer.
Now for this next part, it might help to hide
the tube & flower layers.
Select your magic wand.
While holding the shift button down,
click inside the different photgraph frames.
Selections modify & expand by 2.
Paste your image as a new layer.
Selections invert & press delete.
Select none.
Move the image layer under the frame layer.
Add the earlier drop shadow to the frame layer.
Open a bird element.
Resize 25%
Paste as wanted on the frame.
Add a new raster layer to
the top of the layer palette on your tag.
Fill with a color of choice.
Select with your magic wand.
Selections modify contract by 5.
Adjust add noise 25 Uniform
Add a gradient glow to the border.
EyeCandy 4000 Gradient Glow
Setting Fat Glow width 3.00
Also add the earlier drop shadow.
Now merge layers visible.
Apply plugin Xero Porcelian
to the tag.
Default settings.
Add artist copyright info & name.
Save as png.
Thanks for trying my tutorial.
Labels:Fairy,Forum Style,Tutorial | 0
comments
Sunday, April 15, 2012
2:08 AM | Edit Post
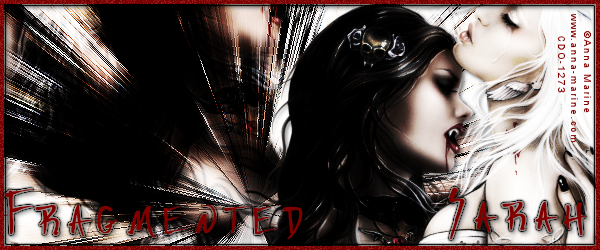
Fragmented
This tutorial was written
by Sarah Fiack on
April 15, 2012
Any resemblance to another
tutorial is purely coincidental.
For this tutorial, I’m using a
tube by Anna Marine.
You can purchase this tube at
CDO
Supplies:
Tube of choice
Plugins
Mura's Meister Copies
VM Natural - Splash
Xero Radiance
EyeCandy400 Gradient Glow
Open a 600x250 new image.
Open up your tube of choice.
Paste your tube as a new layer
onto your new image.
Apply Mura's Meister Copies
Wallpaper Rotate
default settings.
Duplicate the copy layer once.
On the top layer, apply the plugin
VM Natural - Splash
Default settings.
Effects - edge effects -enhance once.
Xero Radiance -default settings.
Now over in your layer palette,
on the same layer, change the
blend mode to hard light.
Paste your tube as a new layer.
Position on a side of the tag
of your choice.
Apply Xero radiance to this layer also.
Add a drop shadow to the layer.
2,2,50,5 Black
Now add a new raster layer on top
of the tag. Fill with a color from your tube.
Once filled, click on this layer with your magic wand.
Selections modify contract by 4.
Press delete on your keyboard.
Viola instant border.
While still on your border layer,
adjust add noise
Uniform 25
Using EyeCandy400 Gradient Glow
add a gradient glow to the tag.
I used Black Halo Glow width 3.00
Also add a drop shadow to the border.
Add a wordart or single word of choice.
I added a single word which seem to fit
the tag.
I also added the same gradient glow
and drop shadow that I used on the border.
Now merge layers visible.
Add artist copyright infomation & name.
Save as png.
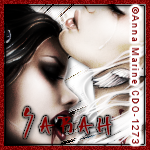
Now to do the avatar for the forum set.
Open a 150x150 new image.
Copy & paste your forum tag
onto the new image.
Position the tag as wanted on the avatar.
Click on the bottom layer of your avatar
with your magic wand.
Now make sure the image is selected on
your layer palette.
Selections invert & press delete.
Select none.
Add a new raster layer to the avatar.
Fill with the same border color as the tag.
Select this layer with your magic wand.
Selections modify contract by 4.
Press delete button.
Select none.
Add noise to the border as we did with
the tag. Uniform 25.
Also add the above gradient glow & drop shadow.
Merge the layers visible.
Don't forget to add artist name & license number
to the avatar.
Save as png.
Thanks for trying my tutoiral!.
Labels:CDO,Forum Style,FTU,Gothic,Tutorial | 0
comments
Saturday, April 14, 2012
4:00 PM | Edit Post
Just wanted to share a tag I just finished making.
This is what I call a Microtut since it is very basic.
I am using the FTU scrap sampler by Gothic Inspirations called
The Darkest Night. You can find it on her
blog.
I am also using a tube by the artist Enys Guerrero.
You can find the tube at DreamscapeImaging.
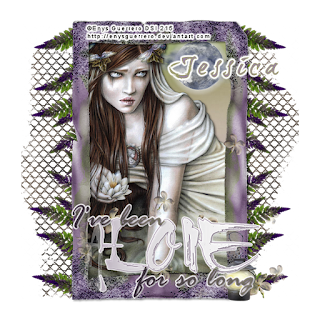
This is what I call a Microtut since it is very basic.
I am using the FTU scrap sampler by Gothic Inspirations called
The Darkest Night. You can find it on her
blog.
I am also using a tube by the artist Enys Guerrero.
You can find the tube at DreamscapeImaging.

Labels:Fantasy,FTU,MicroTut,Tag | 1 comments
Monday, April 9, 2012
6:36 PM | Edit Post

Heart Bear Day
This tutorial was written
by Sarah Fiack on
April 9, 2012
Any resemblance to another
tutorial is purely coincidental.
For this tutorial, I'm only using
a scrapkit. There is no artist
tube for this tag.
Supplies:
Scrap of choice
I am using one called Bear-A-Licious by
Animation by Missy of Divine Intenionz
Animation Shop
Open a 600x250 new image.
Open up your scrap which you are using.
Select your new image with your magic
wand tool.
Paste a scrap paper of choice as
a new layer.
Selections invert & press delete.
Now open a bear element
from the scrap.
Resize 80%.
Paste on a side of the tag.
Press delete.
Paste a grass element
along the bottom of the tag.
You want this layer behind your
bear element.
Press delete.
Now open cloud element.
Resize 60%
Paste along the top of the tag.
Press delete.
Select none.
Open a flower element.
Resize 50% & 70%.
Paste along the tag as wanted.
Move this layer under the grass layer
on your layer palette.
Open a pinwheel element.
Resize 70%. Paste alongside the
flower element.
Now select none.
Add drop shadow to the layers.
2,2,50,5 Black
Merge all the layers visible.
Add a new raster layer.
Fill this layer with a color of choice.
Selet it with your magic wand tool.
Selections modify contract by 3.
Press delete.
Select none.
Now you have a border on the tag.
Add copyright & name for the scrap.
if you are not animating the tag, save here.
To animate please continue.
Copy merged into AS.
Paste as a new animation.
Use Ctrl L to duplicate as many
frames as you need.
For the animation I am using I need
17 frames total.
Once you have all the frames, select all.
On your animation also select all & copy
Once everything is selected, drag the
animation onto your tag & let go
when you have positioned as wanted.
I changed my frame properties to 20
but this varies on you.
Once you are happy, save the tag
with animation.
Thanks for trying my tutorial!
Labels:Animals,Forum Style,Tutorial | 0
comments
Sunday, April 8, 2012
9:53 PM | Edit Post

Wonder
This tutorial was written
by Sarah Fiack on
April 8th,2012
Any resemblance to another
tutorial is purely coincidental.
For this tutorial, I’m using
a tube by Miss Megs
You can find the tube at
PSPTUBESTOP
Supplies:
Tube Of Choice
Scrap of Choice I am using
PTU Scrap Ascension by
designs by sarah available at PMTw/S
Here
Wordart by TLC Creations
Blog
Open a 600x600 new image.
Open up your tube & scrap supplies.
Choose a frame from the scrap.
Resize 88% or as needed.
Paste as a new layer onto your
main image.
Using your magic wand tool,
select inside the center of the frame.
Selections modify expand by 6.
Paste a paper of choice as
a new layer.
Selections invert & press delete.
Move the paper layer under
frame layer.
Keep Selected.
Paste your tube between the two layers.
Duplicate the tube layer once.
Move the tube copy layer to the top
in your layer palette.
Back on the original tube, press delete.
Now select none.
On the tube copy layer. erase the parts
you don't want seen past the frame.
Open a moon glow element.
Paste on the bottom right side of the frame.
Move to the bottom in your layer palette.
Duplicate the glow once & mirror.
Merge the two glow layers together.
Duplicate the layer once & flip.
This should give you a background of sorts behind
the frame.
Open an angel wing element.
Resize 88%
Paste on a side of the frame..above
the glow layers.
Position as wanted & duplicate once.
Mirror the copy layer so the wing shows on
both sides of the tag.
Open a flower element of choice.
Resize 25%
Paste a total of 5 times along the bottom
underneath the frame & wings.
Merge the flower layers together.
Duplicate once & flip.
Add a drop shadow to both
the flower layers.
2,2,50,5 black.
Also add a drop shadow to the frame layer.
Merge your layers visible.
Open a wordart of choice.
For the one I am using, I resized by 50% twice.
Paste as wanted on your tag.
Resize all layers 88%.
Add artist copyright information & name.
Save as png.
Thanks for trying my tutorial.
Labels:Animals,Fantasy,Tutorial | 0
comments
Saturday, April 7, 2012
3:35 PM | Edit Post
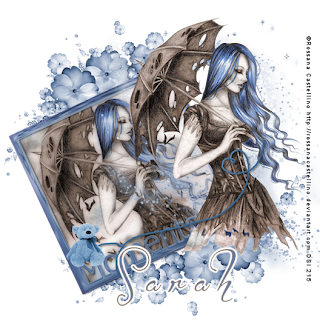
Wanted to share a tag I did today.
I didn't write a tutorial but love how this
came out.It kinda has a dreamy feel to the tag.
I used the artist Rossana Castellino. I also used
the scrapkit called Blue Diamond by Honored Scraps.
Artist & scrap can be found at CDO.
Labels:CDO,Dreams,Honored Scraps,Tag,Thoughts | 0
comments
Friday, April 6, 2012
1:55 PM | Edit Post
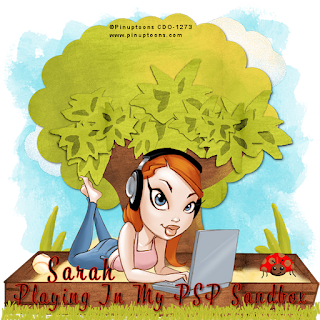
My PSP Sandbox
This tutorial was written
by Sarah Fiack on
April 6,2012
Any resemblance to another
tutorial is purely coincidental.
For this tutorial, I’m using
a tube by Pinuptoons.
You can purchase this tube at
CDO
Supplies:
Tube of choice
FTU Scrap Backyard Play by Everyday Mom Ideas
Here
Wsl Mask 254 Blog
Open a 600x600 new image.
Open up your tube & scrap supplies.
Select a sandbox element.
Since I am using a fullsize scrap,
I have to resize a lot.
I resized the sandbox
25% & 75%.
Paste the sandbox
near the bottom of your tag image.
Now on your main tube,
resize 80% twice or as needed.
Paste as new layer & position
so its on the sandbox.
Open a grass strip element.
Resize 25 & 66%.
Paste along the front of the sandbox.
Duplicate once & mirror.
Open a grass blade element.
Resize 50% three times.
Paste behind the two back corners
of the sandbox.
Open a tree element.
Resize 15%.
Paste on the bottom layer of the tag.
Position in center of the tag.
Add a drop shadow to the
tree layer.
2,2,50,5 Black.
Open a ladybug element.
Resize 15 & 50% once each.
Paste as wanted on the sandbox element.
I repeated this also with a baseball element.
Except I resized the 50% twice with the baseball.
Select a scrap paper of choice.
Resize 20%.
Paste on the bottom layer of the tag.
Apply Wsl Mask 254.
Merge group.
Open a cloud element.
Resize 25%.
Paste twice on the tag.
You want them to be coming from behind
the tree. The clouds should be on the layer
above the mask paper layer.
Okay now that we've created the scene.
Let's add some text.
I added mine along the sandbox but its
entirely up to you.
I had my stroke width at 1.0 so I can
have both colors on the text.
Also, add the earlier drop shadow to the
text once you are happy with it.
Merge layers visible.
Resize 88%.
Add artist copyright information & name.
Save as png.
Thanks for trying my tutorial.
Labels:CDO,FTU,Nature,Women | 0
comments
Wednesday, April 4, 2012
8:34 PM | Edit Post
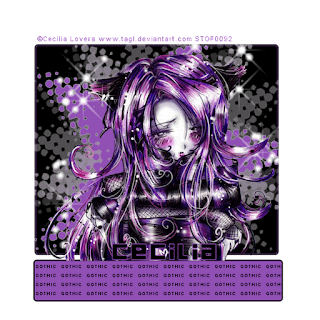
Gothic In Purple
This tutorial was written
by Sarah Fiack on
April 4th,2012
Any resemblance to another
tutorial is purely coincidental.
For this tutorial, I’m using
a tube by Cecilia Lovera
You can find the tube at
PSPTUBESTOP
Supplies:
Tube Of Choice
Animation Shop
Vixmask147 Blog
Tutorial Tag is animated.
You can view the animation here.
Open a 600x600 new image.
Open up your tube of choice.
Copy & paste your tube
as a new layer onto your new
image.
On your materials palette,
select two colors from your
tag.One for stroke and one for
background.
Select your rectangle preset
shape. Width 3.
Have your darker color as the stroke.
Draw out a small rectangle to
go underneath your tube image.
Once happy with the size, convert
to raster.Move to the center bottom
part of your tag underneath your tube.
Now on the materials pallete,
you just want the darker color
on both options.
Draw out a good sized square
for behind your tube.
Convert to raster.
Position the square behind your tube.
You want to leave a small amount
of space between the square and rectangle
layers.
Now with the square layer, duplicate it once.
On the duplicated layer, fill it with the original
2nd color you used earlier.
Now that the duplicated is a different
color from the original layer,apply the
Vixmask 147 to this layer.
Once applied, merge group.
Select the font tool.
Use an easy to read font.Size set
to 12. I used color black but
it varies on your tag.
Type out the word Gothic
or a word of choice.
Convert the word to raster.
Now the plugin Mura's Meister Copies.
Select tiling effect.
Change the tile gap to 2.
Hit Okay.
Select your small rectangle layer
with the magic wand tool.
On the text layer,
Selections invert & press delete.
Select none.
Resize all layers 88%.
Add copyright info & name.
Mask Layer
Xenofex 2 Constellation
Setting Bling Bling default settings
Copy merged into AS as new animation.
Now back into PSP.
Undo the constellation effect.
Select the plugin again & click
random seed once.
Copy merged into AS.
Paste after current frame.
Repeat the above steps until
you have a total of 3 frames in AS.
Select all.
Change frame properties to 20.
View animation.
If happy, save as gif.
Thanks for trying my tutorial.
Labels:Anime,FTU,Gothic | 0
comments
Monday, April 2, 2012
9:27 PM | Edit Post
I proudly donated to Hope to help the artist
Elizabeth Austin.You can find information at UYA
Elizabeth Austin has lyme disease. Hope is a way to help her in
the treatment of it.

Elizabeth Austin.You can find information at UYA
Elizabeth Austin has lyme disease. Hope is a way to help her in
the treatment of it.

Labels:Charity | 1 comments
Subscribe to:
Comments
(Atom)
TOUs
I do not allow resizing of my tags, timelines or wallpapers. All of my creations are for PU only unless otherwise stated. Nor are they to be altered in any way either.
Categories
- Abstract (22)
- ACDivas (2)
- Ad (1)
- addictive pleasures (3)
- ADI (2)
- Adriennes Design (6)
- Adult (8)
- Alicia Mujica (61)
- Amber (6)
- Amy Marie (222)
- Andrea Gibson (1)
- Angel (97)
- Animals (468)
- Animation (107)
- Anime (11)
- AORK (10)
- AOTW (8)
- Apocalyptic (5)
- Art-Content (1)
- Asian (8)
- Attitude (57)
- Authors (9)
- Autism (5)
- Autumn (39)
- award (3)
- Baby (1)
- BAS (1)
- BCA (7)
- BCS (28)
- Bella Caribena (2)
- birthday (3)
- Birthstone (10)
- Blaque Heart Designz (11)
- BLT DeZignZ (11)
- book suggestions (6)
- Cajoline (1)
- Calendar (2)
- Carnival (1)
- Carpe Diem (6)
- Cars (4)
- Casino (3)
- CCD (12)
- CCS (18)
- CDO (1545)
- Celestial Scraps (2)
- Celinart Pinup (1)
- Chaos Priestess (73)
- Charity (29)
- Chasing The Blues (2)
- Chelloenix Blog (1)
- Chichi (65)
- Children (30)
- Christmas (173)
- Cluster Frame (42)
- Color (6)
- Comic (6)
- copyright (2)
- Country (33)
- Crafty (2)
- Crazed Creations (1)
- Creative Misfits (3)
- CRM (23)
- Crowe (17)
- Crystal's Creations (20)
- CSBC (76)
- CU (12)
- cupcake (60)
- Cupcakes (44)
- CUPU (4)
- Cute (205)
- DAH (95)
- Dees"SIGN Depot (65)
- Devil (1)
- Dia De Los Muertos (2)
- Digital Chaos (61)
- Doodle by Design (40)
- Dreams (63)
- DSI (2)
- Easter (49)
- ELF (14)
- EliasC. (25)
- Elli's Creations (2)
- Emo (29)
- emotion (27)
- Extras (81)
- Fairy (185)
- Fall (182)
- Family (21)
- Fantasy (325)
- Farrah (4)
- Feature Tutorial (3)
- Food (165)
- Forum Style (38)
- Foxy's Designz (92)
- Freeks Creations (35)
- Freya (5)
- Friends (20)
- Friendship (14)
- FTU (122)
- Garv (20)
- Gimptastic (146)
- Gingerscraps (2)
- Girly (125)
- Goldwasser (8)
- Gothic (352)
- Gothic Inspirations (12)
- Guest CT (28)
- Halloween (221)
- Hania's Design (9)
- Happy (15)
- Happy New Year (8)
- Heartfelt Perfections (2)
- Help 4 Casper (2)
- Hollywood (4)
- Honored Scraps (230)
- Hungry Hill (171)
- Ilonka's Design (1)
- Inspiring (8)
- Irish Princess Designs (118)
- Jensen (106)
- Jose Cano (1)
- Karmalized (108)
- Kids (12)
- Kissing Kate (4)
- Kizzed by Kelz (81)
- Ladyhawwk (306)
- LaReina Designz (1)
- Layout (6)
- Learning (4)
- Life (98)
- LML Designs (1)
- Love (229)
- Magic (33)
- Mardi Gras (2)
- MellieBeans (11)
- Mental Health (5)
- Mermaids (67)
- MicroTut (19)
- Misc (6)
- Misticheskaya (25)
- Monsters (1)
- Monti's Scraps (22)
- Moon (56)
- MTA (18)
- Music (59)
- Mystery (1)
- Mystical Scraps (184)
- Nature (220)
- Nerd/Geek (1)
- New Years (10)
- Nocturne (27)
- Norella (3)
- Ocean (143)
- Overlays (10)
- Pagan (59)
- Paranormal (1)
- Patriotic (15)
- Peace (4)
- Phone Wallpaper (10)
- Photo (4)
- Pimp'd Designz (3)
- Pimpin Pspers Warehouse (3)
- Pink Paradox (1)
- Pinterest (1)
- Pirates (4)
- Poems (1)
- Poetry (11)
- Poser (4)
- Positive (7)
- Presents (2)
- Promo (25)
- PS (1)
- PSP (3)
- PTU (20)
- PU (1)
- Queen Uriel (43)
- Quickpages (14)
- Rac (9)
- Rebecca Sinz (174)
- Rebel Designz (123)
- Rene Kunert (27)
- Retro (7)
- Rissa's Designs (8)
- RMQ (47)
- Robot (2)
- Sale (3)
- Sams Scraps (1)
- Savage Dezines (2)
- Schnegge (14)
- School (21)
- Sci-fi (3)
- Scrap (23)
- Scrappin with lil ole me (1)
- Scraps of enchantment (1)
- Selina Fenech (13)
- Sexy (149)
- SGRowe (3)
- Sissys Sassitude (3)
- Snowmen (2)
- SophisticatSimone (8)
- Spazz (17)
- Special Friends (2)
- Sports (12)
- Spring (162)
- St Patty's Day (34)
- St. Patricks (1)
- starlite & soul (4)
- Steampunk (26)
- Summer (110)
- summerween (1)
- Sweet (3)
- SWLOM (1)
- Tag (44)
- Taggers Delight (7)
- tagging (1)
- Tasha's Playground (88)
- Tech (4)
- Template (11)
- Thanksgiving (12)
- Thoughts (103)
- Timeline (210)
- Timelines (70)
- Tiny Turtle (4)
- TKDezigns (36)
- Tony T (3)
- Tonya (3)
- Toon (1)
- TPP (8)
- Travel (1)
- Treasured Scraps (7)
- Tresured Scraps (26)
- Tutorial (220)
- UYA (6)
- Valentine's Day (98)
- Verymany (64)
- Vi NIna (1)
- Vintage (112)
- Wallpaper (465)
- WDDesignz (38)
- Western (2)
- Whisprd Desginz (10)
- Wicked Diabla (18)
- Wicked Princess (171)
- Winter (137)
- WITW (1)
- Women (188)
- Wordart (12)
- Words (57)
- Zaric (3)
- Zindy (66)
- Zodiac (2)
- Zombies (11)


