Thursday, March 29, 2012
8:23 PM | Edit Post
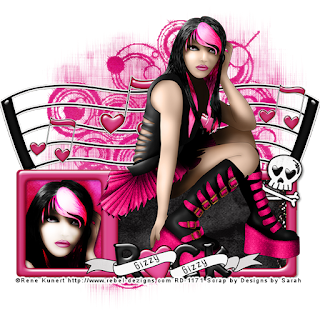
Love Rocks
This tutorial was written
by Sarah Fiack on
March 29,2012
Any resemblance to another
tutorial is purely coincidental.
For this tutorial, I’m using
a tube by Rene Kunert.
The tube is now FTU &
available here.
Supplies:
Tube of choice
Scrap of choice.
I’m using one by Designs by Sarah
called I [heart] Rock
It is available at Pimp My Tags
with Scraps
Here
Mask 17 by moonbeamsandspiderwebs
Blog
Plugin: Xero Radiance
Open a 600x600 new image.
Open up your tube & scrap supplies.
Select & open a frame of choice.
Resize 80%.
Copy & paste onto the new image.
With your magic wand tool,
select the smaller part of the frame.
Selections modify expand by 4.
Paste a paper of choice.
Selections invert & press delete.
Move the paper layer under the
frame layer.
Keep selected.
Now paste your tube between the
two layers & press delete.
Select none.
Add a drop shadow to the frame
& tube layers.
2,2,50,5 black.
Merge the tube & paper layers together.
Apply plugin Xero Radiance to the
merged layer.
Strangeness 128
Charm 50
Truth 128
Beauty 255
Now click inside the larger part of
the frame with your magic wand.
Selections modify expand by 15.
Paste a 2nd paper of choice.
Selections invert & press delete button.
Now move the paper under the frame
layer.
Select none.
Resize your tube 80%.
Paste as a top layer of
the tag.
Position so the tube appears to be
sittin on the frame.
Open a music stanza element.
Resize 70%
Paste along the top of the frame.
You want it to be underneath the tube layer.
Duplicate the stanza once.
Mirror the duplicated stanza.
Now if needed, remove the ends
of the duplicated stanza.
You want it to look like one
stanza.
Open music note element.
Resize 25% or as wanted.
Paste twice along the stanza.
You can position to where you want.
Open a wordart element.
Resize 50%.
Paste along the bottom of the frame.
Paste a paper of choice as new layer
on the bottom layer of the tag.
Apply Mask
MB and SW Mask 17.
Merge group.
Merge layers visible.
Resize 88%.
Add artist copyright info & name.
Save as png.
Thanks for trying my tutorial.
Labels:Emo,FTU,Love,Music,Rene Kunert,Tutorial | 0
comments
Sunday, March 25, 2012
11:39 PM | Edit Post
I play Words With Friends on facebook.So I thought I would start a list of new words I learn. You can also sign up with Dictionary.com and every day they will send you a new word in your email. So I am going to try weekly to post new words for the previous week which I have learned. Maybe we can all learn something. After all, I started playing Words With Friends to help my brain and to make me think a little.
Ensilage -prevesation of green fodder in a silo or pit
Selcouth -strange, uncommon
Brisance -shattering effect of a high explosive
Carp - to find fault or complain querlously or unreasonably
-a type of fish
Vernal -appearing or occurring in spring - of or pertaining to spring
Conniption - Fit of hysterical excitement or anger
Moschate -having a musky smell
Ruck -large number or quantity, mass
Adroit -cleverly skillful, resourceful, or ingenious
Rax- to stretch oneself, as after sleeping
Tellurian -of the characteristic of the earth or its inhabitants

Labels:Words | 0
comments
10:50 PM | Edit Post
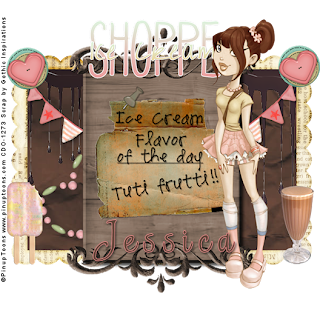
Tutti Frutti
This tutorial was written
by Sarah Fiack on
March 25,2012
Any resemblance to another
tutorial is purely coincidental.
For this tutorial, I’m using
a tube PinupToons. You can purchase
this tube at CDO.
Supplies:
Tube of choice
Scrap of choice.
I’m using one by Gothic Inspiratiosn
Called Ice Cream Shoppe.
Here
Open a 600x600 new image.
Open up your tube & scrap supplies.
Choose a frame of choice & open it.
Resize 75% if needed.
Copy & paste as a new layer.
Add a drop shadow to the frame.
2,2,50,5 Black.
Click inside the frame with your
magic wand tool.
Selections modify expand by 5.
Paste a paper of choice as
a new layer.
Selections invert & press delete.
Move the paper under the frame layer.
Open dripping chocolate element.
Resize 68%.
Paste above the paper layer &
position in top of the frame.
Press delete.
Select none.
Open banner flags element.
Resize 50%
Paste between the two layers.
Move to one side of the frame.
Duplicate once & mirror.
Open a button element.
Resize 25%.
Paste on the two upper corners
of the frame.
Open a heart doodle.
Resize 35%
Rotate free rotate left 45.
Paste under the sign layer
& position to the side slightly.
This should look like the flags are
hanging across the frame.
Add the earlier drop shadow.
Open an ice cream sign element.
Resize 70%.
Paste in the center of your tag.
Now take your main tube,
and paste alongside the sign.
Open a milkshake element.
Resize 25%
Paste on a bottom corner of the tag.
Open an ice cream bar.
Repeat the resizing & paste on the
opposite corner of the tag.
Open a wordart element.
I am using one with the scrap.
Resize 50% & 88% once each.
Paste along the top of the sign element.
Merge layers visible.
Resize 88%.
Add copyright info & name.
Save as png.
Thanks for trying my tutorial.
Labels:CDO,Food,Gothic Inspirations,Summer,Tutorial,Women | 0
comments
Saturday, March 24, 2012
1:22 AM | Edit Post
Just wanted to share a tag I made tonight. I created a scene with the tag
& I always enjoy when I can do that.
I used the wonderful artwork of Barbara Jensen. You can purchase
this sexy tube at her http://www.blogger.com/img/blank.gifstore. I am also using a FTU scrap by Wicked
Princess Scraps called You Are Beautiful.You can find it on her blog.
Thanks for looking & hope you like the tag.

Labels:FTU,Sexy,Tag,Women | 0
comments
Friday, March 23, 2012
2:50 PM | Edit Post
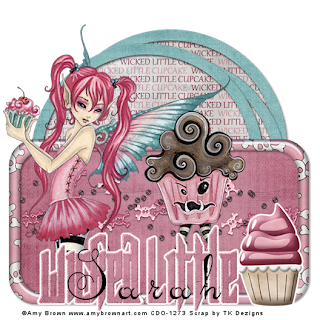
Wicked Little Cupcake
This tutorial was written
by Sarah Fiack on
March 22,2012
Any resemblance to another
tutorial is purely coincidental.
For this tutorial, I’m using
2 tubes by Amy Brown
You can purchase her tubes at
CDO
Supplies:
Tube of choice
Scrap of choice.
I’m using a scrap by
TK Dezigns which is also available
at CDO.
Plugins:
EyeCandy4000 Gradient Glow
Open a 600x600 new image.
Open up your tubes of choice
& scrap supplies.
Choose a frame of choice.
Paste as a new layer.
Click inside the frame with
your magic wand tool.
Selections modify expand by 4.
Paste a paper of choice as a
new layer. Selections invert &
press delete.
Move the papaer under the frame
layer.
Add a drop shadow to the frame layer.
2,2,50,5 Black.
Merge the frame & paper layers together.
Move this down some on your image.
Now paste your tube as a new layer
on the side of the your frame. You do want
it on the frame.
Open cupcake sprinkles element.
Resize 80% & 95%.
Paste along the frame under your
tube layer.
Open a second frame. I used a round
frame. Click inside it with your magic wand.
If selecting multiple areas, hold shift button
down to select them. Selections modify
exand by 5.
Paste a paper of choice on the frame.
Selections invert & press delete.
Move the paper under frame layer.
Select none.
Add a drop shadow to the frame.
2,2,50,5 black.
Merge both layers 88%
Copy merged onto your tag &
paste on the bottom layer.
Open your cupcake monster tube.
Resize 70%
Paste alongside your earlier tube.
Open a word art of choice.
I am using one which comes with
the scrap.
I resized by 90% twice.
Paste along the bottom in
front of your tag.
Add a gradient glow using
EyeCandy4000 Gradient Glow
Setting Fat Glow width 3
Merge layers visible.
Add artist copyright info & name.
Save as png.
Thanks for trying my tutorial.
Tuesday, March 20, 2012
10:27 PM | Edit Post
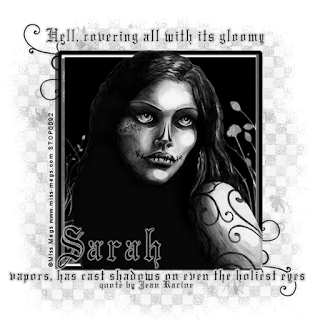
Cast Shadows
This tutorial was written
by Sarah Fiack on
March 20,2012
Any resemblance to another
tutorial is purely coincidental.
I am using a tube by Meg Baker.
This tube is available at
PSPTUBESTOP
Supplies:
Kirsty08 Mask 2 Feb 08
Kirsty08 Mask 5 Feb08
Blog
Plugin:
EyeCandy 4000
Open a 600x600 new image.
Open a tube of choice.
Now on your new image,
add a new raster layer.
Fill with black or a dark
color of choice from your tube.
Apply mask08 by Kristy
to the new filled layer.
Merge group.
Resize your tube 80%
Paste as new layer on
top of the mask layer.
Now add a new raster layer
underneath the mask layer.
We're going to do the 2nd mask
here.
Fill this layer with a lighter color
from your tube. Now apply the mask
Kirsty08 Mask 5 Feb08.
Merge group.
Add wordart or quote of
choice to the tag. I used a quote.
Position as wanted on the tag.
I applied a slight gradient glow
to the text. EyeCandy 4000
Gradient glow. Fat setting.
Color of choice. Glow width 3.00
I applied gradient glow twice
to really get it to pop.
Merge the layers together.
Resize 88%.
Add artist copyright info & name
Save as png.
Thanks for trying my tutorial.
Labels:FTU,Gothic,Tutorial | 0
comments
12:45 AM | Edit Post
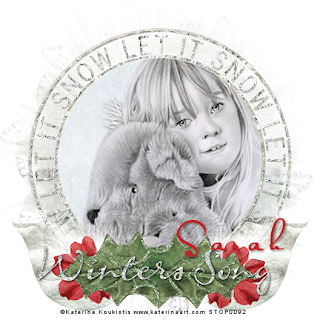
Just sharing a tag I made tonight. I just love this tube by the artist
Katerina Koukiotis.This is such a beautiful and stunning tube. Bears are very special to me. I have had my teddy bear since I was a child. You can find her artwork
at DAH. I used a FTU scrap called Winter's Song by Kim b'sdesign. You can find it on her blog. Scroll very far down to find the freebie.
I also used a mask from Fiona Devil Creations. You can find her masks here.

Labels:DAH,FTU,Tag,Winter | 1 comments
Saturday, March 17, 2012
4:06 PM | Edit Post
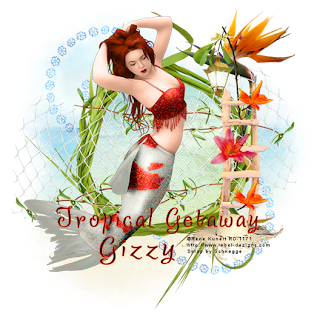
Tropical Getaway
This tutorial was written
by Sarah Fiack on
March 17,2012
Any resemblance to another
tutorial is purely coincidental.
The tube is now FTU &
available here. It is by the artist
Rene Kunert.
Supplies:
Tube of choice.
Scrap of choice.
I’m using one by Schnegge
http://schneggesscraps.blogspot.com/
called Day At The Beach.
It is available at
PMTWS
VixMask452
Open a 600x600 new image.
Open up your tube & scrap supplies.
Select a frame of choice from
the scrap.
Copy & paste as a new layer.
Select your circle preset shape.
Draw out a circle about the size
of your frame.
Convert to raster & Move the circle
under your frame layer.
Now select the shape with
your magic wand tool.
Paste a paper of choice.
Selections invert & press delete.
Select none.
Open a vine branch mesh.
Resize 80%
Paste above the branch layer
of the tag.
On your main tube,resize
80% or as needed.
Paste along your frame as wanted.
Open a doodle.
Resize 50%
Paste above the frame.
Duplicate once mirror & flip.
This should give you a doodle on top
& below the frame.
Open a ladder element.
Resize 50%
Paste along a side of the frame.
Open a hanging light.
Resize 50%.
Paste under the ladder layer.
You want it visible from the top
of the ladder.
Now choose 2-3 different flowers
from the scrap you are using.
Resize each about by 20%.
Place along the ladder as wanted.
Open a hat element.
Resize 50%.
Paste at the bottom of the ladder.
Paste a paper of choice
on the bottom layer of the tag.
Apply Vixmask452.
Merge group.
Add wordart of choice to
the tag.
I used my own text of choice.
Merge layers visible.
Resize the tag 88%.
Add copyright info & name.
Save as png.
Thanks for trying my tutorial.
Labels:Mermaids,Ocean,Rene Kunert,Schnegge,Tutorial | 0
comments
Wednesday, March 14, 2012
9:09 PM | Edit Post
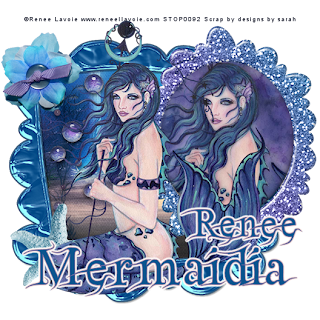
Mermaidia
This tutorial was written
by Sarah Fiack on
March 14,2012
Any resemblance to another
tutorial is purely coincidental.
I am using a tube by Renee Lavoie
You can purchase this tube at
DAH.
Supplies:
Tube of choice.
Scrap of choice.
I’m using one by designs by sarah
Called Mermaidia
It is available at Pimp My Tags
with Scraps
Plugins:
EyeCandy 5 Glass
Xero Porcelain
EyeCandy4000
Open a 600x600 new image.
Open up your tube, image & scrap supplies.
Open a frame of choice.
I am using one similar to a mirror shape.
Resize 70% & paste as a new layer.
Move to the right side slightly.
Click inside the frame with
your magic wand tool.
Selections modify expand by 4.
Paste your image of choice.
Selections invert & press delete.
Select none.
Move the image layer under the
frame layer.
While on the image layer,
open plugin EyeCandy 5 Glass
Clear default settings.
Click okay.
Apply Xero Porcelain to
the mirror layer.
Softness 50
'Strength 128
Brightness 128
Copy & paste your tube as
a new layer beside the frame.
Resize the tube layer 88%.
Open a 2nd frame.
Click inside wtih magic wand.
Selections modify expand by 4.
Paste a paper of choice.
Selections invert & press delete.
Select none.
Add a drop shadow to the frame
layer. 2,2,50,5 Black.
Merge the two layers together.
Resize this layer 80%
Position as wanted on the tag.
Open bubbles element.
Resize 40%.
Apply the earlier eyecandy 5
glass settings.
Paste behind your tube &
in front of the 2nd frame.
Open a starfish element.
Resize 50%
Paste by a bottom corner of the
2nd frame.
Open a flower.
Resize 30%
Paste on a corner of the frame.
Add wordart or text of choice
to the tag.
Add a gradient glow if wanted using
EyeCandy4000
I used Setting fat Glow width 3.
Merge layers visible.
Resize 88%
Add copyright info & name.
Save as png.
Thanks for trying my tutorial.
Labels:DAH,Mermaids,Tutorial | 0
comments
9:06 PM | Edit Post

Touch The Ground
This tutorial was written
by Sarah Fiack on
March 14, 2012
Any resemblance to another
tutorial is purely coincidental.
For this tutorial, I’m using a
tube by Rene Kunert
The tube is now FTU &
available here.
Supplies:
Tube of choice
Animation Shop
Plugins:
Mura Meister Copies
VM Experiemntal TeeWee
VM Toolbox
Xenofex Constellation
Open up your tube image.
Now your going to open two
new images.
Image 1 600x600
Image 2 600x-250
For now shrink the Image 1.
Now on Image 2,
Copy & paste your tube
as a new layer.
Apply Mura Meister Copies
Wallpaper rotate default settings.
Once applied,
click on the bottom layer with your
magic wand tool.
Selections invert & press delete.
Select none.
Okay now apply the plugin
VM Experiemntal TeeWee
default settings.
Add a new raster layer
on top of the image.
Fill with a color of choice from your
tube.
Click this layer with your magic wand.
Selections modify contract by 5.
Press delete & select none.
Adjust add noise uniform 25.
Copy merged & paste this image onto your
600x600 new image.
On your main tube,resize 80% if needed.
Paste in front of your image layer.
Add text to the tag as wanted.
I positioned the text I chose under
the tube on the tag.
Resize all layers 88%
Add copyright info & name
to the tag.
If you are not animating, then save tag now.
To animate, please continue.
On your plugin effects layer,
apply Xenofex Constellation Bling Bling
default settings. Make sure
Keep original image is checked.
Apply plugin.
Now Copy merged into AS.
Paste as a new animation.
Now back in psp,
undo constellation.
Reapply it making sure to click
on random seed once.
Copy merged into AS & paste
after current frame.
You want to repeat this until you
have a total of 5 frames in AS.
In AS, select all.
Change frame properties to 20.
View animation.
If happy, save as gif.
Thanks for trying my tutorial.
Labels:Angel,Animation,FTU,Rene Kunert,Tutorial | 0
comments
Sunday, March 11, 2012
6:56 PM | Edit Post

Lucky In Love
This tutorial was written
by Sarah Fiack on
March 11,2012
Any resemblance to another
tutorial is purely coincidental.
For this tutorial, I’m using
a tube Cecilia Lovera.
You can purchase her tubes at
PSPTUBESTOP
To view this tag with animation
click here
Supplies:
Tube of choice
No scraps needed.
Animation Shop
Plugins:
Eye Candy 5 Glass
EyeCandy 4000 Gradient Glow
Open a 600x250 new image.
Open up your tube of choice.
Add a new raster layer to
your new image.
Fill with a color of choice
from your tube.
Paste your tube as a new
layer. Position as wanted on
the tag.
Click the fill in layer with
your magic wand to select it.
Now on your tube layer,
selections invert & press delete.
Select none.
Adjust add noise
to this layer.
Uniform 25.
Now select your preset shapes.
Draw out a heart shape to
desired size. Convert to raster.
Fill with color wanted if needed.
Open plugin
Eye Candy 5 Glass
Setting Clear with no reflection
Apply the plugin.
Add a new raster layer on top.
Fill with a dark color from your tag.
Click with your magic wand.
Selections modify contract by 4.
Press delete.
Select none.
Add the noise you used earlier
on this layer.
Add text of choice
to the heart. Position as wanted
on the heart.
On the text,
open plugin
EyeCandy 4000 Gradient Glow
Fat setting Glow width 3.00
Merge some layers together being sure
to leave your heart unmerged.
Add artist copyright & name to the tag.
If you don't wish to animate,
then save your tag now.
To animate please continue:
On your heart layer, duplicate
the heart once.
Resize the copy heart 90%
& center in the original heart.
Copy merged into AS.
Paste as a new animation.
Now go back to PSP, resize the same
heart another 90 & center in heart again.
Copy merged into AS & paste after
current frame.
Repeat this for a total of 3 frames.
In AS, select all the frames.
Change frame properties to 17
or as wanted.
If you are happy with the animation,
save as gif.
Thanks for trying my tutorial.
Labels:Animation,Forum Style,FTU,Love,St Patty's Day,Tutorial | 0
comments
Saturday, March 10, 2012
9:50 PM | Edit Post
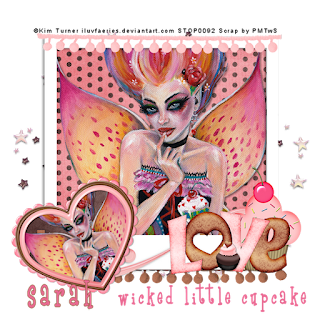
Cupcake Love
This tutorial was written
by Sarah Fiack on
March 10,2012
Any resemblance to another
tutorial is purely coincidental.
For this tutorial, I’m using
a tube Kim Turner
You can purchase her tubes at
PSPTUBESTOP
Supplies:
Tube of choice
Scrap of choice.
I’m using a 3 scraps of a collab
Called Cupcake Surprise.
I am using scraps by Schnegge,
TK Dezigns & Designs by Sarah
It is available at Pimp My Tags
with Scraps
Store
Open a 600x600 new image.
Open up your tube image & scrap supplies.
Open a frame of choice.
I am using a frame from the scrap by TK Dezigns.
Paste the frame as a new image.
Click inside the frame with your magic
wand tool. Selections modify expand by 6.
Paste a paper of choice as a new layer.
Selections invert & press delete.
Move the paper layer under the frame layer.
Press your tube as a new layer between the
two layers.
Press delete. Select none.
Add a drop shadow to the tube layer.
2,2,50,5 Black
Open a wordart of choice.
I am using one from the scrap by Schnegge.
Resize 50% or as needed.
Paste along the bottom of the frame.
Open a cupcake element.
Resize 70%
Paste under the wordart layer on one side.
Back with the TK Dezigns scrap,
open a scatter of stars element.
Paste on the bottom layer of the tag.
Open a ribbon of dangles from the DBS scrap.
Resize 80% & 90%.
Paste along the top of the frame.
Now repeat this with the
2nd dangles & paste along the bottom
of the frame underneath the frame layers.
Open a heart frame from the Schnegge scrap.
Click inside the frame with your magic wand.
Selections modify expand by 6
Paste a paper of choice.
Selections invert & press delete.
Paste your tube as a new layer as you did above.
Press delete & select none.
Add a drop shadow to the heart frame &
the tube layer.
2,2,50,5 Black
Now resize all layers 50
Rotate free rotate 25 left.
Paste on a bottom corner of the tag.
Merge layers visible.
Resize 88%
Add copyright info & name.
Save as png.
Thanks for trying my tutorial.
Labels:cupcake,Fairy,Tutorial | 0
comments
Friday, March 9, 2012
2:32 PM | Edit Post
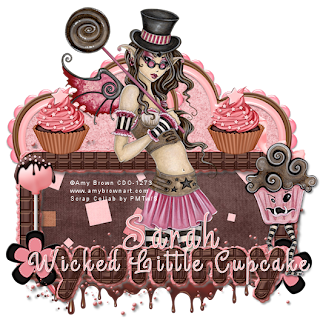
Yummy Lil Cupcake
This tutorial was written
by Sarah Fiack on
March 9,2012
Any resemblance to another
tutorial is purely coincidental.
For this tutorial, I’m using
a tube Amy Brown
You can purchase her tubes at
CDO
Supplies:
Tube of choice
Scrap of choice.
I’m using a 3 scraps of a collab
Called Cupcake Surprise.
I am using scraps by Schnegge,
TK Dezigns & Designs by Sarah
It is available at Pimp My Tags
with Scraps
Store
Open a 600x600 new image.
Open up your tube choices
& your scrap choices. I am using 3
scrapkits in a collab.
For this part, I am using the kit
in the collab by TK Dezigns.
Choose a frame of choice.
Resize 80%
Copy & paste as a new layer.
Move the frame down slightly
on your tag.
Click inside your frame with your
magic wand tool.
Selections modify expand by 15.
Paste a paper of choice.
Selections invert & delete.
Select none.
Move the paper under the frame layer.
Add a drop shadow to the frame layer.
2,2,50,5 Black.
Paste your main tube as a new
layer on top of the frame.
Open a doodle element.
Resize 80%
Paste on the bottom layer of the tag.
You want to see the doodle along the top
& bottom parts of the frame.
Open a bow of choice.
Resize 25% or as needed.
Mirror once & position as wanted on the frame.
I am using a bow by Designs by Sarah in the collab.
Open dripping chocolate from the same scrap.
Resize 70%
Position on tag near the bottom.
You want it to be under the frame layers & the chocolate
to be seen dripping from underneath the frame.
In the scrap by Schnegge, open a flower element.
Resize 50%. Paste on a corner of the frame as wanted.
Now on your 2nd tube, resize 50%
Position on a side of the frame.
Add the earlier drop shadow to this tube.
Back in the scrap by Tk,
open a wordart of choice.
Resize 70% or as needed.
Paste along the bottom part of your tag.
Open a lollipop element.
Resize 70%
Paste by one of the flower elements.
Open a cupcake of choice.
I am using one by TK.
Resize 25%
Paste on top of the frame where wanted.
I pasted it on the frame twice but that is optional.
Okay the Schnegge scrap.
Open a heart frame element.
Click inside the heart with magic wand tool.
Selections modify expand by 5.
Paste a paper of choice.
Selections invert & delete.
Select none.
Move the paper under the frame.
Add the earlier drop shadow to the frame layer.
Resize 70%
Copy merged onto your tag.
Rotate free rotate 25 either direction.
Move on your tag to the bottom layer.
You want it to be coming up from behind
the top of your tag. Duplicate once & mirror.
Merge layers visible.
Resize 88%
Add copyright info & name.
Save as png.
Thanks for trying my tutorial.
Thursday, March 8, 2012
7:17 PM | Edit Post
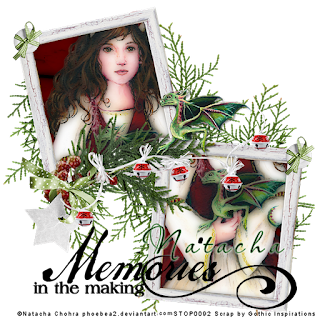
Memories In The Making
This tutorial was written
by Sarah Fiack on
March 8,2012
Any resemblance to another
tutorial is purely coincidental.
For this tutorial, I’m using
a tube by Natacha Chohra
You can purchase the tube at
PSPTUBESTOP
Supplies:
Tube of choice
Scrap of choice.
I’m using one by Gothic Inspiratiosn
Called Christmas Memories.
Here
Wordart by Word Art World
Blog
Plugin: Xero Porcelain
Open a 600x600 new image.
Open up your tube & scrap supplies.
Open a frame of choice.
Resize 70% or as needed.
Copy & paste the frame as
a new layer.
Using your magic wand,
& holding the shift button down,
click inside the areas of your frame.
Copy & paste a paper of choice.
Selections invert & press delete.
Move your paper layer under the
frame layer.
Select none.
Now select inside the top
part of your frame.
Expand as above.
Paste your tube into the frame.
Invert & delete.
Select none.
Repeat this with the bottom part
of the frame & tube.
Move the tube layers under the
frame layer.
Merge the two tube layers together.
Add a drop shadow to them.
2,2,50,5 Black.
Merge the tube layers with the
scrap paper layer in the frame.
Apply Xero Porcelain to the merged layers
Softness 76
Strength & Brightness 128.
Apply Xero Porcelain twice to this layer.
Open a tree branch element.
Resize 70%.
Paste on the bottom layer of your tag.
Position in the right hand side of
the top frame. You want leaves showing
along the frame.Duplicate the branch layer once
& flip it.
Now this is a little confusing so bear with me.
Duplicate the two branch layers & mirror each.
You want to have branches on both sides
of the frame
Once done, merge all the branch layers together.
Open a star element.
Resize 50% & 70% once each.
Paste along the frame once.
Open a button.
Resize 50% twice.
Paste on a corner of each frame once.
Now the tube I am using has another
layer of the dragon. I pasted the dragon
on the frame. You can use another element
of choice from the scrap if you don't have
this layer.
Open a sleigh bells ribbon.
Resize 50%.
Paste along the center of your frame.
Open up your wordart of choice
or add your own text.
I am using a wordart.
I resized 50% twice & 60% once.
Copy & paste as wanted.
Merge all layers visible.
Resize 88%
Add copyright info & name.
Save as png.
Thanks for trying my tutorial.
Labels:Christmas,Tutorial,Winter | 0
comments
Wednesday, March 7, 2012
12:19 AM | Edit Post
This is from Dear Abby advice column.The poem is by the late Robert Muller,a former assistant secretary-general of the United Nations.
I thought this is a really inspiring poem and makes one pause and think.
Therefore I am sharing it.There is also a schedule for one to forgive.
Decide to forgive
For resentment is negative
Resentment is poisonous
Resentment diminishes and devours the self.
Be the first to forgive,
To smile and to take the first step
And you will see happiness bloom
On the face of your human brother or sister.
Be always the first
Do not wait for others to forgive
For by forgiving
You become the master of fate
The fashioner of life
A doer of miracles.
To forgive is the highest,
Most beautiful form of love.
In return you will receive
Untold peace and happiness.
And here is the program for achieving a truly forgiving heart:
SUNDAY: Forgive yourself.
MONDAY: Forgive your family.
TUESDAY: Forgive your friends and associates.
WEDNESDAY: Forgive across economic lines within your own nation.
THURSDAY: Forgive across cultural lines within your own nation.
FRIDAY: Forgive across political lines within your own nation.
SATURDAY: Forgive other nations.
Only the brave know how to forgive. A coward never forgives.
It is not in his nature.

Labels:Thoughts | 1 comments
Monday, March 5, 2012
10:39 PM | Edit Post
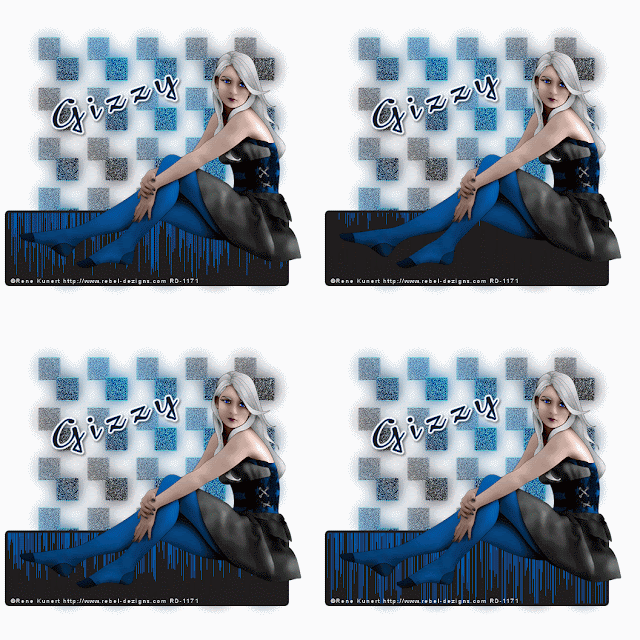
Audio Girl
This tutorial was written
by Sarah Fiack on
March 5, 2012
Any resemblance to another
tutorial is purely coincidental.
For this tutorial, I’m using a
tube by Rene Kunert
The tube is FTU now &
available here
Supplies:
Tube of choice
Vixmask333
Blog
Animation Shop
Plugins
Filters Unlimited 2.0 Pattern Generators
This tutorial is animated.
Please click here to view the animation.
Open a 600x600 white
new image.
Open up your tube of choice.
Copy & paste your tube
as a new layer. If needed,
resize 88%.
I resized the tube I am using.
Now select your rectangle shape tool.
Width 5 Fill is null & Stroke a dark color
from your tube.
Draw out a nice sized rectangle.
Convert to raster.
Move this layer under your tube.
You want the tube to appear
to be on top of part of the rectangle.
Now take your magic wand &
select inside the shape.
Selections modify expand by 2.
Add a new raster layer.
Fill with a color of choice from tube.
Select none.
Move the layer under the rectangle
frame layer.
On your bottom layer,
add a new raster layer.
Fill with a gradient of your two colors.
I used settings Linear
angle 45 repeats 4
Apply Vixmask333
Merge group.
Duplicate the mask layer once.
On the bottom mask layer,
adjust blur gauassian blur 15.
On the top mask layer,
Effects -edges -enhance
Adjust add noise
uniform 25
Effects -edges -enhance
for a 2nd time.
Resize all layers 88%.
Add copyright information to
your tag.
Now make sure you are on the
fill layer of the rectangle.
Apply the plugin
Filters Unlimited 2.0 Pattern Generators
Default settings.
If you don't wish to animate, then
save your tag at this moment.
To animate please continue.
Copy merged & paste as new animation
into Animation Shop.
Now go back to psp, and undo the plugin.
Select the plugin again & click on randomize once.
Copy merged & paste after current frame.
Repeat this for a total of 4 frames in AS.
Select all frames in AS.
Change your frame properties to 20 or as wanted.
If happy, then save tag.
Thanks so much for trying my tutorial.
Labels:FTU,Rene Kunert,Tutorial,Women | 0
comments
Thursday, March 1, 2012
8:07 PM | Edit Post

Delicate Rose
This tutorial was written
by Sarah Fiack on
March 1,2012
Any resemblance to another
tutorial is purely coincidental.
For this tutorial, I’m using a
tube by Mitzi Sato-Wiuff.
You can purchase the tube at
PSPTUBESTOP
Supplies:
Tube of choice
Scrap of choice.
I’m using one by designs by sarah
called Sweet Vintage
It is available at Pimp My Tags
with Scraps
Here
VixMask 273
Here
Open a 600x600 new image.
Open your tube &
scrap supplies.
Open a frame of choice.
Resize 75%
Rotate free rotate left 90.
Paste as a new layer.
Using your selection tool,
draw out selection around
the center of your frame.
Paste a paper of choice
as a new layer.
Selections invert & press delete.
Select none.
Move the paper layer
underneath the frame layer.
Add a drop shadow to
the frame.
2,2,50,5 Black.
Resize your main tube 78% & 95%.
Paste as a new layer.
Position as wanted on the frame.
Open a vine branch.
Resize 60%
Paste along one side of the frame.
Duplicate the vine once & flip.
Open a lace trim.
Resize 70% Rotate Free rotate 90
Paste on the bottom of the tag.
Position along one side of the frame.
Duplicate once & mirror.
Open a single flower element.
Resize 60% & 80%.
Paste on two corners of the frame.
Open a long curled ribbon.
Resize 80%
Rotate Free rotate 90
Paste this layer under the two single flowers.
Open a pearl necklace element.
Resize 50%
Paste near the bottom of your tube.
Arrange the layer to be just under the tube
in your layer palette.
Paste a 2nd scrap paper of choice
on the bottom layer of your tag.
Apply VixMask 273.
Merge group
Resize the mask layer 105.
Add wordart or text of choice
to your tag.
I added the words
Delicate Rose.
Add a drop shadow to the text.
Merge layers visible.
Resize 88%
Add copyright info & name.
Save as png.
Thanks for trying my tutorial.
Labels:Fairy,Tutorial,Vintage | 0
comments
8:04 PM | Edit Post
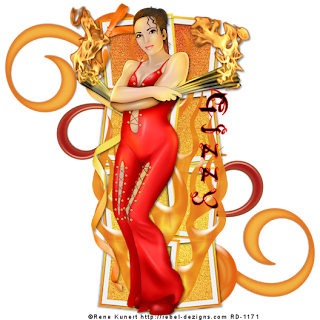
Firedancer
This tutorial was written
by Sarah Fiack on
March 1,2012
Any resemblance to another
tutorial is purely coincidental.
For this tutorial, I’m using a
tube by Rene Kunert.
This tube is a Limited Edition
The tube is now FTU &
available here.
Supplies:
Tube of choice
Scrap of choice.
I’m using one by designs by sarah
called Burnin for you
It is available at Pimp My Tags
with Scraps
Here
Open a 600x600 new image.
Open up your tube and
scrap supplies.
Copy & paste your tube
onto your new image.
Open a frame of choice.
I am using a multi square frame.
Resize 85%.
Rotate Free rotate left 90.
Paste the frame on the bottom
layer behind your tube.
Move to the right slightly
so it appears to be coming
from behind your tube.
Using your magic wand
& holding the shift button down,
Click inside each part of the frame.
Selections modify expand by 5.
Paste a scrap paper of choice.
Selections invert & press delete.
Select none.
Move the paper layer under the frame layer.
Add a drop shadow to the frame & tube.
2,2,50,5 Black
Open a flame element.
Resize 90%
Paste above the frame layer
& behind your tube.
Add the above drop shadow.
On the paper layer,
Adjust - add noise.
Uniform 25
Now merge the 2 frame layers
& the flame layers together.
Duplicate the merged layer & mirror.
This should give you two frames behind
your main tube.
Open a ribbon element.
Resize 85%
Rotate free rotate left 90.
Paste along side of the frames.
Add the above drop shadow.
Open a flame doodle.
Resize 70%.
Rotate free rotate Right 25.
Paste on the bottom layer of
the tag & position as needed.
Duplicate the doodle layer once.
Mirror & flip.
Merge layers visible.
Resize 88%.
Add copyright info & name.
Save as png.
Thanks for trying my tutorial.
Labels:FTU,Rene Kunert,Tutorial,Women | 0
comments
Subscribe to:
Comments
(Atom)
TOUs
I do not allow resizing of my tags, timelines or wallpapers. All of my creations are for PU only unless otherwise stated. Nor are they to be altered in any way either.
Categories
- Abstract (22)
- ACDivas (2)
- Ad (1)
- addictive pleasures (3)
- ADI (2)
- Adriennes Design (6)
- Adult (8)
- Alicia Mujica (61)
- Amber (6)
- Amy Marie (222)
- Andrea Gibson (1)
- Angel (97)
- Animals (468)
- Animation (107)
- Anime (11)
- AORK (10)
- AOTW (8)
- Apocalyptic (5)
- Art-Content (1)
- Asian (8)
- Attitude (57)
- Authors (9)
- Autism (5)
- Autumn (39)
- award (3)
- Baby (1)
- BAS (1)
- BCA (7)
- BCS (28)
- Bella Caribena (2)
- birthday (3)
- Birthstone (10)
- Blaque Heart Designz (11)
- BLT DeZignZ (11)
- book suggestions (6)
- Cajoline (1)
- Calendar (2)
- Carnival (1)
- Carpe Diem (6)
- Cars (4)
- Casino (3)
- CCD (12)
- CCS (18)
- CDO (1545)
- Celestial Scraps (2)
- Celinart Pinup (1)
- Chaos Priestess (73)
- Charity (29)
- Chasing The Blues (2)
- Chelloenix Blog (1)
- Chichi (65)
- Children (30)
- Christmas (173)
- Cluster Frame (42)
- Color (6)
- Comic (6)
- copyright (2)
- Country (33)
- Crafty (2)
- Crazed Creations (1)
- Creative Misfits (3)
- CRM (23)
- Crowe (17)
- Crystal's Creations (20)
- CSBC (76)
- CU (12)
- cupcake (60)
- Cupcakes (44)
- CUPU (4)
- Cute (205)
- DAH (95)
- Dees"SIGN Depot (65)
- Devil (1)
- Dia De Los Muertos (2)
- Digital Chaos (61)
- Doodle by Design (40)
- Dreams (63)
- DSI (2)
- Easter (49)
- ELF (14)
- EliasC. (25)
- Elli's Creations (2)
- Emo (29)
- emotion (27)
- Extras (81)
- Fairy (185)
- Fall (182)
- Family (21)
- Fantasy (325)
- Farrah (4)
- Feature Tutorial (3)
- Food (165)
- Forum Style (38)
- Foxy's Designz (92)
- Freeks Creations (35)
- Freya (5)
- Friends (20)
- Friendship (14)
- FTU (122)
- Garv (20)
- Gimptastic (146)
- Gingerscraps (2)
- Girly (125)
- Goldwasser (8)
- Gothic (352)
- Gothic Inspirations (12)
- Guest CT (28)
- Halloween (221)
- Hania's Design (9)
- Happy (15)
- Happy New Year (8)
- Heartfelt Perfections (2)
- Help 4 Casper (2)
- Hollywood (4)
- Honored Scraps (230)
- Hungry Hill (171)
- Ilonka's Design (1)
- Inspiring (8)
- Irish Princess Designs (118)
- Jensen (106)
- Jose Cano (1)
- Karmalized (108)
- Kids (12)
- Kissing Kate (4)
- Kizzed by Kelz (81)
- Ladyhawwk (306)
- LaReina Designz (1)
- Layout (6)
- Learning (4)
- Life (98)
- LML Designs (1)
- Love (229)
- Magic (33)
- Mardi Gras (2)
- MellieBeans (11)
- Mental Health (5)
- Mermaids (67)
- MicroTut (19)
- Misc (6)
- Misticheskaya (25)
- Monsters (1)
- Monti's Scraps (22)
- Moon (56)
- MTA (18)
- Music (59)
- Mystery (1)
- Mystical Scraps (184)
- Nature (220)
- Nerd/Geek (1)
- New Years (10)
- Nocturne (27)
- Norella (3)
- Ocean (143)
- Overlays (10)
- Pagan (59)
- Paranormal (1)
- Patriotic (15)
- Peace (4)
- Phone Wallpaper (10)
- Photo (4)
- Pimp'd Designz (3)
- Pimpin Pspers Warehouse (3)
- Pink Paradox (1)
- Pinterest (1)
- Pirates (4)
- Poems (1)
- Poetry (11)
- Poser (4)
- Positive (7)
- Presents (2)
- Promo (25)
- PS (1)
- PSP (3)
- PTU (20)
- PU (1)
- Queen Uriel (43)
- Quickpages (14)
- Rac (9)
- Rebecca Sinz (174)
- Rebel Designz (123)
- Rene Kunert (27)
- Retro (7)
- Rissa's Designs (8)
- RMQ (47)
- Robot (2)
- Sale (3)
- Sams Scraps (1)
- Savage Dezines (2)
- Schnegge (14)
- School (21)
- Sci-fi (3)
- Scrap (23)
- Scrappin with lil ole me (1)
- Scraps of enchantment (1)
- Selina Fenech (13)
- Sexy (149)
- SGRowe (3)
- Sissys Sassitude (3)
- Snowmen (2)
- SophisticatSimone (8)
- Spazz (17)
- Special Friends (2)
- Sports (12)
- Spring (162)
- St Patty's Day (34)
- St. Patricks (1)
- starlite & soul (4)
- Steampunk (26)
- Summer (110)
- summerween (1)
- Sweet (3)
- SWLOM (1)
- Tag (44)
- Taggers Delight (7)
- tagging (1)
- Tasha's Playground (88)
- Tech (4)
- Template (11)
- Thanksgiving (12)
- Thoughts (103)
- Timeline (210)
- Timelines (70)
- Tiny Turtle (4)
- TKDezigns (36)
- Tony T (3)
- Tonya (3)
- Toon (1)
- TPP (8)
- Travel (1)
- Treasured Scraps (7)
- Tresured Scraps (26)
- Tutorial (220)
- UYA (6)
- Valentine's Day (98)
- Verymany (64)
- Vi NIna (1)
- Vintage (112)
- Wallpaper (465)
- WDDesignz (38)
- Western (2)
- Whisprd Desginz (10)
- Wicked Diabla (18)
- Wicked Princess (171)
- Winter (137)
- WITW (1)
- Women (188)
- Wordart (12)
- Words (57)
- Zaric (3)
- Zindy (66)
- Zodiac (2)
- Zombies (11)


