Friday, June 14, 2013
4:21 PM | Edit Post
All Lined Up
This tutorial was written
by Sarah Fiack on
June 14,,2013
Any resemblance to another
tutorial is purely coincidental.
For this tutorial, I’m using a tube
by Justsan. It is a FTU tube found at
MTA.
Plugins:
Mura's Meister Copies
Toadies what are you
dsb flux blast
VM Stylize -Motion Trail
Eye Candy 5 Impact Chrome
Open a tube of choice.
No outside scraps are needed for this.
Open a 600x600 new image.
Select a rectangle preset shape tool.
Make sure the square icon is selected.
Also make sure the width is set to 0.00
On your materials pallete, choose both
boxes with a bright color from your tube.
I used yellow for mine.
Draw out a good sized rectangle
on your new image.
Objects - Align -center in canvas.
Convert to raster.
Now select the rectangle icon.
Keep the width set to 0.00
Choose black for both boxes on
your materials palette.
Draw out a vertical thin rectangle on your
square. Convert to raster.
Plugin Mura's Meister Copies
Tiling. Make sure Tile gap is set to 2.
Hit okay or apply.
Select your square layer with your magic
wand tool. Selections - invert.
Back on your black rectangle layer, press delete.
This should give you only rectangles on your
square.
Select none.
Merge the two square layers together.
Duplicate once.
On the bottom layer, apply Toadies
What are you plugin - default setting.
Now apply dsb flux blast -
Direction left
Percentage 20
Now on the Square copy layer, apply
the plugin VM Stylize -Motion Trail
default settings.
Paste your tube as a new layer.
Add a drop shadow to the tube.
2,2,50,5 Black.
Select your ellipse preset shape.
Color black on stroke box on
materials palette
X out the Fill one.
Width 10.00
Draw out a small circle.
Postion on the right side
of the tag. Duplicate twice for a total
of 3 circles. Postion in a vertial row.
Merge the 3 circles together.
Apply the plugin Eye Candy 5 Impact
Chrome - choose Bumper -Shiny Grill
Default settings.
Click inside the 3 circles with your magic wand
tool. Hold shift button down if needed to select
multiple places. Selections expand by 3.
Add new raster layer. Fill with color black.
Select none.
Move this layer underneath the circle layer.
Choose your text tool. Unhide the fill box on
your materials.You want this the same bright
color as earlier. Add text as wanted to
each circle. Make sure to convert to raster
& position as wanted.
Merge layers as visible. Add artist copyright info
& name. Save as png.
Thanks for trying my tutorial.
Labels:FTU,Tutorial,Women | 0
comments
Wednesday, June 5, 2013
11:08 PM | Edit Post
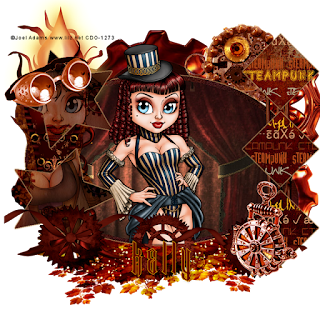
It's been a long time since I made a template. But thought I would share the one I did today.
You can find my older ones on my old blog here. I also did a sample tag using the template.
For that, I used tubes by Joel Adams which you can find at CDO.
I also used a Steampunk scrap by Bibi which you can find at SATC.
Download template


You can find my older ones on my old blog here. I also did a sample tag using the template.
For that, I used tubes by Joel Adams which you can find at CDO.
I also used a Steampunk scrap by Bibi which you can find at SATC.
Download template


Labels:FTU,Steampunk,Template | 3
comments
Subscribe to:
Comments
(Atom)
TOUs
I do not allow resizing of my tags, timelines or wallpapers. All of my creations are for PU only unless otherwise stated. Nor are they to be altered in any way either.
Categories
- Abstract (22)
- ACDivas (2)
- Ad (1)
- addictive pleasures (3)
- ADI (2)
- Adriennes Design (7)
- Adult (8)
- Alicia Mujica (61)
- Amber (6)
- Amy Marie (222)
- Andrea Gibson (1)
- Angel (97)
- Animals (469)
- Animation (107)
- Anime (11)
- AORK (10)
- AOTW (8)
- Apocalyptic (5)
- Art-Content (1)
- Asian (8)
- Attitude (57)
- Authors (9)
- Autism (5)
- Autumn (39)
- award (3)
- Baby (1)
- BAS (1)
- BCA (7)
- BCS (28)
- Bella Caribena (2)
- birthday (3)
- Birthstone (10)
- Blaque Heart Designz (11)
- BLT DeZignZ (11)
- book suggestions (6)
- Cajoline (1)
- Calendar (2)
- Carnival (1)
- Carpe Diem (6)
- Cars (4)
- Casino (3)
- CCD (12)
- CCS (18)
- CDO (1545)
- Celestial Scraps (2)
- Celinart Pinup (1)
- Chaos Priestess (73)
- Charity (29)
- Chasing The Blues (2)
- Chelloenix Blog (1)
- Chichi (65)
- Children (30)
- Christmas (173)
- Cluster Frame (44)
- Color (6)
- Comic (6)
- copyright (2)
- Country (33)
- Crafty (2)
- Crazed Creations (1)
- Creative Misfits (3)
- CRM (24)
- Crowe (17)
- Crystal's Creations (20)
- CSBC (76)
- CU (12)
- cupcake (60)
- Cupcakes (44)
- CUPU (4)
- Cute (207)
- DAH (97)
- Dees"SIGN Depot (65)
- Devil (1)
- Dia De Los Muertos (2)
- Digital Chaos (61)
- Doodle by Design (41)
- Dreams (63)
- DSI (2)
- Easter (49)
- ELF (14)
- EliasC. (25)
- Elli's Creations (2)
- Emo (29)
- emotion (27)
- Extras (81)
- Fairy (186)
- Fall (182)
- Family (21)
- Fantasy (326)
- Farrah (4)
- Feature Tutorial (3)
- Food (165)
- Forum Style (38)
- Foxy's Designz (92)
- Freeks Creations (35)
- Freya (5)
- Friends (20)
- Friendship (14)
- FTU (122)
- Garv (20)
- Gimptastic (146)
- Gingerscraps (2)
- Girly (125)
- Goldwasser (8)
- Gothic (352)
- Gothic Inspirations (12)
- Guest CT (28)
- Halloween (222)
- Hania's Design (9)
- Happy (15)
- Happy New Year (8)
- Heartfelt Perfections (2)
- Help 4 Casper (2)
- Hollywood (4)
- Honored Scraps (230)
- Hungry Hill (171)
- Ilonka's Design (1)
- Inspiring (8)
- Irish Princess Designs (118)
- Jensen (106)
- Jose Cano (1)
- Karmalized (108)
- Kids (12)
- Kissing Kate (4)
- Kizzed by Kelz (81)
- Ladyhawwk (306)
- LaReina Designz (1)
- Layout (6)
- Learning (4)
- Life (98)
- LML Designs (1)
- Love (233)
- Magic (33)
- Mardi Gras (2)
- MellieBeans (11)
- Mental Health (5)
- Mermaids (67)
- MicroTut (19)
- Misc (6)
- Misticheskaya (25)
- Monsters (1)
- Monti's Scraps (22)
- Moon (56)
- MTA (18)
- Music (60)
- Mystery (1)
- Mystical Scraps (184)
- Nature (220)
- Nerd/Geek (1)
- New Years (10)
- Nocturne (30)
- Norella (3)
- Ocean (143)
- Overlays (10)
- Pagan (59)
- Paranormal (1)
- Patriotic (15)
- Peace (4)
- Phone Wallpaper (10)
- Photo (4)
- Pimp'd Designz (3)
- Pimpin Pspers Warehouse (3)
- Pink Paradox (1)
- Pinterest (1)
- Pirates (4)
- Poems (1)
- Poetry (11)
- Poser (4)
- Positive (7)
- Presents (2)
- Promo (25)
- PS (1)
- PSP (3)
- PTU (20)
- PU (1)
- Queen Uriel (45)
- Quickpages (14)
- Rac (9)
- Rebecca Sinz (175)
- Rebel Designz (123)
- Rene Kunert (27)
- Retro (7)
- Rissa's Designs (8)
- RMQ (47)
- Robot (2)
- Sale (3)
- Sams Scraps (1)
- Savage Dezines (2)
- Schnegge (14)
- School (21)
- Sci-fi (3)
- Scrap (23)
- Scrappin with lil ole me (1)
- Scraps of enchantment (1)
- Selina Fenech (13)
- Sexy (150)
- SGRowe (3)
- Sissys Sassitude (3)
- Snowmen (2)
- SophisticatSimone (9)
- Spazz (17)
- Special Friends (2)
- Sports (12)
- Spring (162)
- St Patty's Day (36)
- St. Patricks (1)
- starlite & soul (5)
- Steampunk (26)
- Summer (110)
- summerween (1)
- Sweet (3)
- SWLOM (1)
- Tag (44)
- Taggers Delight (7)
- tagging (1)
- Tasha's Playground (88)
- Tech (4)
- Template (11)
- Thanksgiving (12)
- Thoughts (103)
- Timeline (210)
- Timelines (70)
- Tiny Turtle (4)
- TKDezigns (39)
- Tony T (3)
- Tonya (3)
- Toon (1)
- TPP (8)
- Travel (1)
- Treasured Scraps (7)
- Tresured Scraps (26)
- Tutorial (220)
- UYA (6)
- Valentine's Day (102)
- Verymany (65)
- Vi NIna (1)
- Vintage (112)
- Wallpaper (469)
- WDDesignz (38)
- Western (2)
- Whisprd Desginz (10)
- Wicked Diabla (18)
- Wicked Princess (173)
- Winter (139)
- WITW (1)
- Women (188)
- Wordart (12)
- Words (57)
- Zaric (3)
- Zindy (66)
- Zodiac (2)
- Zombies (11)


