Monday, July 30, 2012
9:39 AM | Edit Post
My first PTU scrapkit! I designed this one with teaching my little one in mind.
I was teaching him colors and this came to mind. I wanted to do one with that in mind.
You can purchase it at Treasured Scraps.
I was teaching him colors and this came to mind. I wanted to do one with that in mind.
You can purchase it at Treasured Scraps.
Labels:Learning,PTU,Scrap | 0
comments
Sunday, July 29, 2012
11:13 PM | Edit Post
Pissed Off
This tutorial was written
by Sarah Fiack on
July 10,2012
Any resemblance to another
tutorial is purely coincidental.
For this tutorial, I’m using an image
by Shayne Bohner. It is available at
AIL
Supplies
Image of choice
TreseMask0095
Blog
Plugins:
Toadies 3D Superchecker Default setting
EyeCandy4000 Gradient Glow
Xero Radiance
Open a 600x600 new image.
Open up an image of choice.
Copy & paste your image as a new layer.
Duplicate the image once.
On the image copy layer, apply the two
plugins.
Toadies 3D Superchecker Default setting
EyeCandy4000 Gradient Glow
Black Halo Glow width 3.00
This should give you a fun sketchy kind of
effect on this layer. The gradient glow will help
"pop" it from the image below.
Now on the bottom image layer,
apply Xero Radiance
Strangeness 156
Charm 50
Truth 128
Beauty 255
Add a new raster layer below the image layers.
Fill this layer with a color of choice from
your images.
Apply the mask TreseMask0095.
Merge group.
Duplicate the mask layer once.
Rotate free rotate either direction 90.
Merge the two mask layers together.
Resize this layer 90.
Choose a font of choice.
Choose a font color - a contrasting
color from your tube will work well.
I used the color red.
Type out a short question at top
of your image.
Type out the response at the bottom
of the tag image.
Convert both to raster layer.
Add the earlier gradient glow
to the text.
EyeCandy4000 Gradient Glow
Black Halo Glow width 3.00
Now go back & same settings except
change it to fat this time.
Merge layers visible.
Crop to desired size.
Add artist copyright information.
Save as png.
Thanks for trying my tutorial.
Labels:Attitude,FTU,Gothic,Tutorial | 0
comments
Thursday, July 26, 2012
9:35 PM | Edit Post
I did these tonight. You know when you come across a tube & scrapkit
made for one another? That's how I feel with these two. They pair so well together!
Tube by The Vintage Angel
Available at CDO
Scrap Breathless by Baby Cakes Scraps
Available at Taggers Delight
made for one another? That's how I feel with these two. They pair so well together!
Tube by The Vintage Angel
Available at CDO
Scrap Breathless by Baby Cakes Scraps
Available at Taggers Delight
Labels:Angel,Extras | 0
comments
6:40 PM | Edit Post
Labels:Overlays | 0
comments
Wednesday, July 25, 2012
7:32 PM | Edit Post
Here are a few snags I did tonight. I used a tube by Terry Heuser available at
TPP The PSP Project. I also used items from several scraps by Leigh Penrod. You can purchase her scraps at Heartfelt Perfections.
Hope you like the snags!
TPP The PSP Project. I also used items from several scraps by Leigh Penrod. You can purchase her scraps at Heartfelt Perfections.
Hope you like the snags!
Labels:Extras,Fairy,Nature | 0
comments
6:35 PM | Edit Post
Paint Drips
This tutorial was written
by Sarah Fiack on
July 24,2012
Any resemblance to another
tutorial is purely coincidental.
For this tutorial, I’m using a tube
by Brittany Elizondo. It is available at
AIL
Supplies:
Tube of choice
Weave Background by me
Here
Plugins:
EyeCandy5 Nature Drips
Eye Candy 4000 Gradient Glow
Open a 600x600 new image.
Open up your tube of choice.
Open up the weave background which
I have provided.
On the weave background,
rotate free rotate 90 right.
Copy & paste as a new layer
onto your new image.We're going
to be adding color to the black rows
of the weave.
Using your magic wand tool,
hold shift button down,
click one row on the weave.
Selections modify expand by 2.
Add a new raster layer.
Fill this with a color from your tube.
You want each row a different color from
your tube.
Now back on the weave, click
on the next row. Repeat the above steps
& fill with a different color this time.
Repeat this so you have 5 different
rows/ columns of color for the background.
Select none.
Merge the color & weave layers together.
Resize your main tube 80%.
Paste as a new layer onto your tag image.
Add a drop shadow to the tube.
2,2,50,5 Black.
Duplicate the weave color layer once.
Resize the duplicated color weave layer 80%.
On the duplicate layer, apply the plugin
EyeCandy5 Nature Drips
Small Spray Paint Drips setting default.
Add the earlier drop shadow to this layer.
Now on the original weave layer,
apply the same plugin with the setting
Small Many little drips.
Choose a graffiti font.
Fill color black.
Stroke width set to 0.
Font size 16 or as wanted.
Type out words of choice.
I chose the words PAINT DRIPS.
Convert to raster.
Rotate free rotate left 90.
Position the wording along the left side
of the tag.
Eye Candy 4000 Gradient Glow
Setting black glow
Glow width 3.0
Gradient glow Fat same settings.
Merge layers together.
Crop to desired size.
Add artist copyright information & name.
Save as png.
Thanks for trying my tutorial.
Labels:Emo,FTU,Gothic,Tutorial | 0
comments
Tuesday, July 24, 2012
12:15 AM | Edit Post
I did this for a color challenge tonight
in a group.Wanted to share.
Honored Scraps kit Reflection
Dark Yarrow Tube
Both at Dreamscape Imaging
Wordart by Create With TLC
Blog
Mask0027 by Trese Mask
Blog
in a group.Wanted to share.
Honored Scraps kit Reflection
Dark Yarrow Tube
Both at Dreamscape Imaging
Wordart by Create With TLC
Blog
Mask0027 by Trese Mask
Blog
Labels:Fantasy,Gothic,Tag | 0
comments
Monday, July 23, 2012
10:23 PM | Edit Post
Sharing one I did tonight.
Another microtutorial by me.
Tube by Mitzi Sato0Wiuff available at PSPTUBESTOP
Scrap Lavender Sunrise by Gothic Inspirations Blog
Another microtutorial by me.
Tube by Mitzi Sato0Wiuff available at PSPTUBESTOP
Scrap Lavender Sunrise by Gothic Inspirations Blog
Labels:Fantasy,MicroTut | 0
comments
9:54 AM | Edit Post
I finished another scrap I've been working on. I designed the scrap to match a tube by Lisa Victoria called The Great Zoo Escape. The tube is available at UYA. You can download the scrap Download Here
Please leave some love if you do :)
Below is a preview of the scrap. It doesn't show everything in it either.
Of course its for personal use only. I would love to see anything made with it.
Scrap is tagger size :)
Please leave some love if you do :)
Below is a preview of the scrap. It doesn't show everything in it either.
Of course its for personal use only. I would love to see anything made with it.
Scrap is tagger size :)
Labels:Animals,FTU,Scrap | 1 comments
Sunday, July 22, 2012
5:56 PM | Edit Post
I thought to help kick off my selling my overlays, that I would share a frebie overlay. This one is baseball related. Baseball is huge in our house. I hope someone can use it.
Download Here
Check out my Overlays for purchase at
Treasured Scraps
Heartfelt Perfections
Download Here
Check out my Overlays for purchase at
Treasured Scraps
Heartfelt Perfections
Saturday, July 21, 2012
5:37 PM | Edit Post
Sharing some snags I made today :)
Artwork Chris Harper available at
AIL
Scrap Love Letters by designs by sarah available at
PMTWS
FTU Wordart by Create With TLC
Blog
Artwork Chris Harper available at
AIL
Scrap Love Letters by designs by sarah available at
PMTWS
FTU Wordart by Create With TLC
Blog
Labels:Extras,Love | 0
comments
4:05 PM | Edit Post
Bubble Mermaid
This tutorial was written
by Sarah Fiack on
April 8th,2012
Any resemblance to another
tutorial is purely coincidental.
For this tutorial, I’m using
a tube by Cecilia Lovera
You can find the tube at
PSPTubeStop
Supplies:
Tube Of Choice.
Plugins: EyeCandy5 Impact Glass
EyeCandy4000 Gradient Glow
Open a 600x250 new image.
Open up your tube of choice.
Fill the new image with a
color from your tube.
Add a new raster layer.
On your materials palette,
choose a 2nd color for stroke
& a 3rd color for Fill.
On your Gradients option,
Foreground & Background blend.
You want the blend on both Materials
palettes.
Angle 45 Repeats 4
Use your preset shape tool, circle
width 3.00.
Draw out four circles in different sizes.
Convert each one to raster.
Position one circle per corner of the tag.
Merge the 4 circle layers together.
Adjust add noise Uniform 15
Apply the plugin EyeCandy5 Impact Glass
Setting Clear No drop shadow.
Default settings.
EyeCandy4000 Gradient Glow.
Apply Setting Fat Glow width 3.00
to the circle layers.
Copy & paste your main tube as
a new layer.
Position in the center of the tag.
Add a drop shadow to the tube.
2,2,50,5 Black.
Add a new raster layer.
Fill with a color of choice.
Select this layer with your magic
wand tool.
Selections contract by 4.
Press delete.
On the same layer, adjust
add noise. Uniform 15.
Merge layers visible.
Add artist copyright info & name.
Save as png.
Thanks for trying my tutorial.
Labels:Forum Style,FTU,Mermaids,Tutorial | 0
comments
Thursday, July 19, 2012
11:34 PM | Edit Post
Wednesday, July 18, 2012
3:59 PM | Edit Post
Just wanted to show preview of a scrapkit I did for the Forum ACDiva.
This scrap is available in the Exclusive section for our members.
Really like how this one came out. My best scrapkit so far.

This scrap is available in the Exclusive section for our members.
Really like how this one came out. My best scrapkit so far.

Labels:ACDivas,Scrap | 0
comments
Monday, July 16, 2012
11:28 PM | Edit Post
Thought I should explain these. I came up with the term microtuts. I have been posting these on my blog. I share a tag & list what I used to make it. Simple. I know I do a lot of the simpler tutorials & tags. I don't always want to write the full length tutorial but would love to share the tag. This way I can share what I used & you can see the tag I made with them. I'll still do full tutorials from time to time don't worry. Just with everything I do I don't always have time or inspiration for them. I find that sometimes just playing generates better tags. This way I can feature scrappers & artists on my blog :)
Labels:MicroTut,Thoughts | 0
comments
11:21 PM | Edit Post
This is what I call a Microtut since it is very basic.
I love how this one came out.
I used the artwork of Melissa Dawn available at CDO.
PTU Scrap is True Blue Friends by Honored Scraps Blog
Hope you guys like it!
Labels:Animals,Friendship,MicroTut | 0
comments
Sunday, July 15, 2012
9:44 PM | Edit Post
This is what I call a Microtut since it is very basic.
Sharing another one by me today.
This one came out just adorable.
Here is what I used for the tag.
TreseMask0042
Blog
Tube by Sandlady
Picsfordesign
Scrap Fairy Bunny by
Scrappin Krazy Designs at
TaggersDelight
Sharing another one by me today.
This one came out just adorable.
Here is what I used for the tag.
TreseMask0042
Blog
Tube by Sandlady
Picsfordesign
Scrap Fairy Bunny by
Scrappin Krazy Designs at
TaggersDelight
Labels:Angel,Animals,MicroTut,Tag | 0
comments
8:06 PM | Edit Post
Sharing a tag I did today.This is what I call a Microtut since it is very basic. I used a tube & scrap combo from Zindy.It is available at her store. The scrap is by Jo of CBJ. Both are just wonderful. Just an overall happy mood tag.
Labels:Angel,MicroTut,Tag | 0
comments
Saturday, July 14, 2012
2:22 PM | Edit Post
I've been very lucky to test a couple tubes by Lisa Cree. I just love these new ones she is doing. Hopefully soon they will be up at PSPTUBESTOP I used two scraps by CBJ from her Colour Pop Collection.
Labels:Fantasy,Kids,Tag | 0
comments
Tuesday, July 10, 2012
9:08 PM | Edit Post
Candy Stripe
This tutorial was written
by Sarah Fiack on
July 10,2012
Any resemblance to another
tutorial is purely coincidental.
For this tutorial, I’m using a tube
by Helena Reis. It is available at
Dreamscape Imaging
Supplies:
Tube of choice
Weave Background by me
Here
Plugins: Toadies What are you
Funhouse Tremors
Open a 600x600 new image.
Open up your tube of choice.
Open up the weave background which
I have provided.
On the weave background,
rotate free rotate 90 right.
Copy & paste as a new layer
onto your new image.
Using your magic wand tool,
hold shift button down,
click one row on the weave.
Selections modify expand by 2.
Add a new raster layer.
Fill this with a color from your tube.
Now back on the weave, click
on the next row. Repeat the above steps
& fill with a different color this time.
Repeat this so you have 5 different
rows/ columns of color for the background.
Add a drop shadow to the original weave
background.
2,2,50,5 Black.
Merge the weave layers together.
Resize 85%.
Paste your main tube as a new layer
above the weave layer.
Duplicate the weave layer once.
On the bottom layer, apply the plugin
Toadies What are you -
default settings.
On the weave duplicate layer,
apply the plugin Funhouse Tremors
default setting.
Select a font tool.
Choose a font of choice.
On your materials palette,
Fill set to a dark color.
Font settings: Stroke width 0.0
Font size 12 or best for your font.
Type out Candy Stripe or
saying to fit your tube.
Convert to raster.
Rotate the text layer.
Rotate free rotate right 90.
Position along one side of
the tag.
Merge layers visible.
Crop to desired size.
Add artist copyright information
& name
Save as png.
Thanks for trying my tutorial.
Labels:Cute,Food,FTU,Tutorial | 0
comments
12:45 AM | Edit Post
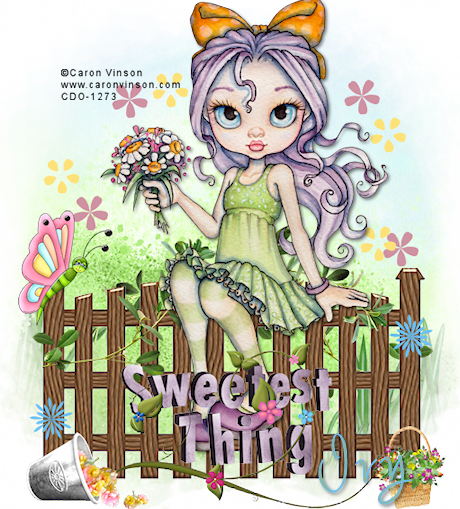
Sharing a tag I made tonight. This is what I call a Microtut since it is very basic.
I did this for a challenge in the forum ACDiva.I love that place! It was a psp brush challenge. I used a tube/scrap combo available at CDO.The tube is by Caron Vinson. The scrap to match the tubes is by LHD.
I also used flower brushes which you can find here. I also used a mask by insatiable dreams.
I love how it came out. Such a whimsical spring feel to it. The tag really reminds me of my daughter.

Monday, July 9, 2012
7:38 PM | Edit Post
Ballpark
This tutorial was written
by Sarah Fiack on
July 9,2012
Any resemblance to another
tutorial is purely coincidental.
For this tutorial, I’m using a
tube by PinUpToons
You can purchase his tubes at CDO
Supplies:
Tube of choice
Scrap of choice.
I’m using one by designs by sarah
Called Batter Up
It is available at Pimp My Tags
with Scraps
Store
FTU Wordart by Elegant Wordart
Blog
Open a 600x600 new image.
Open up your tube & scrap supplies.
Choose a square frame.
Paste as a new layer.
Click inside the frame with your
magic wand tool.
Selections modify expand by 8.
Paste paper of choice as a
new layer.
Selections invert & press delete.
Move the paper layer under the
frame layer.
Keep selected.
Open a baseball field.
Paste between the two layers.
Position as wanted on the tag.
Press delete.
Select none.
On your main tube, copy & paste
on your main tube.
Resize 50% twice.
Position on the baseball field as wanted.
I arranged three tubes on the field.
Add a drop shadow to the frame &
baseball field layers.
2,2,50,5 Black.
Open a bat element.
Resize 70%.
Paste along one side of the frame.
Open a baseball.
Resize 50% twice.
Paste by the bottom of the bat.
Open a chain link element.
Resize 80%.
Paste on the bottom layer of
the tag.
Open a wordart of choice.
For the one I am using, I resized by 50%
three times.
Paste as a new layer onto your tag.
Merge layers together.
Crop to desired size.
Add artist copyright information & name.
Thanks for trying my tutorial.
Labels:CDO,Sports,Summer,Tutorial | 0
comments
12:04 AM | Edit Post
Well when I started this blog I wanted to work on being more positive. I am failing at it lately. My inner demons have shown their heads a lot. I find i am being more negative and talking to myself in a way that isn't good. I could of easily kept this to myself but as this blog is part of me, and I wanted to be more positive I felt i should share here. The demons are very cruel when they choose to be. I am very cruel to myself and therefore, I am not the nicest person for my family. So now I must work on being more positive to myself and therefore to others.
The band Otherwise, a favorite of mine, has a song called Lighthouse. In it is the lyric " Trapped behind this tangled steel, at a loss for words,
I don't know how I really feel, did I get what I deserved?
A second chance or a second curse, I struggle to decide."
I was putting stuff back in the fridge & it popped in my head that i got what i deserved - that I always get what i deserve. Then I wondered what do I deserve? I certainly am blessed in life with a healthy family that loves me. We went on a wonderful vacation last month to San Diego. There are plenty of things to be happy about in life. Yet at the time I was certain I deserved nothing but bad. Well time to quit that thinking. I don't need anymore of that. So I shall continue to work on the journey to be more positive.
Does anyone want to join me on this journey? Kind of cheer each other on & be there for one another if we fall - help one another get back up & dust ourselves off to continue?



Labels:Positive,Thoughts | 0
comments
Sunday, July 8, 2012
7:47 PM | Edit Post
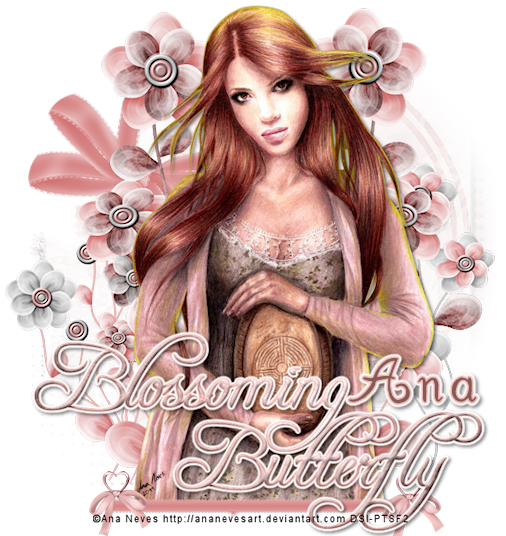
Blossoming Beauty
This tutorial was written
by Sarah Fiack on
June 8, 2012
Any resemblance to another
tutorial is purely coincidental.
For this tutorial, I’m using
a tube by Ana Neves
You can purchase this tube at
CDO.
Supplies:
Tube of choice
Scrap of choice.
I am using a PTU scrap called Butterfly Kisses by
tlpDesignz. It is also available at
Dreamscape Imaging.
Plugin: Eyecandy4000 Gradient Glow.
Open a 600x600 new image.
Open your tube & scrap supplies.
Select a frame of choice.
Copy & paste the frame
as a new layer.
Click inside the frame with
your magic wand tool.
Selections modify expand by
8.
Paste a paper of choice as
a new layer.Selections invert
& press delete. Select none.
Move the paper layer underneath
the frame layer.
Add a drop shadow to your
frame layer.
2,2,50,5 black.
Paste your main tube on the
top layer of the tag.
Position as wanted on your tag.
Add the above drop shadow to the
tube layer also.
Open a standing flower element.
Resize 70%
Paste twice behind your main tube &
position to the side slightly.
You want a flower behind each side
of your main tube.
Open a 2nd flower.
The one i used has its petals turned more
up towards the sky.
Resize 50%.
Position on tag as you did the previous
flowers.
Duplicate each of the 2nd flowers once.
Resize each flower copy 50%.
Position down beside your tube on
either side of it.
Open two different flower clusters.
Resize each one 40%.
Paste one on the left & one on the right
side of your tube.
You want the clusters on the bottom
of the flower layers.
Open a bow ribbon element.
Resize 70%. Paste on the upper left side
of your tag. You want the bow below the
flower layers.
Back on the frame layer,
merge the frame and paper layer
together.
On the merged frame layer,
Apply the mask Tresemask0014.
Merge group.
Open a horizontal ribbon.
Resize 50% & 80% once each.
Paste along the bottom ofy our main tube.
Open a bow element.
Resize 20%.
Paste on both ends of the horizontal ribbon.
Open a wordart from scrap.
Resize 80%.
Paste as a new layer onto your tag.
Add a gradient glow to the wordart.
EyeCandy4000 Gradient Glow
Setting Fat - color of choice
Glow width 3.00
After adding the gradient glow,
add a drop shadow to the wordart.
2,2,50,5 Black.
Merge layers together.
Crop to desired size.
Add artist copyright information & name.
Save as png.
Labels:CDO,Fantasy,Tutorial,Women | 0
comments
Saturday, July 7, 2012
6:54 PM | Edit Post
New scrap by me. I based it off a bear by Ken Morton. The tube is available at CDO. I hope soneone can use it. Would love to see any creations made with it.
Download the kit here.
Download the kit here.
Labels:FTU,Scrap | 2
comments
Friday, July 6, 2012
11:24 PM | Edit Post
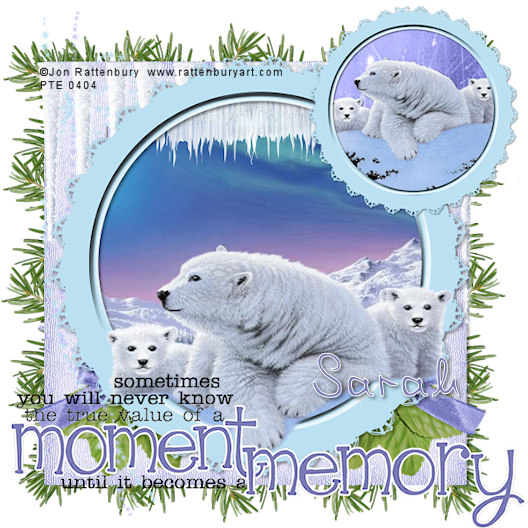
In addition to cupcakes, I love bears. I always have. I wanted to share this tag I did featuring polar bears. The image & tube I used is by Jon Rattnebury & available at PTE. I used a scrap by Schnegge called Lil Winter Girl. You can find her scraps on her blog. I also used a FTU wordart which you can find at Word Art World blog. Having traveled to San Diego zoo, Safari Park & Sea World, the polar bears are still very fresh in my mind. It made this tag extra special to me.

Labels:Animals,MicroTut,Tag,Winter | 0
comments
Thursday, July 5, 2012
10:21 PM | Edit Post
Midnight Dreary
This tutorial was written
by Sarah Fiack on
June 5, 2012
Any resemblance to another
tutorial is purely coincidental.
For this tutorial, I’m using
a tube by Ida Larsen.
You can purchase this tube at
Dreamscape Imaging
Supplies:
Tube of choice
Scrap of choice.
I’m using a PTU scrap called The Raven
by Pimp'd Designz.
It is available at PMTwS.
WSL Mask269 by weescottlass creations
Blog
Open a 600x600 new image.
Open a tube of choice along with
your scrap supplies.
Copy & paste a paper of choice.
Apply the mask WSL Mask269.
Merge group.
Now paste a 2nd paper as a new layer
above the mask layer.
Apply the same mask to this layer.
Merge group.
Resize this layer 90%.
Add a drop shadow to the 2nd mask
layer.
2,2,50,5 Black.
Open written text from the scrap.
Resize 80%.
Paste on the 2nd mask layer of
the tag.
Open an open book element.
Paste as a new layer.
Position along the bottom of the
mask layers.
Open a moon element.
Resize vt 50% twice.
Paste directly above the book
on the tag.
Open tree branch element.
Resize 80%. Mirror.
Paste as a new layer.
Paste your main tube as a new
layer. Position along one side
of the tree branch layer.
The tube I am using has a sepearte
bird layer on it.
I pasted the bird on the tree branch once.
You can use a bird from a scrap if your tube
doesn't have a bird layer.
Add a drop shadow to the main tube
& bird layer.
2,2,50,5 Black.
Select your font tool.
Select a font of choice.
Stroke width 1.0
On your materials palette
Stroke light color
Fill dark color.
Type out a quote of choice.
Convert to raster.
Add the earlier drop shadow to the text.
Merge layers visible.
Crop to desired size.
Add artist copyright information & name.
Save as png.
Thanks for trying my tutorial.
Labels:Angel,Gothic,Tutorial | 0
comments
Wednesday, July 4, 2012
10:39 PM | Edit Post
Copy Cat
This tutorial is animated.
To view the animation click here
This tutorial was written
by Sarah Fiack on
July 4th, 2012
Any resemblance to another
tutorial is purely coincidental.
For this tutorial, I’m using
a tube by Maria Van Bruggen.
You can find the tube at
Dreamscape Imaging
Supplies:
Tube Of Choice
Animation Shop
Open a 600x600 new white image.
Open up your tube of choice.
Copy & paste your tube onto your
new image.
Select your preset rectangle tool.
On your materials palette,
Stroke -light color from tag.
Fill -dark color from tag.
Width 5.00
Draw out a good sized rectangle
about the height of part of your tube.
Convert to raster.
Move this layer behind your main tube.
Draw out a narrow vertical rectangle.
Move this layer behind the first two layers.
Duplicate once & move the copy layer to
the side slightly.
Add words of choice to the tag.
I chose the words " Hey Copy Cat".
Convert to raster.
Now back on your tube layer,
take your selection tool & select around
part of the tube you want to copy for animation.
Copy & paste as a new image in your psp.
If needed, erase parts around the image.
Resize all layers 88%.
Add artist copyright information & name.
We're going to start animation process now.
Open Animation Shop.
Copy merged your tag and paste as a new animation
into AS.
Now back in PSP, take your separate image from
your tube that you selected & copied earlier.
Paste as a new layer behind your tube layer.
You want part of it visible and the rest hidden.
For the tube I am using I pasted a piece of paper by the copy
machine to replicate it coming out of the copier.
Copy merged & paste after current frame in AS.
Go back to PSP. Move the paper or image over just slightly.
Copy merged & paste after the 2nd frame.
Repeat this step until you have 7 frames in AS.
Now staying in AS.
Edit Select all. Copy.
Paste after new animation.
Select all - Animation -Reverse Frames.
Copy.
Back to the original animation.
Select the 7th frame.
Paste after current frame.
Select all -Animation -Frame Properties -change to 15.
View animation.
If happy, save as gif.
Thanks for trying my tutorial.
Labels:Animals,Animation,FTU,Tutorial | 0
comments
Tuesday, July 3, 2012
8:16 PM | Edit Post
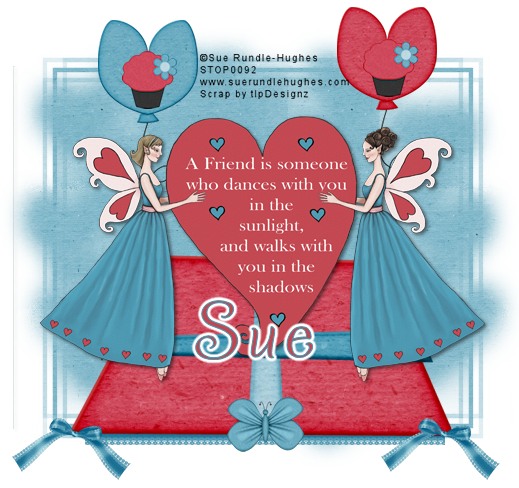
Friendship Heart
This tutorial was written
by Sarah Fiack on
July 3, 2012
Any resemblance to another
tutorial is purely coincidental.
For this tutorial, I’m using a tube
by Sue Rundle-Hughes. It is available at
PSPTUBESTOP
Supplies:
Tube of choice
Scrap of choice.
I’m using a kit called Surprise
by tlpDesignz. It is only available
at Dreamscape Imaging.
WSL Mask187 by weescottlass creations
Blog
Open a 600x600 new image.
Open up your tube & scrap supplies.
Copy & paste your tube as a new layer.
Add a drop shadow to the tube.
2,2,50,5 Black.
Open a rug or mat element.
Paste on the bottom layer of the tag.
Position underneath your main tube.
Open two balloon elements.
Resize each one 80%.
Paste on each of the upper
corners of the rug behind your tube.
One balloon on the left side.
One balloon on the right side.
Open up one cupcake element.
Resize 25% once & 80% twice on the
cupcake. Paste one cupcake per balloon.
You want it to appear the cupcakes are
on the balloons.
Oepn a butterfly element.
Resize 25%.
Paste on the bottom center of the rug element.
Open a ribbon element.
Resize 50%
Paste at bottom of the rug -underneath the rug
layer in the layer palette.
You want the ribbon to appear to be coming
out from underneath the rug.
Open a bow element.
Resize 25%.
Paste on the two bottom corners of the rug.
You want them to appear as corner "tassels" of the rug.
Copy & paste a paper of choice on the bottom
layer of the tag.
Apply the mask WSL Mask187.
Merge group.
Merge layers visible.
Crop to desired size.
Add artist copyright information & name.
Save as png.
Thanks for trying my tutorial.
Labels:Angel,Friendship,Love,Tutorial,Words | 1 comments
Monday, July 2, 2012
7:10 PM | Edit Post
Pride Heart
This tutorial was written
by Sarah Fiack on
July 2nd, 2012
Any resemblance to another
tutorial is purely coincidental.
For this tutorial, I’m using
a tube by Robin McQuay.
You can find the tube at
Dreamscape Imaging
Supplies:
Tube Of Choice
Plugins:
Mura's Meister Copies
Alien Skin Xenofex 2 Rip Open
EyeCandy 4000 Gradient Glow
Open a 600x250 new image.
Open up your tube of choice.
Paste your tube as a new layer
onto your new image.
Duplicate this layer once.
X out this layer for now.
Now back on the original layer,
Apply the plugin
Mura's Meister Copies
Wallpaper rotate default settings.
Effects Art media effects
Brush strokes
Softness 20
Brush Bristles 160
Width 5
Opacity 50
Strokes Length 10
Density 25
Angle 102
Effects edge effects enhance once.
Now unhide the duplicate layer &
select that one in your layer palette.
Apply Alien Skin Xenofex 2 Rip Open
Select the setting lots of small rips
default settings.
Add a drop shadow to this layer.
2,2,50,5 Black.
Back on the original tube,
Resize 70%.
Paste as a new layer onto your tag
between the two layers.
Add the above drop shadow also.
The tube I am using has a heart on
a sepearte layer.I resized this layer 50%.
Paste a heart element on both sides of
your main tube.
Now select your font tool.
Choose a font of choice.
We're going to add a word to each
corner of the tag. Each word will be in
a different color.
I used the words
Love
Acceptance
Pride
Equality.
You can choose words for your tag.
Once you have your four words,
apply the plugin
EyeCandy 4000 Gradient Glow
Setting Fat
Glow width 3.00
Also add the earlier drop shadow.
Merge layers together.
Add artist copyright information & name.
Save as png.
Thanks for trying my tutorial!
Labels:Charity,Forum Style,FTU,Tutorial | 0
comments
Sunday, July 1, 2012
5:37 PM | Edit Post
This is what I call a Microtut since it is very basic.
For this tag I used a tube & scrap collection called Ocean Love. They are available at Zindy's store. The scrap is by CBJ. You can purchase the tube & scrap together at Zindy's store.Being that I am near the ocean i had to share the tag. We love going to the beach & seeing the ocean. It can really cleanse & renew the spirit.
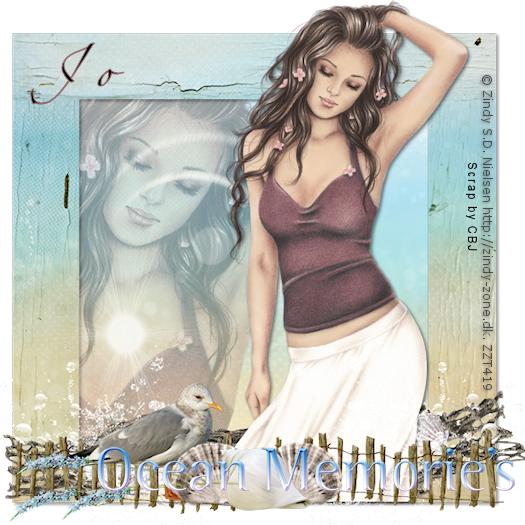
For this tag I used a tube & scrap collection called Ocean Love. They are available at Zindy's store. The scrap is by CBJ. You can purchase the tube & scrap together at Zindy's store.Being that I am near the ocean i had to share the tag. We love going to the beach & seeing the ocean. It can really cleanse & renew the spirit.

Labels:MicroTut,Nature,Ocean,Tag | 0
comments
Subscribe to:
Comments
(Atom)
TOUs
I do not allow resizing of my tags, timelines or wallpapers. All of my creations are for PU only unless otherwise stated. Nor are they to be altered in any way either.
Categories
- Abstract (22)
- ACDivas (2)
- Ad (1)
- addictive pleasures (3)
- ADI (2)
- Adriennes Design (6)
- Adult (8)
- Alicia Mujica (61)
- Amber (6)
- Amy Marie (222)
- Andrea Gibson (1)
- Angel (97)
- Animals (468)
- Animation (107)
- Anime (11)
- AORK (10)
- AOTW (8)
- Apocalyptic (5)
- Art-Content (1)
- Asian (8)
- Attitude (57)
- Authors (9)
- Autism (5)
- Autumn (39)
- award (3)
- Baby (1)
- BAS (1)
- BCA (7)
- BCS (28)
- Bella Caribena (2)
- birthday (3)
- Birthstone (10)
- Blaque Heart Designz (11)
- BLT DeZignZ (11)
- book suggestions (6)
- Cajoline (1)
- Calendar (2)
- Carnival (1)
- Carpe Diem (6)
- Cars (4)
- Casino (3)
- CCD (12)
- CCS (18)
- CDO (1545)
- Celestial Scraps (2)
- Celinart Pinup (1)
- Chaos Priestess (73)
- Charity (29)
- Chasing The Blues (2)
- Chelloenix Blog (1)
- Chichi (65)
- Children (30)
- Christmas (173)
- Cluster Frame (42)
- Color (6)
- Comic (6)
- copyright (2)
- Country (33)
- Crafty (2)
- Crazed Creations (1)
- Creative Misfits (3)
- CRM (23)
- Crowe (17)
- Crystal's Creations (20)
- CSBC (76)
- CU (12)
- cupcake (60)
- Cupcakes (44)
- CUPU (4)
- Cute (205)
- DAH (95)
- Dees"SIGN Depot (65)
- Devil (1)
- Dia De Los Muertos (2)
- Digital Chaos (61)
- Doodle by Design (40)
- Dreams (63)
- DSI (2)
- Easter (49)
- ELF (14)
- EliasC. (25)
- Elli's Creations (2)
- Emo (29)
- emotion (27)
- Extras (81)
- Fairy (185)
- Fall (182)
- Family (21)
- Fantasy (325)
- Farrah (4)
- Feature Tutorial (3)
- Food (165)
- Forum Style (38)
- Foxy's Designz (92)
- Freeks Creations (35)
- Freya (5)
- Friends (20)
- Friendship (14)
- FTU (122)
- Garv (20)
- Gimptastic (146)
- Gingerscraps (2)
- Girly (125)
- Goldwasser (8)
- Gothic (352)
- Gothic Inspirations (12)
- Guest CT (28)
- Halloween (221)
- Hania's Design (9)
- Happy (15)
- Happy New Year (8)
- Heartfelt Perfections (2)
- Help 4 Casper (2)
- Hollywood (4)
- Honored Scraps (230)
- Hungry Hill (171)
- Ilonka's Design (1)
- Inspiring (8)
- Irish Princess Designs (118)
- Jensen (106)
- Jose Cano (1)
- Karmalized (108)
- Kids (12)
- Kissing Kate (4)
- Kizzed by Kelz (81)
- Ladyhawwk (306)
- LaReina Designz (1)
- Layout (6)
- Learning (4)
- Life (98)
- LML Designs (1)
- Love (229)
- Magic (33)
- Mardi Gras (2)
- MellieBeans (11)
- Mental Health (5)
- Mermaids (67)
- MicroTut (19)
- Misc (6)
- Misticheskaya (25)
- Monsters (1)
- Monti's Scraps (22)
- Moon (56)
- MTA (18)
- Music (59)
- Mystery (1)
- Mystical Scraps (184)
- Nature (220)
- Nerd/Geek (1)
- New Years (10)
- Nocturne (27)
- Norella (3)
- Ocean (143)
- Overlays (10)
- Pagan (59)
- Paranormal (1)
- Patriotic (15)
- Peace (4)
- Phone Wallpaper (10)
- Photo (4)
- Pimp'd Designz (3)
- Pimpin Pspers Warehouse (3)
- Pink Paradox (1)
- Pinterest (1)
- Pirates (4)
- Poems (1)
- Poetry (11)
- Poser (4)
- Positive (7)
- Presents (2)
- Promo (25)
- PS (1)
- PSP (3)
- PTU (20)
- PU (1)
- Queen Uriel (43)
- Quickpages (14)
- Rac (9)
- Rebecca Sinz (174)
- Rebel Designz (123)
- Rene Kunert (27)
- Retro (7)
- Rissa's Designs (8)
- RMQ (47)
- Robot (2)
- Sale (3)
- Sams Scraps (1)
- Savage Dezines (2)
- Schnegge (14)
- School (21)
- Sci-fi (3)
- Scrap (23)
- Scrappin with lil ole me (1)
- Scraps of enchantment (1)
- Selina Fenech (13)
- Sexy (149)
- SGRowe (3)
- Sissys Sassitude (3)
- Snowmen (2)
- SophisticatSimone (8)
- Spazz (17)
- Special Friends (2)
- Sports (12)
- Spring (162)
- St Patty's Day (34)
- St. Patricks (1)
- starlite & soul (4)
- Steampunk (26)
- Summer (110)
- summerween (1)
- Sweet (3)
- SWLOM (1)
- Tag (44)
- Taggers Delight (7)
- tagging (1)
- Tasha's Playground (88)
- Tech (4)
- Template (11)
- Thanksgiving (12)
- Thoughts (103)
- Timeline (210)
- Timelines (70)
- Tiny Turtle (4)
- TKDezigns (36)
- Tony T (3)
- Tonya (3)
- Toon (1)
- TPP (8)
- Travel (1)
- Treasured Scraps (7)
- Tresured Scraps (26)
- Tutorial (220)
- UYA (6)
- Valentine's Day (98)
- Verymany (64)
- Vi NIna (1)
- Vintage (112)
- Wallpaper (465)
- WDDesignz (38)
- Western (2)
- Whisprd Desginz (10)
- Wicked Diabla (18)
- Wicked Princess (171)
- Winter (137)
- WITW (1)
- Women (188)
- Wordart (12)
- Words (57)
- Zaric (3)
- Zindy (66)
- Zodiac (2)
- Zombies (11)
Followers
Blog Archive
-
▼
2012
(158)
-
▼
July
(31)
- Just Learning Scrapkit PTU
- Pissed Off
- Breathless Snag Tags
- Overlays Ad
- Peaceful Fairy Snags
- Paint Drips
- Remember To Breathe
- Lavender Laugh
- Zoo Animals FTU Scrap
- CU Baseball Overlay Freebie
- Chris Harper Snags
- Bubble Mermaid
- CU Overlays By Me
- Exclusive Scrap For ACDiva Forum
- About Micro Tuts
- Friendship Cat Micro tut
- Angel Cat Micro Tut
- Pink Ribbons Tag
- Tags Featuring Lisa Cree Artwork
- Candy Stripe
- Caron Vinson Tag
- Ballpark
- Battling My Demons
- Blossoming Beauty
- Love Bear Scrap
- Polar Bear Moments
- Midnight Dreary
- Copy Cat
- Friendship Heart
- Pride Heart
- Ocean Memories
-
▼
July
(31)


