


Friday, May 31, 2013

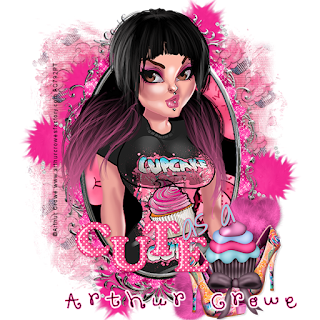
Cupcake toon by Arthur Crowe & matching scrap - perfect for those who love cupcakes & a little attitude. Of course I just love this. Available in his store.

Thursday, May 30, 2013
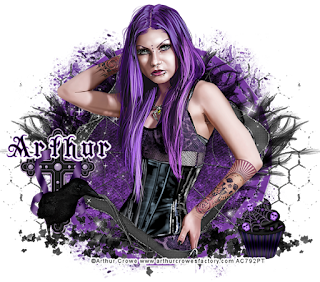
Coming soon by Arthur Crowe. This awesome gothic tube called purple shadows. There is also a matching kit to go with it. Both will be available in his store

Tuesday, May 28, 2013
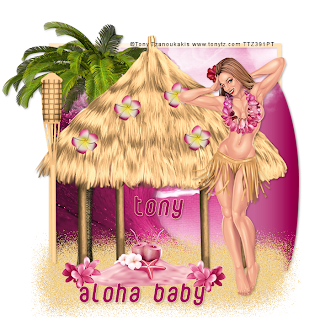
New tag & matching kit featuring the new release Hula girl by Tony. Wonderful island summer combination! You can find both in his store.

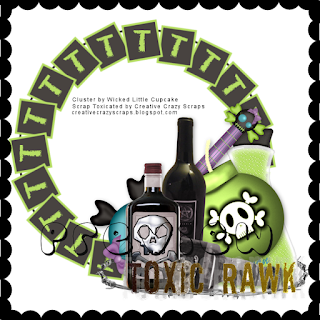
Monday, May 27, 2013
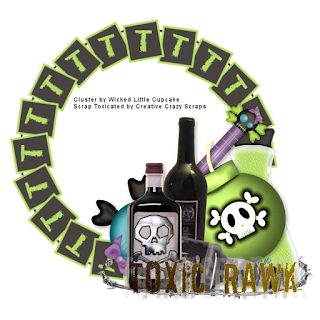
I did a fun cluster using a PTU kit called Toxicated by Creative Crazy Scraps. I hope you guys like it! You can right click & save the cluster. Remember its for personal use only.


Saturday, May 25, 2013

Radiance Lollipop
This tutorial was written
by Sarah Fiack on
May 24,2013
Any resemblance to another
tutorial is purely coincidental.
For this tutorial, I’m using a tube
by Arthur Crowe. It is available for purchase
at his store.
I am also using a matching kit
called Lollipop scrap which is also available
at his store.
Supplies:
Circle1mask_byCaro - I have not been able to locate this mask. If you are the creator of the mask
please let me know so that I may link it.
gemsmasks 107 Blog
Animation Shop
Plugin Xero radiance
Open a 700x700 new white image.
Add a new raster layer.
Choose your fill tool.
On your materials palette,
stroke palette - gradient -rainbow
Angle 0 Repeats 1
Fill this layer with the rainbow gradient.
Apply the Circle 1 by Caro mask.
Merge group.
Select your Ellipse preset
shape tool. You want the
Draw Circle icon selected.
On your materials palette,
select both to white.
Draw out a white circle the same
size of your rainbow mask.
Convert to raster.
Move the circle layer underneath
the mask layer.
Select the circle layer with your
magic wand tool. Paste a close up of
your main tube as a new layer.
Selections invert & press delete.
Select none.
Merge the close up & circle layers together.
Apply the plugin Xero Radiance
Strangeness 128
Charm 50
Truth 128
Beauty 255
Open a speaker element.
Resize 88%.
Paste along the bottom of the
previous layers. You do want it in front
of the two layers.
Add a drop shadow to the mask & speaker
layers. 2,2,25,5 Black.
On your main tube. Resize if needed.
For mine, I resize 75%.
Paste in front of the speaker element.
Also add the above drop shadow as well.
Open piano keys element.
Resize 70%. Paste on the bottom layer of
the tag. Arrange so that everything appears to
be "sitting" on the keys.
Open a cupcake element.
Resize 50% twice.
Paste in front of your main tube.
Open a lollipop element.
Resize 50% once.
Paste on a side of the tag behind
the speaker element.
Also add the the above drop shadow.
Go back to your ellipse preset shape.
Choose the circle shape again.
Width 2.0
On your materials palette, stroke color
black. Fill palette X'ed out.
Draw a good sized circle.
Do not convert to raster yet.
Choose your text tool.
On your Materials palette,
stroke - rainbow gradient
fill - black or color of choice.
Hover your mouse over the above circle
layer. When it has the A) icon, start typing
out your words of choice. You want them to
curve along the circle.
Once you are happy, on your layers palette,
click on the eye icon by this layer.
This should open up the layers on the layer.
X out or hide the circle but leave the text visible.
Convert to raster.
Add a new raster layer above the white layer.
Fill with the color black.
Apply the mask gemsmasks 107.
Merge group.
Now merge the layers above the rainbow
gradient mask layer.
Also merge the layers below it but don't merge
the rainbow layer.
Add artist copyright info & name.
If you don't wish to animate then you can
save the tag now.
To animate:
Open up animation shop.
Copy & paste the rainbow gradient mask layer
as a new animaiton.
Now back in psp, rotate free rotate this layer
right 25.00
Copy & paste back in AS after current frame.
now return to psp.Do not undo the previous rotation!
Rotate free rotate right 25.00
Repeat with pasting in AS this time after the 2nd frame.
This should give you 3 frames so far.
Return to psp one more time, rotate one more time.
Paste again in AS for a total of 4 frames.
Now in psp, copy the bottom merged layers.
Paste in AS as a new animation.
Ctrl L - press L a total of 4 times to duplicate
this to 4 frames.
Select all.
On the rainbow animation, select all & copy.
Drag onto your bottom layers which you just duplicated.
Once happy with the placement, go back into psp
& copy the merged top tag layers.
Repeat the above to get them onto the top of your tag.
Select all - Animation - frame properties
change to 20 - or a desired number for animation speed.
The higher the number the slower it goes.
View animation.
if you are happy, then save the tag as a gif.
Thanks for trying my tutorial.
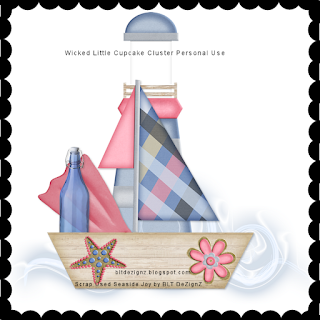
Friday, May 24, 2013
Wanted to share a new cluster by me. I used a PTU scrap called Seaside Joy by BLT DeZignZ. It is an adorable sea themed kit!
Download Here

Download Here
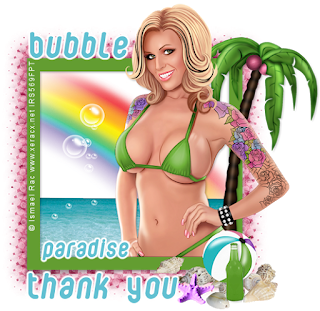
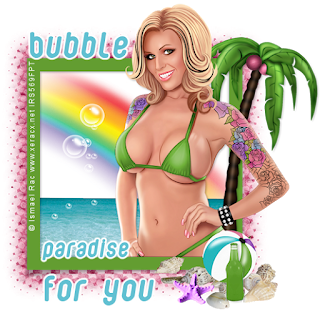
Wednesday, May 22, 2013
Here are a few snags using the revamped Penny 2013 tube available soon at Rac's store. Great tube & kit to help get you in the summer mindset. I think we're all ready for summer here!


Tuesday, May 21, 2013

Ms. Patriotic
This tutorial was written
by Sarah Fiack on
May 21,2013
Any resemblance to another
tutorial is purely coincidental.
For this tutorial, I’m using a tube
by Ismael Rac. It will be available for purchase
soon at his store.
Supplies: I am also using a matching kit
called 2013 penny's tats 2. The scrap kit is
also available at the store.
Plugin: Toadies blast em
Xero Radiance
EyeCandy4000 Gradient Glow
Open a 700x700 new image with white background.
Open up your tube & scrap supplies as well.
Choose a frame of choice.
Copy & paste onto your new image.
Click inside the frame with your magic wand tool.
Selections modify expand by 5.
Paste a scrap paper of choice as a new layer.
Selections invert & press delete button on keyboard.
Move the paper layer underneath the frame in your
layers palette.
Resize your tube if needed. For the one I used, I resized
55%. Copy & paste between the two layers.
Duplicate once. Move the tube copy layer to above
the frame layer. Hide for now.
Back on the original tube, press delete.
Select none.
Now unhide the tube copy layer. Make sure it is selected
in your layer palette.
Take your eraser tool. Erase parts of the tube showing past
the frame which you do not want to show. You may need to hide
the original. And also lower the opacity of the tube copy layer so
that you can see the frame through it.
This helps with the erasing part.
Once done, you can unhide the original tube & put the opacity
back up to 100% on the copy layer.
Add a drop shadow to frame & original tube layer
2,2,25,5 Black.
Open up an exploding firework element.
Paste on the bottom of the tag underneath all
the previous layers.
Duplicate the firework element once.
On the bottom layer, apply the plugin Toadies blast em
Default settings.
Paste a ribbon as a new layer on top of the tag.
Add the earlier drop shadow to the ribbon.
Position near the bottom of the tag. Open a rocket element.
Resize 50% & 80% once each. Paste on right side of
the tag.
Open a pair of flip flops. Resize 30% & mirror.
Paste on the left side of the ribbon.
Open a hanging star element.
Resize 50% & arrange to appear to
be hanging from the frame on one side.
Click inside the hanging star element with magic wand.
Selections modify expand by 3.
Paste your tube so that part of it appears inside the star.
Selections invert & Press delete.
Select none.
Move the tube part underneath the star.
On the tube part inside the hanging star, apply the
plugin Xero Radiance.
Strangeness 128
Charm 50
Truth 128
Beauty 255
Merge the tube part & hanging star element together.
Choose your font tool. Choose a nice fat chunky type font.
Type out words of choice for your tag. Convert to raster.
Apply Gradient glow Fat glow width 3.00
Then apply the gradient glow solid blue also.
Add the earlier drop shadow to the text also.
Resize layers 85%. Add artist copyright information.
Now to do the animation.
First, duplicate 2 more times the firework layer with
the Toadies Blast em effect on it.
On the bottom one, adjust -add noise
uniform 15
Middle layer is same except change number to 25.
The top one the number is 35.
Hide the top two layers until we need them in a bit.
Now open Animation shop.
Copy & paste your hanging star as a new animation.
Effects - Insert Image Effects -Tv Scanlines
Effect length 1.7 secs Frams 3 fps
Move to the side for now.
Back to psp, X out the hanging star on it.
Make sure the bottom blast firework layer is visible.
Copy merged & in Animation, paste as a new animation.
Back to psp, hide that layer & open the next one above it.
Copy merged & paste after current frame in AS.
Repeat the above steps with the last blast firework layer.
Now staying in AS, Select the 3 tag frames. Copy & paste after
the 3rd frame.This should give you a total of 6 frames.
Select all of the tag frames,
Back to the star animation, select all & Copy.
Drag over to the desired position on the tag.
Once all positioned, select all, view animation.
Just to make sure its as you want everything on the tag.
If you are happy, save as gif. Thanks for trying my tutorial!
Monday, May 20, 2013

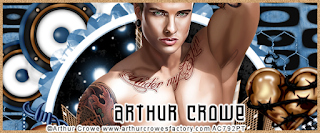
I got the new Arthur Crowe bonus tube. I couldn't resist playing with him lol.
Isn't he just so sexy?? You can find him in the store while he is available.
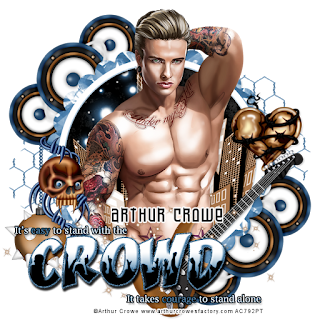

Isn't he just so sexy?? You can find him in the store while he is available.


Wednesday, May 15, 2013
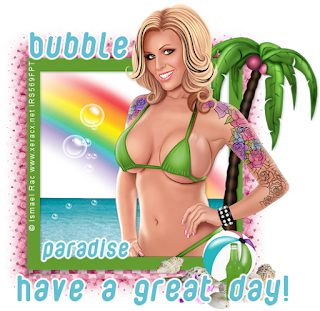
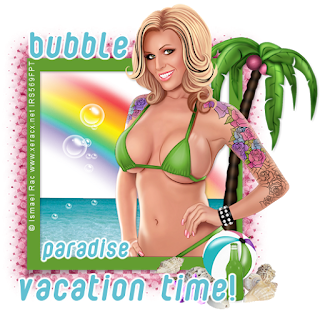
New tag featuring the Aloha tube & matching kit by Roman Zaric.
They are now available in his store. Together they make for a wonderful escape to island paradise.
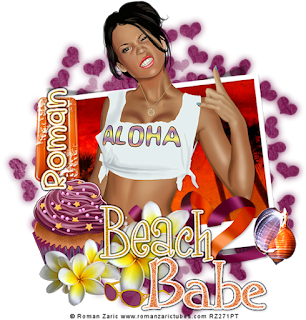
They are now available in his store. Together they make for a wonderful escape to island paradise.

Tuesday, May 14, 2013
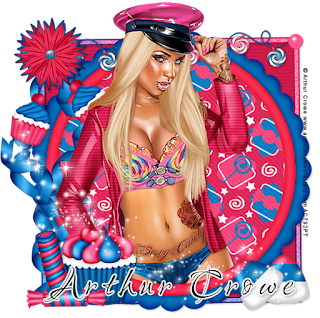
New Promo tag featuring the beautiful candy tube by Arthur Crowe.You can purchase it in his store. I also used the matching scrapkit to the tube. You know I do so love cupcakes..and a sexy one at that is even better.

Friday, May 10, 2013

Centerspot Babe
This tutorial was written
by Sarah Fiack on
May 10,2013
Any resemblance to another
tutorial is purely coincidental.
I am using a tube by Ismael Rac.
You can purchase it in his store.
Supplies
Tube & closeup of choice.
WSL Mask 149 by weescottlass
Blog
Plugins
Muras Meister Copies
Crescent Moon -Warm cloth
VM Stylize
Special Effects 2
Open up a 700x700 new image.
I like to work bigger. We can always
crop our tag image later.
Open up your tube & close up if needed
as well.
Select black for both the
stroke and fill layers on the
Materials palette.
Select your rectangle preset
shape tool. Draw out a
good sized square on your
image.
Convert to raster.
Click inside the shape with
your magic wand tool.
Selections modify expand by 6
( this may vary on your shape )
Paste your closeup as a new layer.
Position on one side of the shape.
You do want it to be inside the shape.
Selections invert & press delete.
Select none.
Now plugin Muras Meister Copies
for the closeup layer.
Wallpaper rotate default settings.
On your layers palette, make sure your
shape layer is selected.
Click with your magic wand tool again.
Now back on the wallpaper close up layer,
Selections invert & press delete.
Select none.
Plugin Crescent Moon -Warm cloth
default settings.
For me, this plugin is with my Filters Unlimited 2.0
Duplicate the wallpaper layer.
On the duplicate layer, apply the plugins
VM Stylize - Square Blur
Default settings.
Special Effects 2 Plugin - Centerspot
default settings
On your layers palette, make sure your
shape layer is selected.
Click with your magic wand tool again.
Now back on the duplicated plugins layer,
Selections invert & press delete.
Select none.
Now on the top layer of the tag,
that we have been applying the plugins,
Selections - select all - float -defloat.
Paste your close up as a new layer.
Selections invert & press delete.
Select none.
On your materials palette, change the
blend mode on this closeup layer to
Overlay.
Choose your font tool. Choose a font which
works with your tag and a color for the font.
Type out text of choice. I am using "Centerspot Babe"
For the first word, I did rotate free rotate -
left 90.00.
This is entirely up to you for placement.
Once I have the text as I wanted, I merged the
two layers together. I set the blend mode also to overlay
on the text layer.
Paste your full tube as a new layer.
Resize if needed. For mine, I resized
50 & 80% once each.
Position along a side of your tag.
Add a drop shadow to the full tube.
2,2,50,5 Black.
Add a new raster layer on bottom of
the tag. Fill with a color of choice
from your tag.
Apply the mask WSL Mask 149.
Merge group.
Merge layers visible.
Add artist copyright information & name.
Save as png.
Thanks for trying my tutorial.
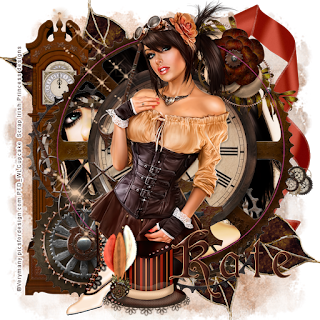
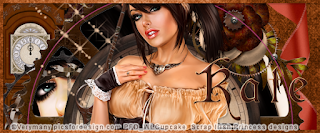
Sunday, May 5, 2013
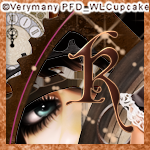
A new tag set by me. This one features a steampunk beauty by Verymany. You can find this tube at Picsfordesign. The scrap is called Steampunk Girl and is by Irish Princess Designs. You caan find it at SCRAP CANDY.


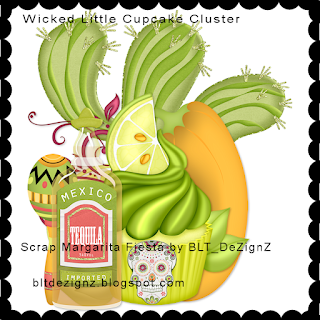
Saturday, May 4, 2013
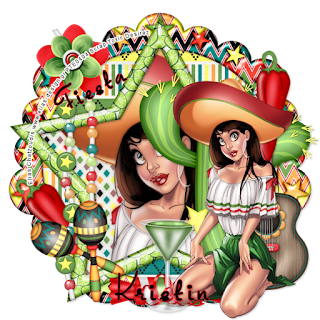
New cluster using a scrap called Margarita Fiesta by BLT DeZignZ. Perfect for all those Cinco De Mayo tags or maybe a party one :)
Download Here

Download Here
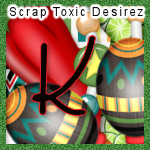
I was asked to join the CT team of Scrap Candy. For my first kit to work with, i used the exclusive kit Fiesta by Toxic Desirez.
I used a tube by Elias Chatzoudis which works just perfectly!.
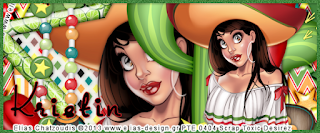
I used a tube by Elias Chatzoudis which works just perfectly!.


Friday, May 3, 2013


Wednesday, May 1, 2013
Coming soon a beautiful bride by Tony Tz! Perfect for all the spring and summer brides!
I also used the matching scrap kit which will also be in the store.
There are also two snag tags for everyone!


I also used the matching scrap kit which will also be in the store.
There are also two snag tags for everyone!


A new release by Roman Zaric called Slaja. I also used the matching kit. You can find both in his store.
I really love the combination of this. I am partial to beach scenes though.
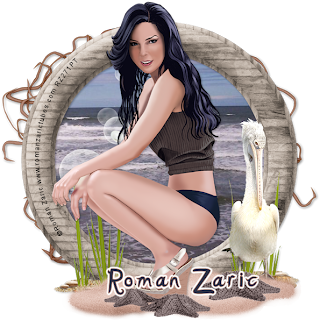
I really love the combination of this. I am partial to beach scenes though.

Subscribe to:
Posts
(Atom)
Zone Award
