



Showing posts with label Sports. Show all posts
Showing posts with label Sports. Show all posts
Wednesday, June 4, 2025


Tuesday, March 1, 2022
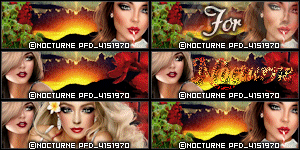
CT timeline featuring the wonderful art of
Misstigri using her tube 7-33. I am also
showcasing the attitude filled IB Michi Art
February 2022 Scrap by Curious Creative Dreams.
Curious Creative Dreams is the Designer Of
The Month at CDO for March. All of his scrapkits
are 25% off this month!
Some people say that I have an attitude- Maybe I do.
But I think that you have to.
You have to believe in yourself when no one else
does- that makes you a winner
right there.- Venus Williams


Saturday, April 4, 2020
CT tag featuring the beautiful art of
Anna Liwanag using her tube 106-1.
I am also showcasing the sports filled
IB Keith Garvey 21-2 by Gimptastic.
She is waiting for her favorite ball
player to come out from the locker room.
She always enjoys snagging some in
action & close up photos of him .
There is something about his smile
that draws her to every game & practice.
Plus, of course, a love of the game.


Tuesday, March 1, 2016
New CT Tag featuring personal
photos take by me & the scrap
Baseball Babe by Gimptastic Scraps.
We are a huge baseball house &
this was perfect for using a couple
photos of my boy playing ball.
Whether you are a guy or a girl,
if you love the sport you will enjoy the kit.
It definitely captures the spirit of baseball.


Tuesday, May 26, 2015
Today I did a layout featuring two photos of my son playing baseball. I used a wonderful scrap by S.G. Rowe Designs called Some Gave All. It is patriotic theme and red,white & blue. You can find it in tagger & full size at Treasured Scraps. It is perfect scrap to honor soldiers or
remember patriotic holidays. As my son is playing for the Nationals in Babe Ruth, I thought
I would feature his photos.


Monday, May 11, 2015
CT tags featuring the sports beauty Ginger by Spazz. She is ready to referee any game. Win or lose she will look great deciding penalities during the game.Don't cross her or the
game may not be to your favor. She'll blow that wistle when she thinks
a team or player is doing something illegal.


game may not be to your favor. She'll blow that wistle when she thinks
a team or player is doing something illegal.


Sunday, March 8, 2015
CT tag featuring the awesome new artist Carpe Diem at Mystical Scraps. I love the attitude that this tube exhudes. Roller derby is all about attitude and this lady certainly has it. She is ready to kick your butt in the match and set her blades on fire while doing it.

Saturday, January 31, 2015
While I'm not a football fan myself (OH THE HORROR) I have plenty of friends who are. In particular, I have close friends who are Seattle Seahawks fans. This tag is for those ladies. I do have to say they are very devoted to their team. I always know when a game is on because I can almost follow the game by the Facebook posts lol. The tube does also come with a Patriots color layer as well.
Art by Freya Here
Football Nut: Seattle Scrap by Wicked Princess Here


Sunday, June 1, 2014
CT tags featuring the new PTU scrap Camping USA by Amy Marie. You can purchase this wonderful scrap at her store. It is jam packed with lots of outdoor camping elements combined with plenty of 4th of July and patriotic elements as well.


Thursday, April 10, 2014
Today I have a cute & fun PTU scrap called Baseball 4 Girls by Amy Marie. This scrap combines being girly & loving baseball into one. It's defintely a must have if you love baseball.
You can purchase this kit in her store.


You can purchase this kit in her store.
Sunday, January 12, 2014

This is a timeline tutorial. But you could easily
convert to a forum style tag.
This tutorial was written
by Sarah Fiack on
January 12th, 2014
Any resemblance to another
tutorial is purely coincidental.
I am using 1 tube by Cris DeLara
which you can purchase at
TPP
No scrapkit needed.
Dingbat font of choice.
I used the font KR All Sport
Plugins:
Muras Meister Copies
VM Natural -Acid Rain
VM Stylize- Motion Trail
Toadies -Glasswork Gray
UnPlugged Tools -REM Lotus
Open a timeline size image.The size
for this is 851x315.Open your tube
of choice.
Fill with a dark color from your tube.
For mine I am using black.
Select your ellipse preset shape tool.
Make sure the circle shape is selected
on the settings.
On your Materials palette,
X out the stroke box as we don't
need it at the moment.
Select a color from the tube for
your fill box. I am using red.
Draw out a smallish circle
on your image. Convert to
raster.
Apply the plugin effect
Muras Meister Copies.
Tiling Angle. Change tile gap
to 2 for this.
Click Okay.
Change the color on your
materials palette for the
fill. I am using a light
purple.
Draw out a large
circle to take up most
of the center of the timeline.
Objects - align -center in canvas.
Convert to raster.
VM Natural Plugin
Acid Rain -default settings
VM Stylize Motion Trail
default settings
Duplicate the circle layer
once. Make sure the
copy layer is selected in your
layer palette.
Apply the plugin Toadies
Glasswork Gray - default settings. Click Apply.
Resize this layer 75%.
Merge the two circles together.
Plugin UnPlugged Tools
REM Lotus -default
Round button -default
Take your tube & paste onto
the circle image you've been
working on.
Resize the tube 60%.
Go to effects - 3d effects-cutout
default settings. Make sure both
colors are set to black. Click okay.
Paste your tube again. Resize 65%.
Position on the left side of the circle.
You want it partly over the circle
and partly off it.
Add a drop shadow to the 2nd
tube layer and the large circle layer.
2,2,50,5 black.
Now click on the multiple
circle layer of the timeline.
Select your font tool and a
font of choice. I am using a sports
dingbat font.
On your Materials palette, select
the fill box to a white or similar color.
Also make sure stroke is set at 0.0
on font settings. Font size to 14 or
as wanted.
For the dingbat I wanted, I did
a Capital E to get bowling icon.
Enlarge if needed. Convert to raster.
Do an icon on each side of the main circle.
Merge the two icons together.
Change the blend mode in your layer
palette to soft light.
Select your rectangle preset shape
tool. Change the fill box on materials to
black. Make sure the rectangle shape is
selected.
Draw out two rectangles on the upper
right side of the timeline. Make one
wider and slightly longer than the
other one. Convert to raster &
merge the two layers together.
Select your font tool.
Choose the white color again.
Select a font you like for your tag.
Add a word per rectangle which fit
yours. I am using Bowling & Strike
for mine.
Merge layers visible.
Add a new raster layer.
Fill with color of choice
from your tag. This is for
the border.
Click the layer with your
magic wand tool.
Selections -contract by 4.Press
delete button on your keyboard.
Select none.
Add artist copyright for the
company timelines. Some companies
vary on their timeline rules.
Make sure to add a name as well.
Save as png or jpeg.
Thanks for trying my tutorial.
Monday, July 9, 2012

Ballpark
This tutorial was written
by Sarah Fiack on
July 9,2012
Any resemblance to another
tutorial is purely coincidental.
For this tutorial, I’m using a
tube by PinUpToons
You can purchase his tubes at CDO
Supplies:
Tube of choice
Scrap of choice.
I’m using one by designs by sarah
Called Batter Up
It is available at Pimp My Tags
with Scraps
Store
FTU Wordart by Elegant Wordart
Blog
Open a 600x600 new image.
Open up your tube & scrap supplies.
Choose a square frame.
Paste as a new layer.
Click inside the frame with your
magic wand tool.
Selections modify expand by 8.
Paste paper of choice as a
new layer.
Selections invert & press delete.
Move the paper layer under the
frame layer.
Keep selected.
Open a baseball field.
Paste between the two layers.
Position as wanted on the tag.
Press delete.
Select none.
On your main tube, copy & paste
on your main tube.
Resize 50% twice.
Position on the baseball field as wanted.
I arranged three tubes on the field.
Add a drop shadow to the frame &
baseball field layers.
2,2,50,5 Black.
Open a bat element.
Resize 70%.
Paste along one side of the frame.
Open a baseball.
Resize 50% twice.
Paste by the bottom of the bat.
Open a chain link element.
Resize 80%.
Paste on the bottom layer of
the tag.
Open a wordart of choice.
For the one I am using, I resized by 50%
three times.
Paste as a new layer onto your tag.
Merge layers together.
Crop to desired size.
Add artist copyright information & name.
Thanks for trying my tutorial.
Subscribe to:
Posts
(Atom)
Zone Award