
Showing posts with label Mental Health. Show all posts
Showing posts with label Mental Health. Show all posts
Friday, January 5, 2024


Thursday, October 26, 2023

Thursday, August 19, 2021
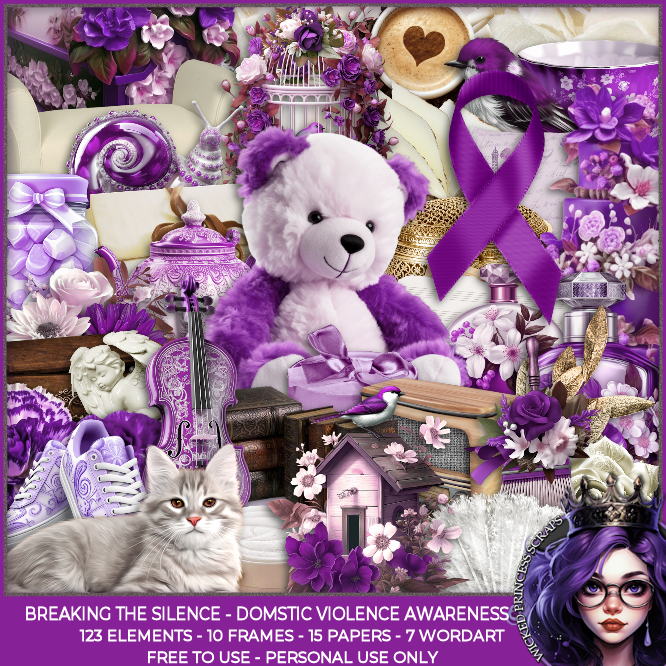
Today I did a tag & matching wallpaper featuring
my absolutely wonderful commission by Queen Uriel.
This beauty of a tube is available in her store.
I wanted a fairy that represents Mental Illness
& depression battle. So many in the world
fight battles with them everyday. I asked for a
semi-colon as it is associated with the battle.
It represents a reminder to pause - that our
lives matter and to keep going.
Doodle by Design did a wonderful kit to
match her too. The wallpaper is 1920x1080
& available to download here.


Friday, May 22, 2020

This tutorial was written on May 9,2020.
Any resemblance to another
tutorial is purely coincidental.
I am using the tubes
No More & Beauty and Decay by Zindy
Textures: Magic Realm by Devirose
Mask: 170 InsatiableDreams
Mask is unavailable right now
Plugins:
Mura's Meister:Copies
VM Natural: Splash!
Funhouse
Open up a 700x700 new image.
Open up your tubes & textures of choice.
Copy & paste your tube as a new layer onto your
blank canvas.
Choose your preset shape tool.
Set your Foreground/Stroke to Black or a dark color
from your tube. Hide the Background/Fill color option for now.
On the Preset shape tool, set the width to 5.00.
I used a Rounded Rectangle shape.
Draw out a vertical rectangle approximately the same size
of your tube vertically. The one I used is 280x545.
This may vary depending on the tube you are using.
Dupclicate the tube layer once. On the Original tube layer,
apply the Mura's Meister:Copies - Wallpaper Rotate to the layer.
Add a new raster layer. Fill with black or the same dark color
you used for the shape.
Select your magic wand tool. Click inside the shape layer to select it.
Selections Modify - Expand by 3. Invert
Select one at a time the tube, tube copies layer & the fill layer.
Press delete on each layer.
Select none.
On the original tube layer, apply the plugin
VM Natural Splash! with default settings.
Right click on your tag & copy merged.
Paste as a new layer. Reize the merged layer 93%.
Move to the left so that its partially off of your previous layers.
Copy & paste a texture of choice as a new layer.
Arrange so the texture layer covers the merged layer.
In your layer palette, make sure the merged layer is selected.
Selections - Copy, float, defloat. Selections invert.
Press delete on the texture layer. Select none.
Change the blend mode on the texture layer to Overlay - or whichever
looks good on your tag.
Duplicate the Merged layer once. Mirror this layer & move it below
the previous tag layers. Repeat the above steps except use a 2nd texture
of choice. Merge layers together.
Select your Font tool. Choose a font of choice & a color of choice for it. I did
a very light grey & used the words Mental Torment. Apply the plugin Mura's Meister Copies: H-Tile(random rotate line). Click OK.
Apply a drop shadow of choice. to the text layer. Change the blend mode
to overlay.
Select the merged layers in your layer palette.
Selections - Float -Defloat. Selections Invert.
Press delete on the text layer.
Select none.
Copy & paste your 2nd tube of choice as a new layer.
Position along the bottom of your tag.
I did resize mine 88%.
Add a drop shadow to the tube.
Back to your text tool.
Type out your words once again.
This time do them in one of the colors from the textures you used.
Position the colored wording along the bottom of your tag near
the 2nd tube. Apply the plugin Mura's Meisters: Copies
Afterimage(sphere random) Default settings.
Add a drop shadow of choice to the wording.
Add a new raster layer above the bottom/background layer of your tag.
Fill with black or a color of choice.
Apply the mask I used or one of choice.
I did check the Invert Mask option.
Merge Mask Group.
On your Mask layer, apply the plugin Funhouse: Heizenberg's
Mirror with default settings.
Go to your Effects Menu
Edge Effects - Enhance.
Merge the layers visible. Copy & paste a texture of choice as a new layer.
I used one I had already used previously.
In your Layers Palettes, select the merged layer.
Selections - Float - Defloat Invert
Press delete on the texture layer. Select none.
Change the blend mode on the texture to Soft Light
& lower the opacity to 55. Merge down.
I resized my tag 95% but that is optional.
Crop tag to desired size.
Add copyright information & name.
Save as png.
Thanks for trying my tutorial.
Monday, January 19, 2015
Bullied Heart

For everyone who has ever been bullied in their lives.I wanted to do this tutorial because it is
such an important issue in society.
This tutorial was written
by Sarah Fiack on
January 19,2015
Any resemblance to another
tutorial is purely coincidental.
I am using a tube by Tezza Dezignz.
This tube is available at
Mystical Scraps
by Sarah Fiack on
January 19,2015
Any resemblance to another
tutorial is purely coincidental.
I am using a tube by Tezza Dezignz.
This tube is available at
Mystical Scraps
Supplies
DBV_Mask 133 by Vaybs
DBV_Mask 133 by Vaybs
VM Distortion broken mirror Plugin
Open a new image 700x700.
Select your preset shape tool.
Select a heart preset shape.I am
using one that is angled slightly
to the left but its up to you.
Draw out a good sized heart.
Convert to raster.
Select a color on the stroke box
of the materials palette.
Using the fill tool, pour the color onto
the heart shape.
Duplicate the heart shape once.
Fill the copy heart with the color black
or another dark color of choice.
Apply the plugin VM Distortion broken mirror.
Click Randomize a few times to find one you like
with the plugin effects. The settings for the one I used
are Pieces 16 Gap 16 Falling Height 16 Entropy 92
Transparency 0 Mode 92
Choose your font tool. Select a font
of choice and set your fill box on the
materials palette to white. Make sure
stroke width is set to 0 as well.
Now on the heart, type out words
which fit with your tube. Stagger how
they appear on the heart.You will probably have
to do various layers of text to get them arranged as
you want on the heart.Remember to convert each
layer to raster when done with it. Once you have
all the text you want on the heart, merge
the text layers together.
Copy & paste your tube of choice as a new layer.
Arrange so it is sitting by the layers. It should partially
cover them as well.
Draw out a small heart.
Convert to raster.
Select a color on the stroke box
of the materials palette.
Using the fill tool, pour the color onto
the heart shape. Duplicate this heart once.
Open a new image 700x700.
Select your preset shape tool.
Select a heart preset shape.I am
using one that is angled slightly
to the left but its up to you.
Draw out a good sized heart.
Convert to raster.
Select a color on the stroke box
of the materials palette.
Using the fill tool, pour the color onto
the heart shape.
Duplicate the heart shape once.
Fill the copy heart with the color black
or another dark color of choice.
Apply the plugin VM Distortion broken mirror.
Click Randomize a few times to find one you like
with the plugin effects. The settings for the one I used
are Pieces 16 Gap 16 Falling Height 16 Entropy 92
Transparency 0 Mode 92
Choose your font tool. Select a font
of choice and set your fill box on the
materials palette to white. Make sure
stroke width is set to 0 as well.
Now on the heart, type out words
which fit with your tube. Stagger how
they appear on the heart.You will probably have
to do various layers of text to get them arranged as
you want on the heart.Remember to convert each
layer to raster when done with it. Once you have
all the text you want on the heart, merge
the text layers together.
Copy & paste your tube of choice as a new layer.
Arrange so it is sitting by the layers. It should partially
cover them as well.
Draw out a small heart.
Convert to raster.
Select a color on the stroke box
of the materials palette.
Using the fill tool, pour the color onto
the heart shape. Duplicate this heart once.
Position as wanted on the tag.
Duplicate the bottom layer of the tag. Fill with black
or a dark color of choice. Apply the mask DBV_Mask 133.
Merge group.
Merge layers. Add artist copyright information & name to the tag. Save as png.
Thanks for trying my tutorial.
or a dark color of choice. Apply the mask DBV_Mask 133.
Merge group.
Merge layers. Add artist copyright information & name to the tag. Save as png.
Thanks for trying my tutorial.
Subscribe to:
Posts
(Atom)
Zone Award