


Sunday, April 28, 2013

Revolution Bubble
This tutorial was written
by Sarah Fiack on
April 28 ,2013
Any resemblance to another
tutorial is purely coincidental.
For this tutorial, I’m using a
tube by Barbara Jensen.
You can purchase the tube at
her store.
Supplies:
Tube of choice
Scrap of choice.
I am using a scrap collab called Memories.
It was at Digiscrapbooking
Here
Open a 700x700 new image.
Open up your tube & scrap supplies.
Open a bubble element.
Copy & paste as a new layer.
Select your ellipse preset shape tool.
Width size doesnt matter.
Fill option on your materials palette
X'ed out.
Just need a color on the stroke option.
Draw out a circle the same size of
the bubble.
Convert to raster.
Open a scrap paper.
Resize as needed. For the one I am using,
I resized 20%.
Click inside the circle preset shape.
Selections modify expand by 1.
Paste the paper as a new layer.
Selections invert & paste as a new layer.
Move to bottom layer below the bubble.
Keep the circle layer selected.
Open a leaf branch element.
Resize as needed.
I resize 50% & 40% once each.
Paste as new layer between the paper &
bubble layers.
Press delete.
Paste your tube above the leaf branch element.
Duplicate once. Move the copy layer to
the top layer in your layer palette.
X it out for now.
On the original tube layer, press delete.
This should make it so just the tube is inside the
bubble & not on the outside.
Select none. Add a drop shadow to the
tube: 2,2,25,5 Black
X out the original tube layer.
Now back on the tube copy layer, unhide it.
Lower the opacity as needed on this layer.
Erase any parts showing past the bottom of the bubble.
Once happy, put the opacity back to 100.
And unhide the original layer.
You can delete the circle shape layer now off
of your tag.
Add the above drop shadow to the bubble layer as well.
Open a flower element.
Resize as needed. For mine, I resized 50% three times.
I pasted on either side of the bottom of your tube.
You want the flower layers behind your tube.
The flowers should be peeking out from behind your tube.
Open a doodle element.
Resize as needed. For the one I am using, I resized
20& 80% once each.
I pasted behind the tube copy layer.
Add the earlier drop shadow to the doodle.
The doodle I chose is subtle but there.
Merge layers visible.
Crop to desired size.
Add artist copyright information & name.
Save as png.
Thanks for trying my tutorial!
Friday, April 26, 2013

Charleston Beauty
This tutorial was written
by Sarah Fiack on
April 26,2013
Any resemblance to another
tutorial is purely coincidental.
For this tutorial, I’m using a
tube by Arthur Crowe.
You can purchase the tube at
his store.
Supplies:
Tube of choice
Scrap of choice.
I am using a matching kit called Beauty
Charleston by Desirena Designs. It is available
at Arthur Crowe's store also.
Mask MC_Mask10 by Melissa Creationz
Blog
Animation Shop
Open a 700x700 new white image.
I like room to work- we can always
crop later.
Open two frames from the matching kit.
Copy & paste the pink & black frame first.
Then copy & paste the pearl frame on top
of it.
Merge the two frame layers together.
Click inside the frames with your magic wand
tool.
Selections modify expand by 5.
Paste a paper of choice as a new layer.
Selections invert & press delete.
Move the paper under the frame layer.
Open a closeup of your tube.
Resize 75%.
Paste as a new layer between the paper
& frame layers.
Press delete. Select none.
Merge the paper & tube layer together.
Open your full length tube.
Resize 80%.
Arrange on a side besides your frame.
Select piano keys element.
Resize 80%.
For my tag, I rotated - free rotated
Right 25
I positioned behind my full length tube.
This may vary depending on where your
tube is.
Open a wine bottle & glass elements.
Resize each 50%.
Position side by side in front of the tag.
Open a cupcake element.
Resize 40%. Position in front of the bottle & glass.
Open beads element. Paste on either side of the
bottle,glass and cupcake elements.
I pasted on one side then duplicated & mirrored
to the other side.
Add a new raster layer above the background layer.
Fill with a color of choice from your tag.
Apply the mask MC_Mask10.
Merge group.
Resize all layers 88%.
Add artist copyright info and name to the tag.
If you don't wish to animate, then stop here & save
your tag.
To animate, continue on below.
Open animation shop.
Copy & paste your close up/paper layer into AS.
Effects - insert image effect
Effect - Tv Scanlines
Effect length 1.7
Frames per second 3
This should give you 6 frames total.
Copy & paste the background, mask layer & frame over
to AS. Paste as a new animation. Hold Ctrl L down to duplicate
this to 6 frames. You will have to repeatedly press L to do this.
Once you have 6 frames, select all.
On your animation close up, select all & copy.
Move over to the center of the frame
on the tag.
Once you have that all set, Copy and paste
the rest of your tag from psp.
Repeat the above steps with it,
Once you are all set, Select all & view animation.
My tag ended with 2 frames.
If happy, save as gif.
Thanks for trying my tutorial!
Tuesday, April 16, 2013
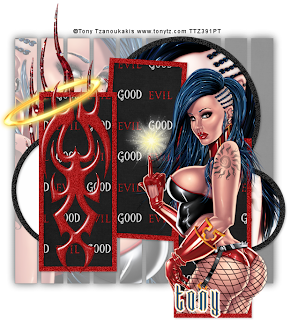
A promo tag featuring the art of Tony Tz. This tube is called Serina & will be available soon at his store. I also used the matching kit which will be available as well.
This tube is just stunning!

and here are a few snag tags with it as well.


This tube is just stunning!

and here are a few snag tags with it as well.


Monday, April 15, 2013
A new promo tag featuring the tube Monster Love by Arthur Crowe. The tube is available in his store. I used two FTU kits by Gimptastic Scraps on the tag. I used the kits Los Muertos and Tough Love.


Sunday, April 14, 2013
3 new clusters featuring new scraps by BLT DeZignZ.
1st one is Breakfast In Bed.
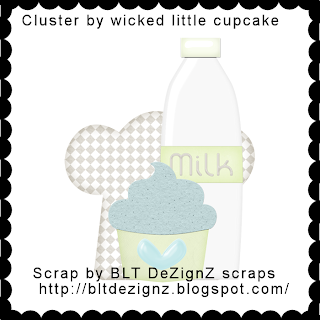
Download Here
2nd one Ladybug

Download Here
3rd one Night at the prom
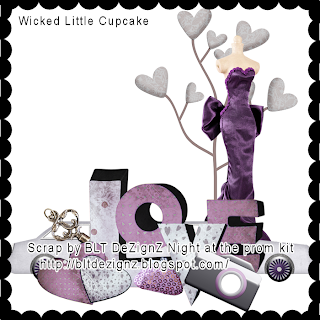
Download Here
1st one is Breakfast In Bed.

Download Here
2nd one Ladybug

Download Here
3rd one Night at the prom

Download Here
Wednesday, April 10, 2013

Twin Hearts
This tutorial was written
by Sarah Fiack on
April 10,2013
Any resemblance to another
tutorial is purely coincidental.
For this tutorial, I’m using a tube
by Markia. You can purchase it
at CDO.
No scraps are needed.
Plugins:
Mura's Meister Copies
Unplugged Shapes Twin Rings
Xero Porcelain
EyeCandy 4000 Gradient Glow
Open up a tube of choice along
with a new image 600x250.
Fill your new image with a color
from your tube.
Copy & paste your new tube
as a new layer above the fill layer.
Apply the plugin
Mura's Meister Copies
Wallpaper rotate default settings.
Select your fill layer with your magic
wand tool.
Make sure your copies layer is
selected in the layers palette.
Selections invert & press delete.
Select none.
Duplicate this layer.
On the top layer, apply the plugin
Unplugged Shapes Twin Rings
Default settings.
Now with the magic wand again,
click inside each part that is colored.
You may have to hold shift button down
while doing this to keep them all selected.
Press delete on your keyboard.
Select none.
Add a drop shadow to the selected layer.
2,2,25,5 Black.
Apply Xero Porcelain to the other wallpaper layer.
Default settings.
Paste your tube again on the top layer.
Position as wanted on the tag.
Add the above drop shadow as well to it.
Take your preset shape tool.
Select a heart shape.
Draw out a heart on one side of your
main tube. Convert to raster.
Fill with a color of choice.
Duplicate the heart once.
Mirror the heart copy.
Merge the two hearts together.
Adjust add noise - uniform 25
to the hearts.
EyeCandy 4000 Gradient Glow
Setting fat Glow width 3.00
apply to the hearts.
Merge layers visible.
Add a new raster layer to
the tag. Fill with a 2nd color from
the tag. Select with your magic wand.
Selections contract by 5.
Press delete button.
Select none.
You now have a border for the tag!
Apply the earlier adjust noise.
Merge layers.
Add artist copyright & name to the tag.
Save as png.
Thanks for trying my tutorial!
Friday, April 5, 2013

I did a tag with an older Tony T tube called Reign. This tube is all about attitude!
You can find it in his shop Also check out his new releases
and the wonderful bonus tube he has now!
You can find it in his shop Also check out his new releases
and the wonderful bonus tube he has now!

Subscribe to:
Posts
(Atom)
Zone Award
