






Showing posts with label PTU. Show all posts
Showing posts with label PTU. Show all posts
Sunday, July 6, 2014
*Coming Soon* PTU clusters featuring the PTU scrapkit Johanna by Amy Marie. The clusters will be available in her store, as is the scrapkit. Il ove the spring and artsy feel of the scrap.


Tuesday, March 18, 2014
New Robin McQuay CT Tag featuring a new release tube Tomorrow Robins Will Sing. I also am using the PTU Scrap Robin's Spring by Dark Yarrow. Both are available at Digital Chaos.
I love how well they fit together. The tube is done in greys & blacks with a POP of color on the Robin bird - which makes it really stand out.


I love how well they fit together. The tube is done in greys & blacks with a POP of color on the Robin bird - which makes it really stand out.
Friday, January 24, 2014
New PTU Cluster Pack featuring the PTu scrap Elegance by Amy Marie.
You can purchase this pack in her store.


You can purchase this pack in her store.


Sunday, January 19, 2014
I've done four PTU Cluster packs which can be purchased at the Amy Marie store.
The cluster packs are for personal use only. You can also purchase the full scraps at the
store as well.


The cluster packs are for personal use only. You can also purchase the full scraps at the
store as well.


Friday, January 17, 2014
New CT Tag featuring the wonderful art of Anna Marine and the perfect matching Inspired by Scrap
Anna Marine 50-2 by Abstract Creations. The scrap pairs perfectly with the tube.
You must purchase both at CDO to use them.


Anna Marine 50-2 by Abstract Creations. The scrap pairs perfectly with the tube.
You must purchase both at CDO to use them.


Sunday, January 5, 2014
New CDO Tag featuring the Enamorte 2-1 tube and matching IB scrap by Abstract Creations. Both are available at CDO.


New CDO Tag featuring the Enamorte 3-1 tube and matching IB scrap by Abstract Creations. Both are available at CDO.


Sunday, October 20, 2013

Harvest Owls
This tutorial was written
by Sarah Fiack on
October 20, 2013
Any resemblance to another
tutorial is purely coincidental.
I am using 1 tube by Lisa Victoria
which you can purchase at
Up Your Art
I am also using the scrap Sweet Harvest
by Amy Marie which you can purchase
at here.
Mask by Moonbeams & Spiderwebs
MB and SW Mask26
Blog
Open a new image 700x700.
Open up your tube and scrap
supplies.
Copy and paste your tube
as a new layer onto your image.
Open a scattered leaf element.
Paste as a new layer.
Move this layer below your tube layer
in your layer palette. Move over to the side
and near the bottom of your tube.
Duplicate the leaf layer once & mirror.
Open a grass element.
Repeat the above steps with it but make
sure the 2 grass layers are underneath
the scattered leaf layers.
Add a drop shadow to your main
tube layer.
2,2,50,5 black.
Also add a drop shadow to the leaf layers
as well.
Open a flower element.Resize 50%.
Paste as a new layer at the base of
one side of your tube. I used the flowers
to hide the end of the branch for the tube
I chose.
Open a tree element. Mirror once.
Paste as a new layer above the scattered
leaves layer. Position on the same side
of the flower.
Open a squirrell element. Resize 50%.
Paste beside the flower element on your tag.
Open a haybale element.
Paste below the previous layers behind
your main tube on one side.
Duplicate once & mirror.
Open a wooden sign.
Resize 45%.
Paste on the right side in front
of the tag. Position so it appears
to be standing in the grass/leaves.
Open a wordart of choice. I am using
one provided in the scrap I chose.
Resize 60% or as needed.
Paste as a new layer.
Position below your tube on tag -
but you do want it as a top layer.
Add the earlier drop shadow to the wordart.
Open a leaf heart element.
Paste as a new layer & position behind
your main tube.
Choose a scrap paper of choice.
Paste as a new layer making sure it is
below the other previous layers.
Layers - Load mask.
MB and SW Mask26
Merge group.
Still on the mask layer.
Adjust - blur- Gauassian Blur 3.00
Merge layers visible.
Crop to desired size.
Add artist copyright information and name.
Save as png.
Thanks for trying my tutorial.
Tuesday, October 15, 2013
Lavendar Sweetheart

This tutorial was written
by Sarah Fiack on
October 15,2013
Any resemblance to another
tutorial is purely coincidental.
For this tutorial, I’m using
a tube by Camilla Drakenborg
You can purchase her tubes at
UYA
Supplies:
Tube of choice
Scrap of choice.
I am using one called Chell by
Amy Marie. It is also available
at her store.
Mask
Tresemask 0002
Open a 700x700 new image.
Open up your tube & scrap supplies.
Choose a frame of choice.
I am using a circle frame.
Paste the frame as a new layer.
Click inside the frame with
your magic wand tool.
Selections -modify-expand by 15.
This can vary depending on the
frame you select to use.
Select a scrap paper of choice.
Paste as a new layer.
Selections invert & press delete
button.
Move the paper underneath the
frame layer.
Keep selected.
Above the paper layer, paste
a heart doodle element from
the scrap.
Press delete.
Paste your tube as a new layer.
Position in one side of the frame.
Press delete.
Select none.
Add a drop shadow to the
frame, tube & doodle layers.
2,2,50,5 black.
Open a color splatter element.
Paste as a new layer & move this
layer underneath the previous layers
in your layer palette. You want it
coming out from behind the
frame layers.
Open a horizontal leaf branch.
Paste on the left side above the
splatter layer. Duplicate once & mirror.
This way you see parts of the branch
from both sides of the tag.
Open a vertical branch.
Paste above the horiztonal branch
on the left side. You want the leaves
to be coming up.
Open a flower element of choice.
Resize 50% or as needed.
Paste as a new layer at the top
of the frame.
Open a horizontal ribbon.
Resize 60% or as needed.
Paste along the bottom of
the frame.
Open a martini glass element.
Resize 60%.
Paste as a new layer on the left side
- position this layer behind the ribbon
layer.
Add the earlier drop shadow to the
glass element.
Open a flower layer.Resize 40%.
Paste on the right hand end
of the ribbon.
Open a key element.
Resize 50%. Paste on the
right hand side behind the
flower and ribbon layers.
Add the earlier drop shadow to it.
Open a butterfly element.
Resize 40%.
Paste along the frame &
vertical leaf branch element.
Paste a scrap paper of choice as
a new layer below the previous layers.
Apply the mask Tresemask 0002.
Merge group.
Merge layers.
Add artist copyright information
and name to the tag.
Save as png.
Thanks for trying my tutorial.

This tutorial was written
by Sarah Fiack on
October 15,2013
Any resemblance to another
tutorial is purely coincidental.
For this tutorial, I’m using
a tube by Camilla Drakenborg
You can purchase her tubes at
UYA
Supplies:
Tube of choice
Scrap of choice.
I am using one called Chell by
Amy Marie. It is also available
at her store.
Mask
Tresemask 0002
Open a 700x700 new image.
Open up your tube & scrap supplies.
Choose a frame of choice.
I am using a circle frame.
Paste the frame as a new layer.
Click inside the frame with
your magic wand tool.
Selections -modify-expand by 15.
This can vary depending on the
frame you select to use.
Select a scrap paper of choice.
Paste as a new layer.
Selections invert & press delete
button.
Move the paper underneath the
frame layer.
Keep selected.
Above the paper layer, paste
a heart doodle element from
the scrap.
Press delete.
Paste your tube as a new layer.
Position in one side of the frame.
Press delete.
Select none.
Add a drop shadow to the
frame, tube & doodle layers.
2,2,50,5 black.
Open a color splatter element.
Paste as a new layer & move this
layer underneath the previous layers
in your layer palette. You want it
coming out from behind the
frame layers.
Open a horizontal leaf branch.
Paste on the left side above the
splatter layer. Duplicate once & mirror.
This way you see parts of the branch
from both sides of the tag.
Open a vertical branch.
Paste above the horiztonal branch
on the left side. You want the leaves
to be coming up.
Open a flower element of choice.
Resize 50% or as needed.
Paste as a new layer at the top
of the frame.
Open a horizontal ribbon.
Resize 60% or as needed.
Paste along the bottom of
the frame.
Open a martini glass element.
Resize 60%.
Paste as a new layer on the left side
- position this layer behind the ribbon
layer.
Add the earlier drop shadow to the
glass element.
Open a flower layer.Resize 40%.
Paste on the right hand end
of the ribbon.
Open a key element.
Resize 50%. Paste on the
right hand side behind the
flower and ribbon layers.
Add the earlier drop shadow to it.
Open a butterfly element.
Resize 40%.
Paste along the frame &
vertical leaf branch element.
Paste a scrap paper of choice as
a new layer below the previous layers.
Apply the mask Tresemask 0002.
Merge group.
Merge layers.
Add artist copyright information
and name to the tag.
Save as png.
Thanks for trying my tutorial.
Wednesday, September 4, 2013
Available in the Amy Marie store.
Quickpages use the PTU scrap Jewels available in
Full or tagger size

Quickpages use the PTU scrap Jewels available in
Full or tagger size

Thursday, August 29, 2013


Tuesday, July 9, 2013
Among The Stars

This tutorial was written
by Sarah Fiack on
July 9th, 2013
Any resemblance to another
tutorial is purely coincidental.
I am using a tube by Enamorte
which you can purchase at
CDO
I am also using Inspired by Enamorte10-3
scrap by Babycakes which can also be purchased
at CDO.
Trese mask0002
Blog
Plugin
Xero Softmood
Open a 700x700 new image.
Open up a tube & scrap supplies.
Choose a frame of choice.
Paste as a new layer.
Click inside the frame with
your magic wand tool.
Selections modify expand
by 8.
Paste a paper of choice as a
new layer. Selections invert
& press delete button.
Move the paper layer underneath
the frame layer.
Paste your tube as a new layer
between the two layers.
Position as wanted.
Press delete.
Select a closeup layer of the tube.
Mirror if needed. Paste across from
your original tube.
Press delete.
Select none.
Merge the closeup layer & the
frame background layers together.
Apply the plugin Xero Softmood
Haziness 125
Glow Red 199
Brightness -18
Contrast 11
Add a drop shadow to the frame
& tube layers.
2,2,50,5 black.
Open a scattering of stars.
Resize 75%.
Paste as a new layer above the
paper layer.
Add the above drop shadow to it.
On your layer palette, change the blend
mode to screen.
Add a fill layer on the bottom layer.
Fill with a color of choice from your tag.
Apply the mask Trese mask0002.
Merge group.
Paste a wordart of choice as a new layer.
Position on the bottom part of your tag.
Add artist copyright info & name.
Save as png.
Thanks for trying my tutorial.

This tutorial was written
by Sarah Fiack on
July 9th, 2013
Any resemblance to another
tutorial is purely coincidental.
I am using a tube by Enamorte
which you can purchase at
CDO
I am also using Inspired by Enamorte10-3
scrap by Babycakes which can also be purchased
at CDO.
Trese mask0002
Blog
Plugin
Xero Softmood
Open a 700x700 new image.
Open up a tube & scrap supplies.
Choose a frame of choice.
Paste as a new layer.
Click inside the frame with
your magic wand tool.
Selections modify expand
by 8.
Paste a paper of choice as a
new layer. Selections invert
& press delete button.
Move the paper layer underneath
the frame layer.
Paste your tube as a new layer
between the two layers.
Position as wanted.
Press delete.
Select a closeup layer of the tube.
Mirror if needed. Paste across from
your original tube.
Press delete.
Select none.
Merge the closeup layer & the
frame background layers together.
Apply the plugin Xero Softmood
Haziness 125
Glow Red 199
Brightness -18
Contrast 11
Add a drop shadow to the frame
& tube layers.
2,2,50,5 black.
Open a scattering of stars.
Resize 75%.
Paste as a new layer above the
paper layer.
Add the above drop shadow to it.
On your layer palette, change the blend
mode to screen.
Add a fill layer on the bottom layer.
Fill with a color of choice from your tag.
Apply the mask Trese mask0002.
Merge group.
Paste a wordart of choice as a new layer.
Position on the bottom part of your tag.
Add artist copyright info & name.
Save as png.
Thanks for trying my tutorial.
Monday, February 25, 2013

Friday, January 4, 2013

PSP VICE
This tutorial was written
by Sarah Fiack on
January 4,2013
Any resemblance to another
tutorial is purely coincidental.
For this tutorial, I’m using a tube
by Dirk Richter. You can purchase it
at CDO
Supplies
Tube of choice
Scrap of choice
I am using a PTU scrap called Geek Like Me.
By Wicked Princess Scraps
Blog
Vix Mask 127
Blog
Open a 600x600 new image.
Open a tube of choice along
with your scrap supplies.
Open a computer element.
Paste as a new layer on your
600 image.
Select your font tool. Choose a font
to look like it is on a computer.
Font color white.
Type out MY PSP VICE or a saying
of choice. You want the text to appear
to be on the screen.
Copy & paste your tube as a new layer.
Position on the computer. Since I am using
a laying down tube, I have it so she is laying
on the laptop.
Open a power cord element.
Resize 50%.
Position so part of it is hidden
underneath your main tube. You want
part of the cord visible on the computer.
Open a round circle frame.
Paste on the bottom layer underneath
the laptop element. Resize if needed.
I didn't need to resize mine but it can vary.
Open an Ipod element. Resize 50 & 70%.
Position as wanted on or by the computer.
Open a crayon element. Resize 25%.
Rotate free rotate left 45.
Position by the Ipod element.
Open a cupcake element.
Resize 50%.
Position behind the Ipod & crayon layers.
Cupcakes are my snack of choice but you can
change it for yours.
Open a coffee cup element.
Resize 50% twice.
Position by the computer on the tag.
After all we all need a drink while tagging.
Paste a paper of choice as a new layer on
the bottom layer of the tag.
Apply Vix Mask 127.
Merge group.
Duplicate the mask layer once.
On the bottom mask layer,
Adjust Blur -Gauassian 6.00
Merge layers visible.
Crop to desired size.
Add artist copyright & name.
Save as png.
Thanks for trying my tutorial.
Wednesday, August 22, 2012
My newest scrap kit Little Boy Birthday. Wow this one means a lot to me.
Inspired by my youngest turning 3 on the 26th. While I would design he loved
to sit on my lap & watch it. His favorite part is the red car in the kit. He absolutely loves cars so I had to include one. I hope you all enjoy! It is now available in stores at below links.
Treasured Scraps
Scrappers Den

Inspired by my youngest turning 3 on the 26th. While I would design he loved
to sit on my lap & watch it. His favorite part is the red car in the kit. He absolutely loves cars so I had to include one. I hope you all enjoy! It is now available in stores at below links.
Treasured Scraps
Scrappers Den

Sunday, August 12, 2012
A very cute halloween scrapkit by me now available in stores.I love halloween! I had a lot of fun doing this scrap. Thinking about trick or treating with my kids & having fun as a family.
Also don't forget right now that my products are on sale 26% off!
Treasured Scraps
Scrappers Den

Also don't forget right now that my products are on sale 26% off!
Treasured Scraps
Scrappers Den

Tuesday, August 7, 2012
I added CU element packs to the stores. The elements are of stone bear tiles.
Preview is below.
Available in Full size & Tagger size.
In stores:
Treasured Scraps
Scrappers Den
Heartfelt Perfections

Preview is below.
Available in Full size & Tagger size.
In stores:
Treasured Scraps
Scrappers Den
Heartfelt Perfections

Sunday, August 5, 2012
My newest scrapkit is available in two stores.
I still suck at previews lol.
Has a fall theme to the scrap.
I can't wait for fall here! It's my favorite time of year!
Availabe at
Treasured Scraps and
Scrappers Den

I still suck at previews lol.
Has a fall theme to the scrap.
I can't wait for fall here! It's my favorite time of year!
Availabe at
Treasured Scraps and
Scrappers Den

Monday, July 30, 2012
My first PTU scrapkit! I designed this one with teaching my little one in mind.
I was teaching him colors and this came to mind. I wanted to do one with that in mind.
You can purchase it at Treasured Scraps.

I was teaching him colors and this came to mind. I wanted to do one with that in mind.
You can purchase it at Treasured Scraps.

Saturday, February 11, 2012
A dear friend & artist Robin McQuay needs help.
Purchase her artwork or order a commission.
Robin is trying to improve herself & her life and their
car just went Kaput completely on them. She is having a
big sale on her artwork to help raise funds for another car.
You can find out more details here
You can also purchase her tubes at DSI.
We always want to say thank you & help out the artists who
give our community so much..this is a chance to do that.
Robin is a sweetheart. I've been without a car before. Life gets
a lot harder when you don't have a ride to places.
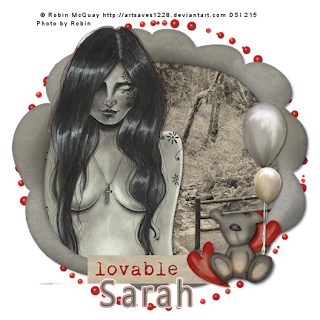
Purchase her artwork or order a commission.
Robin is trying to improve herself & her life and their
car just went Kaput completely on them. She is having a
big sale on her artwork to help raise funds for another car.
You can find out more details here
You can also purchase her tubes at DSI.
We always want to say thank you & help out the artists who
give our community so much..this is a chance to do that.
Robin is a sweetheart. I've been without a car before. Life gets
a lot harder when you don't have a ride to places.

Subscribe to:
Posts
(Atom)
Zone Award
