



Showing posts with label TPP. Show all posts
Showing posts with label TPP. Show all posts
Monday, November 16, 2015
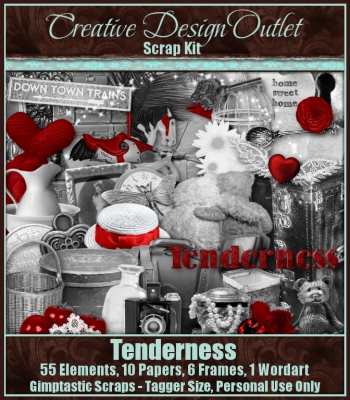
CT tag featuring art by Chris Pastel &
the scrap Tenderness by Gimptastic Scraps; which are on sale.
I love the two girls and their bears together.
Together, they will face the world and
the adventures it takes them on. Reminds me of
my cherished teddy which I have had for
28 years. Together we have faced
many adventures in life.
The wallpaper is size 1920x1080 &
available here.
available here.


Thursday, September 10, 2015
I am starting something special on my blog. I am going to do designs
sometimes for a close friend. A design that, in some way, is reflective of them
& reminds me of the friendship I have with them.
To start this series off, I have a tag for my
Neenja friend Shani. She is one of my dearest friends in life.
We can talk about anything and often do.
Now, our boys are starting a friendship involving ninjas.
It makes us both smile and means so much.
Shani, thank you for everything & your friendship means
so, so much to me.
Neenja Master Scrap by Wicked Princess Scraps
& VE Samurai tube by KiwiFireStorm
Both available at The PSP Project
& VE Samurai tube by KiwiFireStorm
Both available at The PSP Project


Sunday, August 23, 2015
CT tag featuring art by Gabi Spree &
matching scrapkit Got Java? by Wicked Princess Scraps.
You can purchase both in a bundle at TPP.
She is enjoying a cup of coffee at her
favorite cafe. She even managed to
get her favorite seat by the window.
Come on in for a cup of your own.


Thursday, July 9, 2015
New Guest CT tag featuring a new release called Surfin' Sophie by Wicked Princess Scraps. This scrap is brightly colored and lots of fun. It is all about the beach & enjoying summer. Everyone loves to be at the beach playing in the waves during the summer. Come find your beach at TPP.


Wednesday, April 1, 2015
CT tag featuring the gothic themed scrap The Hunt by Wicked Princess Scraps. This awesome scrap is jam-packed with gothic and darkly themed elements. Perfect for all your vampire, witchy and spooky tags. You can find the scrap available at The PSP Project. On my tags, I used the
awesome art of Freya, which you can find here.


Saturday, May 31, 2014
Heart Banner

This tutorial was written
by Sarah Fiack on
May 31,2014
Any resemblance to another
tutorial is purely coincidental.
For this tutorial, I’m using a tube
by Agata Wiejak. It is a PTU tube found at
Mask VixMask 196 Here
Animation Shop
Open a 700x700 new image.
Fill this image with white.
Open up a tube of choice.
On your materials palette,
choose a color for each of the
of the color options.
I chose a lighter color for
stroke and a slightly darker
color for Fill.I used two
colors from my tube.
Select rectangle preset shape tool.
Set the width to 5.00.
Draw out a square to desired
size. Convert to raster.
Copy & paste your tube as a new layer.
Resize by 70%. Position in front
of the square.
Choose another color from your tube
for the heart shape.
Select a preset shape heart.
Draw out a heart shape of choice.
You want the heart slightly
smaller than the square.
Convert heart to raster.
Fill with color if needed.
Position this layer behind your
tube.
Now select the rectangle preset
shape. Choose a light color
for this layer - making sure it is the fill.
Make sure it is set to rectangle
on the shape & width set to zero.
Draw out a rectangle. You
want each end to slightly
hang off the square sides.
Convert to raster - and have this
layer between the heart & square.
Drop shadow the heart, rectangle
& tube layers.
2,2,50,5.
Select your font tool.
Choose a font of choice
& a size you like. Choose a
darker color for the font.
Type out a single word of choice.
Convert to raster.
Apply the plugin Mura's Meister
Copies - Tiling. Change the tile gap
to 2 & apply. Move this layer to above
the square layer.
With your magic wand tool, click on
the square layer to select it.Then, in
your layer palette, make sure the text
layer is highlighted.
Selections - invert & press delete.
Select none.
Add a new layer above the white background.
Fill with a darker color of choice.
Apply the mask VixMask 196
Merge group.
Resize the mask 88%.
Crop image to desired size.
Add artist copyright to tag
along with name.
If you are not animating, you can
save the tag now. To animate,
continue on. Do make sure the artist
you are using allows animation of tubes.
Merge layers together except for your
tube. We're going to animate part of the
tube. Open Animation Shop (AS).
Back in PSP, take your freehand selection tool
& select around the banner, or part which you
want to animate of the tube. Copy this layer
which you selected.
Go to AS & paste as a new animation.
Still in AS, go to effects - Insert Image Effects
Choose effect wave define effect: length 2.0
Frames per second 4 fps
Click on customize -Choose horizontal
This should give you 9 frames total.
Go back to psp. Select none.
Copy merged.
Paste as a new animation in AS.
Duplicate by holding Ctrl & repeatedly
pressing L to get the same number of frames.
Select all
Over to the animation now, select all & copy.
Edit Propagate Paste.
Now drag the animation over to the tag.
This should let you preview and decide
where to put the animation & line it up right.
Once you click it, it should apply to all
9 frames.
View animaton & if happy, save your tag.
My finished tag was only 2 frames but I still had
animation.
Thanks for trying my tutorial!
Sunday, January 12, 2014

This is a timeline tutorial. But you could easily
convert to a forum style tag.
This tutorial was written
by Sarah Fiack on
January 12th, 2014
Any resemblance to another
tutorial is purely coincidental.
I am using 1 tube by Cris DeLara
which you can purchase at
TPP
No scrapkit needed.
Dingbat font of choice.
I used the font KR All Sport
Plugins:
Muras Meister Copies
VM Natural -Acid Rain
VM Stylize- Motion Trail
Toadies -Glasswork Gray
UnPlugged Tools -REM Lotus
Open a timeline size image.The size
for this is 851x315.Open your tube
of choice.
Fill with a dark color from your tube.
For mine I am using black.
Select your ellipse preset shape tool.
Make sure the circle shape is selected
on the settings.
On your Materials palette,
X out the stroke box as we don't
need it at the moment.
Select a color from the tube for
your fill box. I am using red.
Draw out a smallish circle
on your image. Convert to
raster.
Apply the plugin effect
Muras Meister Copies.
Tiling Angle. Change tile gap
to 2 for this.
Click Okay.
Change the color on your
materials palette for the
fill. I am using a light
purple.
Draw out a large
circle to take up most
of the center of the timeline.
Objects - align -center in canvas.
Convert to raster.
VM Natural Plugin
Acid Rain -default settings
VM Stylize Motion Trail
default settings
Duplicate the circle layer
once. Make sure the
copy layer is selected in your
layer palette.
Apply the plugin Toadies
Glasswork Gray - default settings. Click Apply.
Resize this layer 75%.
Merge the two circles together.
Plugin UnPlugged Tools
REM Lotus -default
Round button -default
Take your tube & paste onto
the circle image you've been
working on.
Resize the tube 60%.
Go to effects - 3d effects-cutout
default settings. Make sure both
colors are set to black. Click okay.
Paste your tube again. Resize 65%.
Position on the left side of the circle.
You want it partly over the circle
and partly off it.
Add a drop shadow to the 2nd
tube layer and the large circle layer.
2,2,50,5 black.
Now click on the multiple
circle layer of the timeline.
Select your font tool and a
font of choice. I am using a sports
dingbat font.
On your Materials palette, select
the fill box to a white or similar color.
Also make sure stroke is set at 0.0
on font settings. Font size to 14 or
as wanted.
For the dingbat I wanted, I did
a Capital E to get bowling icon.
Enlarge if needed. Convert to raster.
Do an icon on each side of the main circle.
Merge the two icons together.
Change the blend mode in your layer
palette to soft light.
Select your rectangle preset shape
tool. Change the fill box on materials to
black. Make sure the rectangle shape is
selected.
Draw out two rectangles on the upper
right side of the timeline. Make one
wider and slightly longer than the
other one. Convert to raster &
merge the two layers together.
Select your font tool.
Choose the white color again.
Select a font you like for your tag.
Add a word per rectangle which fit
yours. I am using Bowling & Strike
for mine.
Merge layers visible.
Add a new raster layer.
Fill with color of choice
from your tag. This is for
the border.
Click the layer with your
magic wand tool.
Selections -contract by 4.Press
delete button on your keyboard.
Select none.
Add artist copyright for the
company timelines. Some companies
vary on their timeline rules.
Make sure to add a name as well.
Save as png or jpeg.
Thanks for trying my tutorial.
Tuesday, May 29, 2012

Warm Cuddle
This tutorial was written
by Sarah Fiack on
May 26,2012
Any resemblance to another
tutorial is purely coincidental.
For this tutorial, I’m using a tube
by Tatjana Willms. It is available at
TPP.
Supplies:
Tube of choice
Scrap of choice.
I’m using a kit called Love Me
by WDDesignz. It is only available
at DreamscapeImaging.
WSL Mask 254 by weescottlass creations
Blog
Wordart by Create With TLC
Blog
Plugin: EyeCandy4000 Gradient Glow
Open a 600x600 new image.
Open up your tube & scrap supplies.
Open up a frame of choice.
Resize 80%.
Paste as a new layer.
Click inside the frame with your
magic wand tool.
Selections expand by 6.
Paste a paper of choice.
Selections invert & press delete.
Move the paper under the frame
layer. Select none.
On your main tube,resize 88%.
Paste as a new layer on your tag.
Position as wanted.
Open a bling heart element.
Resize 80%.
Paste on the bottom layer of the tag.
Position on the upper corner of
the tag.
Open heart string element.
Resize by 50% twice.
Paste along the top of the frame.
Duplicate once & mirror.
You want the hearts along both parts
of the top of the frame.
Open a vertical frame of choice.
Click inside the frame with your magic wand.
Hold shift down if needed to select multiple areas.
Selections modify expand by 6.
Paste a paper of choice.
Selections invert & press delete.
Move the paper under the frame layer.
Paste your tube between the two layers.
Position as wanted & press delete.
Select none.
Merge the layers together.
Resize 85%.
Paste onto your main tag.
Position alongside your original frame.
You want this frame on the side of your
main tube.
Open a corner flower.
Resize 25%
Paste on two corners of the
veritcal frame.
Paste a paper of choice on the bottom
layer of the tag.
Apply the mask WSL Mask 254.
Merge group.
Open a wordart of choice.
For the one i am using I resize 50% twice.
I used colors from my tag to change the
color on the wordart. This is done by using
your fill tool.
Paste as a new layer on the top layer of
your tag.
Apply a Gradient Glow to the wordart.
EyeCandy4000 Gradient Glow
Setting Fat Glow width 3.00.
Click Apply.
Also add a drop shadow to the wordart
layer.
2,2,50,5 black.
Merge layers & resize 88%.
Add artist copyright information & name.
Save as png.
Thanks for trying my tutorial.
Subscribe to:
Posts
(Atom)
Zone Award