My Blinkie


Cupcake Bear

Sarah_MS_Bear

Autism Bear

Autism_Bear-_MPP-_Sarah_Ben_zps942ced18

My Pixel Giraffe

giraffe_pixel_sarah

CT Teams

Showing posts with label Sexy. Show all posts
Friday, February 6, 2026
New creations by me featuring the wonderfully
sexy art of Carolina Seabra using her tube 
Cherry Red Devil. I am also showcasing
the oh so spooky Valloween scrap
Batty4U by Tkdezigns. There is also
a PU Cluster along with a wallpaper as well.
The wallpaper is 1920x1080 & available here.
Love is composed of a single soul inhabiting two bodies. - Aristotle


Sunday, April 7, 2024
CT tag & wallpaper featuring the beautiful art of 
Jessica Dougherty using her tube 52-3.
CDO is closing the end of May so grab this
beauty while you can. I am also showcasing the 
gorgeous scrap Rockin' Romance by Wicked Princess.
The wallpaper is 1920x1080 & available here to download.
Where words fail, music speaks. - Hans Christian Andersen
Music is the divine way to tell beautiful, 
poetic things to the heart. - Pablo Casals


Thursday, February 15, 2024


This tutorial was written on February 15,2024
Any resemblance to another
tutorial is purely coincidental.
I am using the art of Ted Hammond 
with his tube 99-2.

Plugins: 
 Mura's Meister Copies
VM Toolbox
Xero Porcelain

Open a 700x300 new image.
Open up your tube of choice.

On the new image, add a new raster layer.
Fill this layer with a color that pops from your tube.
I chose to use pink for my tag. 

Copy & paste your tube as a new layer above the color layer.
Resize the tube 75% if needed. Make sure you are only resizing the 
tube & not the whole image. Duplicate the tube layer once.
Rename the layers as such (from top to bottom)
Main
Tube1
Color
Now, hide the Tube2 layer for now. Make sure your Tube1 layer
is selected in your layer palette.

Apply the plugin Mura's Meister Copies - Wallpaper rotate to this layer.
You may need to repeat the plugin 1x to ensure the whole image is 
covered by your tube. You can do this easily by going to Edit - Repeat Copies.
Duplicate this layer & rename it as Tube2.

On the Tube1 layer of the tag, apply the plugin
 VM Toolbox - Crystal Ball with the settings:
Highlight X 54
Highlight Y 54
Highlight Size 192
Distortion 55
Radius 156
Brightness 128
Transparency 255
Refraction 255

Move the Tube2 layer underneath the Tube1 layer. Apply the plugin
VM Toolbox - Radial Mosaic with default settings.
Back on Tube1, select your magic wand tool. Click in the center of this layer
where the tube is not showing. Selections invert & select your Tube2 layer.
Press delete. Select none. This should give you the mosaic layer only in that area of your tag. Change the blend mode to Soft Light on Tube2 layer. Or you can use a blend mode that fits better with your tag. 

Add a new raster layer above the layer Tube1. Fill with a lighter color from your tube.
Change the blend mode to Soft Light or one of choice that works well with your tag.

Select your Rectangle Preset Shape tool. On your Materials Palette, hide 
the Foreground/Stroke Color Palette. Make sure the original pop color is selected on the Background/Fill color option. Draw out a vertical rectangle on the left side of your tag.
You don't want it all the way to the edge though but you do want it go from top to bottom. Convert the layer to Raster. 

Copy & paste your tube as a new layer above the Rectangle layer. Resize 65% if needed.
I did rotate my tube for this part - Right 90%. Position the tube as wanted for most of it 
to be inside the shape. On the Shape layer, click inside it with your magic wand. Selections - Invert. On the tube layer, hit delete. Select none. You should have the tube contained within the shape layer. Change the blend mode to Screen on the tube. Merge these two layers together.  Duplicate & mirror.

Add drop shadows of choice to your Tube layers. 
On the Main layer, apply the plugin Xero Porcelain with default settings.
Change the blend mode to Hard light or one of choice. You want to position the 
Main tube in between the two vertical rectangle layers of your tag. I also put mine
along the base of the tag as well. 

Add a new raster layer above the previous layers. Unhide the Foreground color option on your Materials Palette. Fill with the pop color. Select with your magic wand. Selections - Contract by 4. Press delete on your keyboard select none. Add a drop shadow of choice. Ta-da you have a border now. 
Thursday, June 1, 2023
New tag & wallpaper by me featuring the gorgeous
art of Jennifer Janesko using her bonus
from September 2011. This beautiful cowgirl
is available for purchase here. I am also
showcasing the wonderful scrap
On The Farm by Doodle by Design.
The wallpaper is 1920x1080 & available
for download here. 
“The country has charms only for those not 
obliged to stay there.” – Edouard Manet
“The country habit has me by the heart.” – Vita Sackville West


Wednesday, March 1, 2023
CT tag featuring the gorgeous art of 
Keith Garvey using his tube 365-1.
I am also showcasing the IB 
Keith Garvey 365-1 Scrap by 
Ladyhawwk Designs.
She may be a woman but don't doubt
her skill when it comes to car repair.
We advise against any sexist comments though.
Otherwise, you may find a tool thrown at you.
She'll prove that she can fix your car
better than any guy out there.
Just watch & see. 


Tuesday, February 14, 2023

This tutorial was written on February 14,2023
Any resemblance to another
tutorial is purely coincidental.
I am using the art of Keith Garvey
using his tube 38-2

Plugins:
Mura's Meister Copies
VM Toolbox
VM Natural
Greg's Factory Output Vol II
VM Stylize

Open a 700x300 new image.
Open a tube of choice. The tube
I chose has 3 layers. I am going to
use the middle layer. Copy & paste
the tube to your new layer. 
Resize the tube 70% if needed. Duplicate once.
Hide the tube copy layer for now.

On the original tube layer, apply the filter
Mura's Meister Copies: Wallpaper rotate.
Duplicate once. Rename the layers as 
WP1 & WP2. 
Make sure WP2 is the duplicated the layer.
Select that layer for now.

Go to Adjust - Blur - Gauassian with 15.
Use filter VM Toolbox - Softborder with 
default settings. Drag the layer WP2 under
layer WP1. Change the blend mode on WP1
to Soft Light. Lower the opacity to 40. 
Apply the filter VM Natural- Lightburst
with default settings. 

On WP1, apply the filter Greg's Factory Output Vol II.
Use the effect Shatter on the layer.
Go to Effects - Edge Effects & Enhance. Add a drop shadow
of choice. 

Add a new raster layer above the WP1 layer.
Fill with the color black. Select your magic wand
tool & click on the black layer. Selections - Modify
- Contract by 8. Press delete on your keyboard. 
Select none. Change the blend mode to Soft Light.
Add a drop shadow of choice to the layer.

Unhide your tube copy. Make sure its under the black
border layer. I resized it again by 93%. Add the same 
drop shadow to the layer. 

Duplicate the tube copy layer. Move to either the 
left or right of the tube copy layer & underneath the layer.
Apply the filter VM Stylize - Zoom Blur with default settings.
Change the blend mode to Soft Light. Add drop shadow.

Select a font of choice. Type out a word on the opposite 
side of the tag from the Zoom Blur layer. 
I used the word Beautiful but choose one that fits your tag.
Convert to raster & add a drop shadow.

Merge the layers together. Add copyright to the tag along
with a name. Save as png. Thanks for trying my tutorial.
Thursday, April 7, 2022
CT tag & wallpaper featuring the sexy art of
Elias Chatzoudis using his tube 137-1.
I am also showcasing the oh so lovely IB
Elias Chatzoudis 137-1 Scrap by Kizzed by Kelz.
The wallpaper is 1920x1080 &
available here to download.
She'll be your naughty Easter bunny.
She'll even dress up & play with the bunny.
The treats are of the adult kind in the eggs.
Will you let her hop on your basket this year?


Tuesday, January 18, 2022

 I started this last night & it wasn't originally going

to include a photo of myself..but the muse thought it should.

My fairy was right. Yup the beautiful lady in this tag

is myself. It was taken last August on a trip to 

Vegas for a boudoir session. I was channeling my

inner goddess with this particular outfit.

Society tries its hardest to tear us women down.

It tries to make us feel like we are never good enough no

matter what we do. We don't have to listen ladies.

We can determine how we feel about ourselves.

And I am choosing to love myself. That while

I am not perfect, I am perfectly me. Our bodies

& our minds do a lot for us. Shouldn't we control

the narrative we tell ourselves? The scrap kit I used

is by Cutie Pie Scraps & is called Self-Love

 Its such a pretty scrap

& perfect for designing with a self love them.


Thursday, July 8, 2021


This tutorial was written on July 6th, 2021

Any resemblance to another

tutorial is purely coincidental.

I am using the art of Lorenzo Sperlonga

with his tube 67-3.

Plugins:

Mura's Meister's Copies

Graphics Plus: Horizontal Mirror

Toadies Motion Trail

Mask: BST_Mask9

As far as I know, this mask isn't

available anymore.


Open up your tube of choice & a 

700x700 new image.

C&P your tube onto your new image.

Duplicate the tube once & hide the copy

layer for now.


Rename your original tube as Shape Tube.

This will help keep layers straight as we work.

Now choose your rectangle shape tool.

Or you can use a circle one too. But for mine, I am

using a square shape which is found under the Rectangle shape.

Set width 6.00.


On your Materials Palette, hide the foreground/Stroke color for now.

Select a color for the Background color. I chose white but it doesn't matter

too much.

On your Shape tube layer, draw out a shape to desired size.

Convert to raster & position as wanted on your tube.

Duplicate the shape two more times.

Position the shapes in a row. I did mine going down the tube I chose.

Merge the three shape layers together.


Now, move this layer underneath your Shape tube layer.

Hide for a moment, the tube layer.

Select your magic wand tool & click the top shape layer..

then holding shift down, select the other two layers as well.

Go to selections - Invert. Unhide the Shape Tube now & select 

that layer in your layer palette. Hit delete on your keyboard.

Select none. Now merge the two layers together.


Rename the layer 3 Squares (or circles if using them)

Duplicate the layer once. Move the top layer towards the left so it partially overlaps the layer below.

the 3 Squares layer

Rename the duplicated layer as top 3.

Change the blend mode on it to Hard Light.


Select your Pen tool.

Click the layer above your bottom layer.

On your Materials layer, hide your Background layer for now.

Unhide your Foreground & select black for this color.

Set the Pen width to 5.00.


Draw out two vertical lines underneath your 3 squares layer.

Move one of the lines slight higher than the other one.

Merge the two lines together & rename the layer 2 lines.


Now select 3 Squares layer again. Apply the plugin Graphics Plus:

Horizontal Mirror with default settings.

Apply the plugin Toadies Motion Trail with default settings.


Remember your earlier tube copy that you hid at the beginning?

Now unhide it & position along the left side of your tag. You want her also

 overlapping your other tag layers. Add a drop shadow of choice to her.


Add a new raster layer above the bottom layer. Fill with a color of choice

from your tube. I chose yellow from the tube I am using.

Layers- Load Mask-Load Mask from disk.

I used BST_Mask9. Right click the mask layer & merge group.


Now, C&P your tube again above the mask layer as a new layer.

Apply the plugin Mura's Mesiter Copies: Wallpaper Rotate default.

You may need to apply this plugin twice depending on your tube.


Re-select your mask layer again.

Selections - Select all -Float -Defloat - Invert.

Select the tube you just wallpapered & press delete.

This should remove all of that layer outside of the mask area.

Change the blend mode to Screen & lower the opacity to 65.

Merge the two layers together & resize 97%.


Now, select the 3 Squares layer. Choose your font tool.

Type out a word of choice. I used Vixen & typed it out two different times.

I positioned it above & below the center shape of the 3 shapes layer.

Merge the two words together & add a drop shadow of choice.


Crop your tag image to desired size.

Add artist copyright info & a name to your tag.

Save as png. Thanks for trying my tutorial.


Monday, January 25, 2021

CT tag featuring the wonderful art of Vi Nina

using her tube Jill. I am also showcasing

the stunning scrap Sexy Eleonor by Bella Caribena.

I do take advantage of, you know, feeling sensual and feeling sexy. 

And I think that is tremendously empowering and is not 

diminishing in any way. I fell that any woman who is in control,

 who is in touch with her femininity and sensuality, 

is a woman that is empowered. - Shakira


Tuesday, August 4, 2020
CT tag featuring the gorgeous art of Keith Garvey using his tube 59-3.
I am also showcasing the oh so pretty Charity Dauenhauer  July 2020
IB by Karmalized Scraps. Surrounded by two of her favorite
things, petals & books make her smile. She loses herself
in the books while smelling the sweet flower petals.
Perhaps she is reading poetry by her favorite poet.


Saturday, July 4, 2020
CT tag featuring the beautiful art of Vi Nina
using her tube Jill. I am also showcasing the 
wonderful scrap Tantalizing Tryst 
oh so pretty scrap was made to match
the stunning Jill tube. She will tantalize
you with her beauty - yet will remain
just out of reach. Tempting you enough
to make you want to catch her. To feel
her in your grasp & against you.
Can you catch her & keep her?


Wednesday, July 1, 2020
CT tag featuring the beautiful art of Dirk Richter
using his tube 27-1. I am also showcasing
the IB Cartoon Pink September 2018
If i give you my heart, do not
treat it frivolously. It cannot take
being broken or damaged. I've guarded
my heart so long - scared to hand
it over to another soul. Out of 
fear that it may come back shattered.
My heart cannot heal again from that. 


Wednesday, June 24, 2020
CT tag & wallpaper featuring the gorgeous 
art of Barbara Jensen using her Layered
tube Peach 107-2. I am also showcasing
the very pretty scrap Quiet Moment
by Gimptastic Scraps. The wallpaper
is 1920x1080 & available for download here.
Beautiful as a dandelion-blossom golden in the 
green grass, this life can be.
Edna St. Vincent Millay


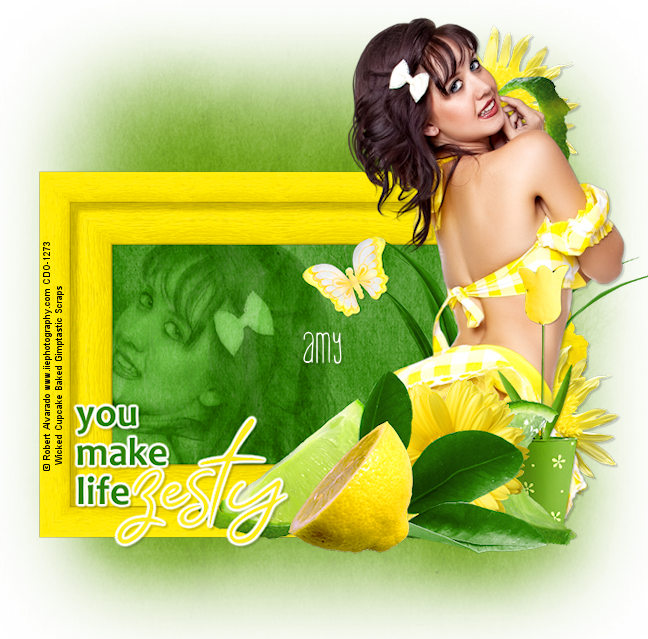
Sunday, May 31, 2020
CT tag featuring the gorgeous 
pinup art of Robert Alvarado
using his tube 7-2.  I am also
showcasing the oh so refreshing
IB Jessica Dougherty 3-1 
Don't be afraid to add a little
zest to your life. It can add
excitement to your day
and/or relationship. Sometimes zest can 
add another dimension we 
didn't realize we were missing.


TOUs

I do not allow resizing of my tags, timelines or wallpapers. All of my creations are for PU only unless otherwise stated. Nor are they to be altered in any way either.

Categories

Followers

Blog Archive

Contributors

Zone Award

Award_Wicked_Little_Cupcake