



Showing posts with label Rene Kunert. Show all posts
Showing posts with label Rene Kunert. Show all posts
Sunday, September 17, 2023


Friday, October 15, 2021
In addition to being a fantastic
artist & designer, Rene Kunert
writes amazing Photoshop tutorials.
A few examples of her tutorials
are below. And she is a magician
with animation. Her tutorials will teach
you how to design & animate all within Photoshop.
For those within the tagging community who
do use PSP, happy playing!!


Saturday, August 15, 2020

This tutorial was written on August 15,2020
Any resemblance to another
tutorial is purely coincidental.
I am using the tube 2-2 by Rene Kunert
Plugins:
EyeCandy 4000 Gradient Glow
Xero: Soft Mood
DCSpecial
Mura's Meister Copies
Mask:
MontiblindsMask1
by Monti's Pixel Playground
Open a 700x700 new image.
Open up your tube of choice.
Copy & paste your tube as a new layer
onto your new image. Resize 88% if needed.
Apply the Plugin Effect Mura's Meister Copies.
Wallpaper Rotate with default settings.
Select the Ellipse Preset shape tool.
Set the Width to 5.00.
On your Materials Palette, hide the
Background Fill color option.
For the Foreground Stroke, select a dark color
from your tube.
Now, draw out a circle to desired size.
Objects - Align -Center In Canvas.
Then Right click on the layer in your Layer Palette.
Convert to Raster Layer.
Select your magic wand tool.
Click inside the circle shape.
Selections -Modify -Expand by 3.
Selections Invert.
Select the tube layer on the layer palette.
Press delete. Select none.
Rename the two layers.
For the circle layer: Circle Frame
Tube layer: Tube WP1
This will help keep things straight as we do the tutorial.
Duplicate the Tube WP1 layer & rename the copy as
Tube WP2.
Apply the plugin effectl -Ice to the WP2 layer.
Add a new raster layer above the WP2 layer.
Fill with a different color of your tube.
Repeat these steps:
Select your magic wand tool.
Click inside the circle shape.
Selections -Modify -Expand by 3.
Selections Invert.
Select the new raster layer on the layer palette.
Press delete. Select none.
Rename this layer Color Fill.
Change the blend mode to Screen &
lower the opacity to 61 depending on the color you used.
Merge the layer down with the WP2 layer.
Apply the plugin Xero: Soft Mood with the settings:
Haziness 182
Glow Red Green blue -70
Brightness 32
Contrast -20
Click OK.
Move the WP1 layer above the WP2 layer in your
layer palette. Change the blend mode on WP1 to Soft Light.
On WP1, go to Effects - Art Media Effects - Brush Strokes.
On the Pull down menu, select Speckles & use default settings.
Copy & paste your tube as a new layer above the Circle Frame layer.
Resize 88% & 93% or as needed.
Drop shadow each of the layers with a default one of choice.
Select your Ellipse tool again. Change the color for Foreground to
a color that isnt on your tag. Change the width to 2.00.
Draw out aa circle above the Circle Frame layer. We're going to
add wording to this layer so do not convert to raster.
We need this layer as a vector.
Select your Font tool. Choose a font of choice that fits your tag.
Unhide the Background color layer also in your Materials Palette.
Hover your mouse above the Vector Circle. When you have A) icon,
type out your wording along the circle. Use words that fit your tag/tube.
Once you have the wording you want & the size you want, go to your layers palette.
Click the + symbol on this layer. This will open up the hidden layers of the circle.
Now, you want to click on the eye of the New Ellipse to hide it.
Then click on the - of the Vector layer to hide the layers. You will have wording
but no vector circle showing.
Convert to raster.
Apply the plugin EyeCandy 4000 Gradient Glow to the wording.
Setting Fat Glow width 3.00.
Apply earlier drop shadow to the layer as well.
Merge your tag layers together.
Fill the bottom layer of your image with a color of choice.
Go to Layers - Load/Save Mask - MontiblindsMask1.
Check Invert Mask. Apply.
Merge Mask Group layers.
Crop tag to desired size.
Add artist copyright information & name for tag.
Save as png. Thanks for trying my tutorial.
Friday, May 25, 2018
CT tag featuring the whimsical scrap
Queen Heart by Freek's Creations.
I am also showcasing the art of Rene
Kunert which unfortunately isn't
available for purchase anymore.
A new queen has risen in Wonderland.
How she shall reign remains to be seen.
I wouldn't suggest you cross her though.


Sunday, December 31, 2017
Just wanted to share a tag I finished tonight.
I used the art of CelinartPinup with her
tube Amy. I am also showcasing the
scrap Dark Love by Hania's Design.
Lastly, I am using Animation 8
by Rene Kunert. It is only
available for a Limited Time.


Tuesday, November 28, 2017
CT tag featuring the wonderful art of Rene Kunert.
Unfortunately, this tube isn't available at
this time. I am also showcasing the
wonderful scrap She's So Classy
by Tasha's Playground. It is a
Previously Released kit.Her dancing
is hypnotic in its movements. Roots
of classical lessons reveal themselves
as you watch her dance.


Thursday, February 16, 2017
CT tag featuring the art of Rene Kunert
& a wonderful scrap Lost Toys by
Creative Scraps by Crys. Memories
of our beloved toys always bring
smiles to our faces. Sometimes, a toy
is so special it continues
into our adult lives.


Wednesday, February 15, 2017
CT tag featuring the fantastic art of Rene Kunert
I am using her new Gothic Alice tube.
To create her wonderland, I am using
the IB Rene Kunert 18-1 Scrap
by Honored Scraps. Shall she
drink the potion or eat the cupcake?
Such decisions in this strange place.


Wednesday, January 25, 2017
CT timeline set featuring the fantastic art of Rene Kunert
with her tube 6-1 & the
rocking scrap CDXLIV by Rebel Dezigns.
He is waiting to take the stage to
perform before all of his fans.
There is nothing like performing live
& feeling the energy of the crowd.


Thursday, June 2, 2016
CT tag featuring the wonderful art of
Rene Kunert & the gorgeous scrap
Shades Of Elegance by Honored Scraps.
A glimpse into her world as she
prepares to go out. What perfume
shall she spritz on today? Or perhaps
she is mentally contemplating the
rest of her day and the activities that
will fill it.


Tuesday, March 29, 2016

This tutorial was written
by Wicked Cupcake on March 29,2016
Any resemblance to another
tutorial is purely coincidental.
I am using a two tubes by Rene Kunert.
available here.
Supplies: Texture bokeh 2012 Pack by animekol
available here
Program: Paint Shop Pro X2
Open up textures or papers of choice
to use on your tag. Also, open up two tubes
of choice or a tube with a closeup will work too.
Open up a 700x700 new image.
Also open up a 250x250 new image.
Fill the smaller image with white.
Copy and paste the white image onto your
larger new image. Duplicate this layer three
times for a total of 4 layers.
Arrange the layers so they form a larger square
with slight spacing between each of the smaller squares.
It might help to rename the squares in terms of their placement.
I did names such as top left, bottom right so I can keep straight
which one I am working with.
Choose a texture of choice & select a square with your
magic wand tool. Do make sure you have that square layer
selected in your layer palette as well also. Paste your
texture as a new layer. Selections - invert & press delete
on your keyboard.
Now, copy and paste your tube or closeup as
a new layer.Position so it is over the texture & square layers. Press delete
again. Select none. Change the blend mode on the tube layer to
Overlay or one of choice.
Repeat the above the steps with the other three squares. Use a different
texture for each square. For the squares on the right side, I mirrored the
tube I am using on them to have the faces facing right instead of left.

Copy & paste your second tube of choice as a new layer. Make sure this layer is
above the square layers. I resized the tube I used 95% but this is optional.
Choose your text tool & select a font of choice. I used the color black for my
text. Type out text of choice and adjust to a desired size. Convert to raster.
For a moment, hide the text, second tube layer & the background layers.
Select a square layer & right click. Select merge visible.
Duplicate this layer & select the original square layer.
Go to Adjust - Blur -Motion Blur. Set the Angle to 315 and strength to 75.
Apply a Gauassian blur to the same layer of 5.00. On the square copy layer,
apply a subtle drop shadow.
Unhide the layers we had hidden. Crop your tag to desired size.
Add artist copyright information & name. Save as png. Thanks for
trying my tutorial.
Friday, February 5, 2016
CT tag featuring the fantastic art of Rene Kunert
Fairy Magic scrap by Gimptastic Scraps
Animation from Animaton Pack 131
Join her inside the fairy realm
and explore the different secrets it holds.
A sprinkle of fairy dust and the
secrets shall reveal themselves.


Monday, June 4, 2012

Lady Cupcake
This tutorial was written
by Sarah Fiack on
June 4, 2012
Any resemblance to another
tutorial is purely coincidental.
For this tutorial, I’m using a
tube by Rene Kunert
The tube is now FTU &
available here.
Supplies:
Tube of choice
Scrap of choice
I am using a PTU scrap called Colour Pop_Red
by CBJ. You can purchase the scrap at
Dreamscape-Imaging
TreseMask0034
Here
Open a 600x600 new image.
Open up your tube & scrap supplies.
Choose a frame of choice.
Resize 88%.
Paste as a new layer.
Using your magic wand
tool, & holding the shift button
down: click inside the inner
parts.
Selections modify by 6.
Add a new raster layer.
Fill different sections
inside the frame with
different colors from your
main tube.
Once filled, move this layer
underneath the frame in your
layer palette.
Open a scrap paper.
Resize 75%.
Paste the paper as a
new layer.
Selections invert &
press delete.
Select none.
Move this layer directly
underneath frame layer.
On your paper layer, in your
layer palette, change the blend mode
to overlay.
On your main tube,
resize 75% & 90%.
Paste as a new layer making sure its
the top layer on your tag.
Add a drop shadow to
the frame & tube layer.
2,2,50,5 black.
Open a draped cloth element.
Resize 45%.
Paste on opposite of your tube
along the side of the frame.
Change the blend mode on this
layer to Luminance.
Open a flower element.
Resize 25%.
Paste on top corner of the
draped cloth.
Open a vertical stitches element.
Resize 48%.
Mirror once.
Paste underneath the draped cloth element.
Duplicate once & mirror.
Move the copy layer back to by the original.
Paste a small tile on the bottom of the stitches
where they meet.
Add a new raster layer to above the
bottom layer on the tag.
Fill with a color of choice.
Apply the mask TreseMask0034.
Merge group.
Add any text or saying you want
to tag. I did Lady Cupcake
on the cupcake.
It is entirely optional.
Do add the earlier drop shadow
to your text.
Merge layers visible.
Resize 88%
Add artist copyright info & name.
Save as png.
Thanks for trying my tutorial.
Saturday, May 12, 2012

Puzzle Pieces
This tutorial was written
by Sarah Fiack on
May 11, 2012
Any resemblance to another
tutorial is purely coincidental.
For this tutorial, I’m using a
tube by Rene Kunert
The tube is now FTU &
available here.
Supplies:
Tube of choice
Mask SpawnsFSMask57 by Spawns Forum set Masks
Blog
Plugins VM Distortion Tilomat 2000
AAA Frame Foto Frame
Open a 600x250 new image.
Open a tube of choice.
Fill the new image with black
or a dark color.
Paste your tube as a new layer.
Apply the plugin
Muras meister Copies
Wallpaper rotate default settings.
Duplicate the wallpaper layer once.
X out the copy layer.
On the original wallpaper layer,
Adjust blur Gauassian Blur 15
On the same layer, apply the mask
SpawnsFSMask57.
Merge group.
Adjust add noise
Uniform 25 to this layer.
Now unhide the copy layer we hid earlier.
Apply the plugin
VM Distortion Tilomat 2000 default settings.
Take your selection tool, and select various
squares on this layer. You don't want to select
all of them - just certain ones.
Once you have some selected, press delete
on your keyboard.
This should allow you to see the mask layer
underneath as the selected squares should
disappear.
Okay paste your tube as new layer.
You want this the top layer in your layer palette.
Position on the right side of your tag.
Add a drop shadow.
2,2,50,5 Black
Duplicate the tube once & mirror.
On the tube copy layer apply
Effects 3D Effects Cutout
Offset Vertical 10
Horizontal 10
Attributes 50
Blur 5
Colors : two colors from your tag
Hid the tube copy layer.
Merge the rest of the layers visible.
Apply the plugin AAA Frames Foto Frames
Width set to 5.
Unhide the tube copy layer now.
Add words of choice to match
your tag.
I used the words puzzle pieces but
it is entirely up to you.
Convert text to raster.
Add artist copyright info & name.
Merge layers visible.
Save as png.
Thanks for trying my tutorial.
Friday, April 27, 2012

Quote the Raven
This tutorial was written
by Sarah Fiack on
April 27, 2012
Any resemblance to another
tutorial is purely coincidental.
For this tutorial, I’m using a
tube by Rene Kunert
The tube is now FTU &
available here.
Supplies:
Tube of choice
Scrap of choice.
I am using a PTU scrap called Nevermore
by designs by sarah. It is available at
PMTWS
BeckyMask022 Here
Open a 600x600 new image.
Open up your tube, closeup & scrap supplies.
Open up a tag background element.
Paste as a new layer.
Duplicate the tag once.
On the original tag layer, rotate
free rotate 90 left.
Paste your main tube beside it.
Resize the tube 80%.
Open a wordart element.
Paste this between the two
existing layers.
Open a raven element.
Resize 70%
Paste along the top of the tag.
Open a tree element.
Resize 70%
Paste twice along the bottom
layer of the tag. You want two
trees behind the tag layers.
Now select the top tag layer with
your magic wand tool.
Paste your close up as a new layer.
Arrange on one side of tag layer.
Press delete.
Select none.
Now on the close up layer,
on your layer palette.
change the blend mode to soft light.
Open a vine cross element.
Resize 70%.
Position along the bottom of the tag.
You want this layer underneath your main tube
in your layer palette.
Open a button of choice.
Resize 50%
Paste along the end of the vine not
hidden by your tube.
Paste a paper of choice on the bottom
layer of your tag.
Apply mask of choice.
I am using BeckyMask022.
Merge group.
Merge all layers visible.
Resize 88%.
Add artist copyright & name.
Save as png.
Thanks for trying my tutorial.
Friday, April 20, 2012

Beauty Within One
This tutorial was written
by Sarah Fiack on
April 20, 2012
Any resemblance to another
tutorial is purely coincidental.
For this tutorial, I’m using a
tube & photo by Rene Kunert
The tube is now FTU &
available here.
Supplies:
Tube of Choice
Photo of Choice
Scrap of choice
I am using one called
For Girls
by Schnegges Scraps
Blog.
Wordart by Word Art World
Blog
Plugin: EyeCandy Gradient Glow 4000
Open a 600x600 new image.
Open up a photo, tube & scrap supplies
of choice.
Select a frame from the scrap.
Copy & paste as a new layer
onto your new image.
Click inside the frame with your
magic wand tool.
Selections modify expand by 8.
Now on your photo, resize if needed.
I resize 70%
Copy & paste as a new layer.
Selections invert & press delete.
Move the layer under the frame layer.
Select none.
Now duplicate the photo image once.
On the copy layer,
Effects - Art Media Effects -Brush Strokes
Default settings
Lower the opacity on this layer to about 80.
Take your main tube.
Resize 80%.
Paste as new layer on side of
your frame.
Add a drop shadow to the tube.
2,2,50,5 Black
Open an element of petals.
Paste twice along the bottom of the tag.
You want them to appear to underneath the frame..
like the frame is on the petals.
Open a tree element.
Paste along the bottom layer of the tag.
Arrange near the top of the tag.
Duplicate once & mirror.
Open a leaf branch.
Resize 80%.
Rotate free rotate right 45.
Now paste like you did the tree element.
Except we want the branch on the bottom part of the tag
& underneath the tree layer in layer palette.
Open a bottle element.
Resize 25%
Paste on one of the petals.
Add the earlier drop shadow to the bottle.
Open a bird element.
Resize 35%
Paste along the top of the frame as wanted.
Arrange so it appears to be sitting on the frame.
Open a mushroom element.
Resize 25%
Paste just under & beside the bottle layer.
Duplicate the mushroom once. & mirror.
Move this layer back beside the original mushroom layer.
Wordart of choice.
Resize 50% twice.
Paste as wanted on tag.
EyeCandy Gradient Glow 4000
Gradient glow setting fat
Glow width 3.00
Merge all the layers visible.
Resize 88%.
Add artist copyright information & name.
Save as png.
Thanks for trying my tutorial.
Thursday, March 29, 2012

Love Rocks
This tutorial was written
by Sarah Fiack on
March 29,2012
Any resemblance to another
tutorial is purely coincidental.
For this tutorial, I’m using
a tube by Rene Kunert.
The tube is now FTU &
available here.
Supplies:
Tube of choice
Scrap of choice.
I’m using one by Designs by Sarah
called I [heart] Rock
It is available at Pimp My Tags
with Scraps
Here
Mask 17 by moonbeamsandspiderwebs
Blog
Plugin: Xero Radiance
Open a 600x600 new image.
Open up your tube & scrap supplies.
Select & open a frame of choice.
Resize 80%.
Copy & paste onto the new image.
With your magic wand tool,
select the smaller part of the frame.
Selections modify expand by 4.
Paste a paper of choice.
Selections invert & press delete.
Move the paper layer under the
frame layer.
Keep selected.
Now paste your tube between the
two layers & press delete.
Select none.
Add a drop shadow to the frame
& tube layers.
2,2,50,5 black.
Merge the tube & paper layers together.
Apply plugin Xero Radiance to the
merged layer.
Strangeness 128
Charm 50
Truth 128
Beauty 255
Now click inside the larger part of
the frame with your magic wand.
Selections modify expand by 15.
Paste a 2nd paper of choice.
Selections invert & press delete button.
Now move the paper under the frame
layer.
Select none.
Resize your tube 80%.
Paste as a top layer of
the tag.
Position so the tube appears to be
sittin on the frame.
Open a music stanza element.
Resize 70%
Paste along the top of the frame.
You want it to be underneath the tube layer.
Duplicate the stanza once.
Mirror the duplicated stanza.
Now if needed, remove the ends
of the duplicated stanza.
You want it to look like one
stanza.
Open music note element.
Resize 25% or as wanted.
Paste twice along the stanza.
You can position to where you want.
Open a wordart element.
Resize 50%.
Paste along the bottom of the frame.
Paste a paper of choice as new layer
on the bottom layer of the tag.
Apply Mask
MB and SW Mask 17.
Merge group.
Merge layers visible.
Resize 88%.
Add artist copyright info & name.
Save as png.
Thanks for trying my tutorial.
Saturday, March 17, 2012

Tropical Getaway
This tutorial was written
by Sarah Fiack on
March 17,2012
Any resemblance to another
tutorial is purely coincidental.
The tube is now FTU &
available here. It is by the artist
Rene Kunert.
Supplies:
Tube of choice.
Scrap of choice.
I’m using one by Schnegge
http://schneggesscraps.blogspot.com/
called Day At The Beach.
It is available at
PMTWS
VixMask452
Open a 600x600 new image.
Open up your tube & scrap supplies.
Select a frame of choice from
the scrap.
Copy & paste as a new layer.
Select your circle preset shape.
Draw out a circle about the size
of your frame.
Convert to raster & Move the circle
under your frame layer.
Now select the shape with
your magic wand tool.
Paste a paper of choice.
Selections invert & press delete.
Select none.
Open a vine branch mesh.
Resize 80%
Paste above the branch layer
of the tag.
On your main tube,resize
80% or as needed.
Paste along your frame as wanted.
Open a doodle.
Resize 50%
Paste above the frame.
Duplicate once mirror & flip.
This should give you a doodle on top
& below the frame.
Open a ladder element.
Resize 50%
Paste along a side of the frame.
Open a hanging light.
Resize 50%.
Paste under the ladder layer.
You want it visible from the top
of the ladder.
Now choose 2-3 different flowers
from the scrap you are using.
Resize each about by 20%.
Place along the ladder as wanted.
Open a hat element.
Resize 50%.
Paste at the bottom of the ladder.
Paste a paper of choice
on the bottom layer of the tag.
Apply Vixmask452.
Merge group.
Add wordart of choice to
the tag.
I used my own text of choice.
Merge layers visible.
Resize the tag 88%.
Add copyright info & name.
Save as png.
Thanks for trying my tutorial.
Wednesday, March 14, 2012

Touch The Ground
This tutorial was written
by Sarah Fiack on
March 14, 2012
Any resemblance to another
tutorial is purely coincidental.
For this tutorial, I’m using a
tube by Rene Kunert
The tube is now FTU &
available here.
Supplies:
Tube of choice
Animation Shop
Plugins:
Mura Meister Copies
VM Experiemntal TeeWee
VM Toolbox
Xenofex Constellation
Open up your tube image.
Now your going to open two
new images.
Image 1 600x600
Image 2 600x-250
For now shrink the Image 1.
Now on Image 2,
Copy & paste your tube
as a new layer.
Apply Mura Meister Copies
Wallpaper rotate default settings.
Once applied,
click on the bottom layer with your
magic wand tool.
Selections invert & press delete.
Select none.
Okay now apply the plugin
VM Experiemntal TeeWee
default settings.
Add a new raster layer
on top of the image.
Fill with a color of choice from your
tube.
Click this layer with your magic wand.
Selections modify contract by 5.
Press delete & select none.
Adjust add noise uniform 25.
Copy merged & paste this image onto your
600x600 new image.
On your main tube,resize 80% if needed.
Paste in front of your image layer.
Add text to the tag as wanted.
I positioned the text I chose under
the tube on the tag.
Resize all layers 88%
Add copyright info & name
to the tag.
If you are not animating, then save tag now.
To animate, please continue.
On your plugin effects layer,
apply Xenofex Constellation Bling Bling
default settings. Make sure
Keep original image is checked.
Apply plugin.
Now Copy merged into AS.
Paste as a new animation.
Now back in psp,
undo constellation.
Reapply it making sure to click
on random seed once.
Copy merged into AS & paste
after current frame.
You want to repeat this until you
have a total of 5 frames in AS.
In AS, select all.
Change frame properties to 20.
View animation.
If happy, save as gif.
Thanks for trying my tutorial.
Monday, March 5, 2012

Audio Girl
This tutorial was written
by Sarah Fiack on
March 5, 2012
Any resemblance to another
tutorial is purely coincidental.
For this tutorial, I’m using a
tube by Rene Kunert
The tube is FTU now &
available here
Supplies:
Tube of choice
Vixmask333
Blog
Animation Shop
Plugins
Filters Unlimited 2.0 Pattern Generators
This tutorial is animated.
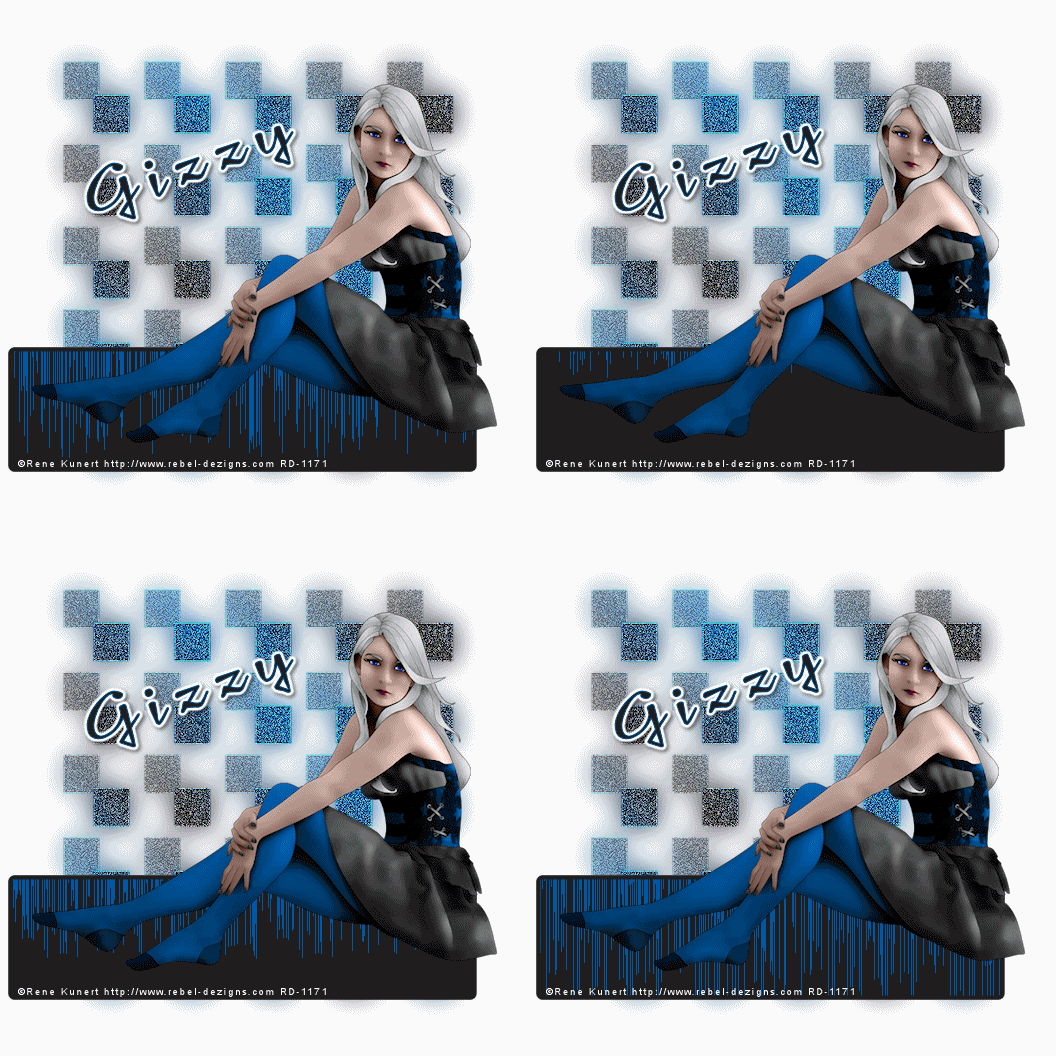
Please click here to view the animation.
Open a 600x600 white
new image.
Open up your tube of choice.
Copy & paste your tube
as a new layer. If needed,
resize 88%.
I resized the tube I am using.
Now select your rectangle shape tool.
Width 5 Fill is null & Stroke a dark color
from your tube.
Draw out a nice sized rectangle.
Convert to raster.
Move this layer under your tube.
You want the tube to appear
to be on top of part of the rectangle.
Now take your magic wand &
select inside the shape.
Selections modify expand by 2.
Add a new raster layer.
Fill with a color of choice from tube.
Select none.
Move the layer under the rectangle
frame layer.
On your bottom layer,
add a new raster layer.
Fill with a gradient of your two colors.
I used settings Linear
angle 45 repeats 4
Apply Vixmask333
Merge group.
Duplicate the mask layer once.
On the bottom mask layer,
adjust blur gauassian blur 15.
On the top mask layer,
Effects -edges -enhance
Adjust add noise
uniform 25
Effects -edges -enhance
for a 2nd time.
Resize all layers 88%.
Add copyright information to
your tag.
Now make sure you are on the
fill layer of the rectangle.
Apply the plugin
Filters Unlimited 2.0 Pattern Generators
Default settings.
If you don't wish to animate, then
save your tag at this moment.
To animate please continue.
Copy merged & paste as new animation
into Animation Shop.
Now go back to psp, and undo the plugin.
Select the plugin again & click on randomize once.
Copy merged & paste after current frame.
Repeat this for a total of 4 frames in AS.
Select all frames in AS.
Change your frame properties to 20 or as wanted.
If happy, then save tag.
Thanks so much for trying my tutorial.
Subscribe to:
Posts
(Atom)
Zone Award