





My Blinkie


Cupcake Bear

Sarah_MS_Bear

Autism Bear

Autism_Bear-_MPP-_Sarah_Ben_zps942ced18

My Pixel Giraffe

giraffe_pixel_sarah

CT Teams

Showing posts with label Charity. Show all posts
Friday, March 29, 2024


This tutorial was written on March 29, 2024
Any resemblance to another
tutorial is purely coincidental.
I am using the art of Beth Wilson using her tube 42-6.

Plugins:
Mura's Meister Copies
VM Natural
Toadies

Open a 700x300 new image.
Open up your tube of choice.
Copy & Paste your tube as a new layer onto
the new image. Resize if needed. I resized the 
tube I am using at 50%.

Duplicate the tube once. Rename the copy as T2.
Hide this layer for now.
Rename the original tube layer as T1. 
Make sure the T1 layer is selected in your layer palette.
Apply the plugin Mura's Meister Copies - Wallpaper rotate
with default settings. 

Select your rectangle shape tool. On your Materials palette, hide the
Foreground/Stroke color. Set your background color to a color of choice.
I used black. You can set Width on the shape options to 2 if you wish but its not 
necessary. Draw out a vertical thin rectangle. You want it to run the height of your tag. Convert to raster. 

Apply the Mura's Meister Copies - Tiling with Tile Gap set to 2. 
This should give you tiled rectangles going across your tag.
Select your Paint Can/Flood Fill tool. Unhide the Foreground color option on the Materials Palette. Fill each rectangle with a color from the flag of your tube. Repeat if needed. Rename the layer Colors.

Duplicate T1 layer. On the copy, rename as T3.
Staying on T1 layer, & for the moment, hiding both of the layers
Colors & T3, go to Adjust - Blur - Gauassian -15. 
Unhide T3 - Go to  VM Natural - Lightburst with default settings. 
Effects - Edge Effects - Enhance. 
Change the blend mode on T3 to Overlay.

Unhide the Colors layer. Change the blend mode on this layer to Overlay.
Add a drop shadow of choice to each layer - including T2 which you can unhide now. Position the tube in the center of your tag. Apply the plugin 
Toadies - Blast 'em! with default settings.
Change the blend mode to Soft Light.

Choose your Font tool. Choose a font of choice. Select a color of choice from
your tag for the font color - making sure its the Background color option. Type out a word of choice. I chose the word PRIDE for mine. Convert the word to raster layer. Apply Mura's Meister Copies - Tiling again. Once tiled, change the blend mode to Overlay or one that fits your tag.

Add a new raster layer to the top of your tag. Fill with a color of choice.
With your magic wand tool. click on the layer. This should select it. Go to
Selections - Modify - Contract by 4. Press delete on the layer. Select none.
Add a drop shadow to the layer. 

Add copyright information & a name to your tag. Save as a png. Thanks for trying my tutorial.
Thursday, October 26, 2023
New wallpaper by me featuring the beautifully
 emotional art of Zindy using her tube Unmasked.
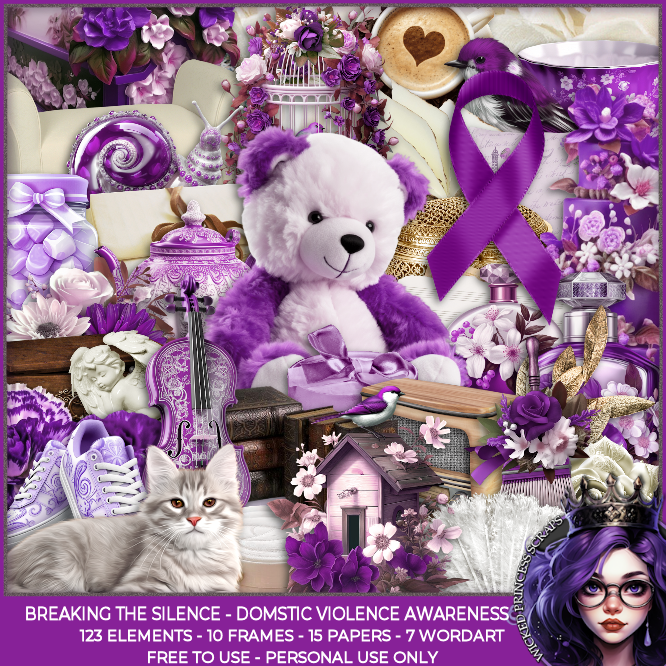
I am also showcasing the FTU scrap
Break The Silence: Domestic Violence
 Scrap by Wicked Princess.
The wallpaper is 1920x1080 & is
available to download here.
“You’re not broken. Someone who didn’t love
you convinced you that you are.” —Anonymous
“The scars you can’t see are the
 hardest to heal.” —Astrid Alauda
“It’s hard to look for the light when 
you’re lost in darkness.” —Anonymous


Wednesday, March 23, 2022
CT tag & wallpaper featuring the magically
adorable art of Queen Uriel using her 
Hearing Aid fairy. I commissioned her to 
draw this fairy as I have partial deafness.
I wanted to represent that in the psp world.
I wear hearing aids daily to help myself
hear the world better. These last two years
have been a true struggle for the deaf
 community. A lot of us depend on lip reading
& being unable to see lips has been hard.
I love that the fairy is wearing a hearing aid
& her shirt has the symbol for deafness.
I am also using the wonderful scrap
Spring Fever by Wicked Princess Scraps.
I love that she included elements which
are known to make noise/sounds in the world.
The wallpaper is 1920x1080 &
available here for download.


Wednesday, March 9, 2022
I wanted to share what I made in honor of March
being National Women's History Month.
It is so important to honor & remember
how far we have come through the decades & centuries.
However, we must also continue to fight for 
our equality and our rights in some areas.
Art is by Zindy using her tube Gazing Beauty.
Scrap is from Gingerscraps & is there Monthly
mix called Women History. I've made snags
& wallpaper with them. The wallpaper is 
1920x1080 & available here.
We must also remember to help lift one
another up and fix each other's crowns.
We only do damage when we attack one another.
Women should be helping one another.


Sunday, July 11, 2021


This tutorial was written on July 11th, 2021

Any resemblance to another

tutorial is purely coincidental.

I am using the art of Queen Uriel

using her tube Pride Month 2021.


Plugins:

Mura's Meister's Copies

Xero Porcelain

VM Natural Splash! 

EyeCandy4000 Gradient Glow


Preset Shape:

dbmmisc04


Open a 700x300 new image.

Open up your tube of choice.

Copy & Paste your tube as a new 

layer onto your blank image.


Duplicate the tube layer once.

Rename the duplicate to Top Tube.

Hide the tube copy layer for now.

Make sure the original tube layer

is selected in your layer palette.

Rename the layer as OG Tube.


Apply the plugin Mura's Meister Copies:

Wallpaper rotate with default settings.

Also apply the plugin Xero Porcelain with default settings.

Duplicate the OG Tube layer once.

Rename the layer OG2.

Apply the plugin VM Natural Splash! Default.

Go to Effects - Edge -Enhance once.

Lower the opacity on this layer to 44%.


Select your Rectangle Preset Shape tool.

Width doesn't matter right now.

On your Materials Palette, Hide the 

Foreground/Stroke color for now.

Choose black or white for the Background

color. It doesn't really matter.


For this part, I took a preset shape called

dbmmisc04 & modified it to work for my purpose.

I drew out the shape on a new image 700x700.

Color black or white it doesn't matter.

Draw it out to desired size. Using your selection tool,

draw around the top rectangle. Once selected, right click

& promote to new layer. Select none.

Move the promoted layer to just above the below shape.

Merge together.


Now, apply the plugin Mura's Meister Copies: Tiling w/

default settings. If needed, trim off any excess rectangle shapes.

You only want 6 rectangles per column. I have 3 columns of 

6 rectangles each.

Copy & paste as a new layer onto your tag image.

Rename the layer as Pride colors.


Now, we're going to fill each row going across,

with a color of the Pride Rainbow.

The order of the colors starting at the top are:

Red

Orange

Yellow

Green 

Blue 

Purple.

Make sure you fill each of the rectangles going across 

per row (not column). Also, if you aren't doing a Pride 

themed tag, feel free to change the colors to fit your tag.

Change the blend mode on the colors layer to Soft Light.


Select your Top Tube layer in your palette. Now, select your Preset

Shape Tool again. You want to use an angled heart shape &

set width to 3.00 Set your color to white in your Materials Palette.

Hide your Background color for the moment & unhide your Foreground one.

Draw out a white heart. I did 334x260 for mine. Convert 

the shape to raster layer. Position the heart on the 

bottom right corner of your tag. Rename the heart shape as Heart1.

Now, move your Top Tube layer so its inside of the heart shape.


Select your magic wand tool. Make sure you are on the Heart1 layer.

Click inside your heart to select it.

Selections - Modify - Expand by 2. Selections invert.

In your layer palette, select your Top Tube layer & press delete

on your keyboard. Select none. Add a drop shadow to the Heart1 layer.


Add a new raster layer. Fill this layer with white.

Select the layer using your Magic Wand. Selections Modify-Contract by 4.

Press delete. Select none.

Apply plugin EyeCandy4000 Gradient Glow - using Black Halo &

set the Glow Width to 3.00.


Select your Text tool. Set your Background color to white.

Choose a font of choice & size preference.  Type out words of choice.

I used Love Is Love. Convert text to raster. I positioned the wording on

top left corner of my tag. This way its diagonal from the heart shape.


Merge layers visible. Add artist copyright info & a name to your tag.

Save as PNG. Thanks bunches for trying my tutorial.


Thursday, March 18, 2021

CT tag featuring the beautiful art of Abranda Icle Flaminio

using her tube 11-1. I am also showcasing the wonderful

scrap Fibro Awareness by Karmalized Scraps.

Fibro is an awful, evil monster of pain. Two

dear friends of mine suffer from it. 

You can find out more information 

about it here.

Fibro is very real & those who have it

experience hell with their bodies.


Tuesday, September 29, 2020


 This tutorial was written on Sept. 29,2020

Any resemblance to another

tutorial is purely coincidental.

I am using the tube Cherry Blossom girl by Zindy

Plugins:

Mura's Meisters Copies

Xero Porcelain

Crescent Moon

VM Natural

EyeCandy 4000 


Mask:AKK_Mask061 by Karmalized Scraps


Open up tube of choice.

Open up a 700x700 new image.

Select your Rectangle Preshape tool.

Set your width to 6.00 & on your Materials

palette, set Foreground/Stroke to white.

Hide the Background/Fill color option for now.


Draw out a square shape.

Go to Objects - Align Center In Canvas.

Convert the layer to raster.


Add a new raster layer underneath the square layer.

Fill this layer with a color from your tube of choice.

If your tube has a close up layer, copy & paste the closeup

as a new layer above the layer you just filled with color.


On the close up layer, apply the plugin Mura's Meisters Copies

- Wallpaper Rotate with default settings.

If it didn't fill your whole image with the closeup, simply repeat the plugin 

one more time.


Let's rename a few layers to help keep everything straight.

I named mine from top to bottom (minus the blank bottom layer)

Square

Closeup

Color BG


Now select the Square layer in your Layers Palette.

With your Magic Wand tool, select inside the square.

Go to selections, Modify -Expand by 2.

Selections Invert & on your Layers palette,

select the Closeup layer & press delete button on your keyboard.

Repeat the last step with the Color BG layer.

Select None.

That should remove any parts of those two layers outside of the Square.


Select the Closeup layer again. 

Apply the plugin Xero Porcelain with default settings.

Change the blend mode on the layer to Soft Light or one

that looks good with the tube you are using.

Apply the plugin Crescent Moon - WarmCloth with default settings.


Duplicate the Closeup layer. Rename the copy as Closeup 2.

On this layer, apply the plugin 

VM Natural Splash! with default settings.


Select your Font tool. Choose a darker color from your tube for

your Background/Fill color option on Materials Palette.

Set your font to a desired font & size. I used size 11 for mine.


Type out wording of choice. I used Breast Cancer Awareness for mine.

Convert the wording to Raster & rename the layer Words.

Open the plugin Mura's Meister Copies again.

Select the option Tiling & change the Tile Gap to 2. Click ok.


Now select the Square layer in your Layers Palette.

With your Magic Wand tool, select inside the square.

Go to selections, Modify -Expand by 2.

Selections Invert & on your Layers palette,

select the Words layer & press delete button on your keyboard.

Select None.

Lower the opacity on this layer to 36. You can find the Opacity on 

the Layers palette.


Copy & paste your full tube as a new layer above the Square layer.

Position on one of the corners of the square. Rename Tube.


On the Square layer, apply the plugin EyeCandy4000 Gradient Glow.

I used Black Halo option with a glow width of 3.00

Add a desired drop shadow to the layers of your tag.


Back with the Font tool, type out wording of choice.

I used: Knock Cancer On Its Ass - but feel free to change

wording for your tag.

Convert the wording to raster layer.


Apply the plugin EyeCandy 4000 Glass.

I chose the Glass Color white for mine but feel free to change it.

Bevel Width 7.20

Smoothness 0

Inside Marquee checked

Edge Darkening 0

Gradient Shading 10

Refraction 50

Opacity 50

Tinting 50

Apply the effect.

Be sure to add desired drop shadow as well to the wording.


Select your Preset shape tool. I chose a heart shape.

On the Materials Palette, hide the top color for now.

Choose a color for the bottom one.

Draw out the shape or heart that you chose.

Once you have it the size you want, convert the layer to raster.


Go to Adjust - Add Noise.

I did Gauassian & 25.

Apply the plugin EyeCandy4000 Gradient Glow.

I used the Fat option with a glow width of 3.00

Add a desired drop shadow to the heart/shape layer.

Position it as wanted around your

 tube. Duplicate once

& mirror. Position as wanted.


Fill the bottom layer with color of choice.

Go to Layers Load/Save Mask - Load Mask From Disk.

I used the mask AKK_Mask061

Right click on one of the mask layers in your layer palette.

Merge- Merge Group.

I did resize my mask layer 94 & 96%.


Crop your tag to desired size.

Add artist copyright info & name.

Save as png.

Thanks for trying my tutorial.


Sunday, June 14, 2020


Note: This tutorial has special meaning to me.
I've been battling depression to keep myself
mentally okay during everything right now.
I am trying to illustrate how I feel at times 
via the tag. Maybe I can help others a little 
while trying to copy myself. Mental health
is as important if not more so than
physical health.

This tutorial was written on June 14,2020
Any resemblance to another
tutorial is purely coincidental.
I am using a tube by Tiffany Toland-Scott.
This tube isn't available anymore but her 
regular tubes are here:

Mask: DD-NFM_2015_5
by Dee available here

Plugins:
Mura's Meister Copies
Apply VM Experimental
Distortion Filters
EyeCandy 4000 Gradient Glow

Open a 700x700 new image.
Open up your tube of choice.

On your Materials palette, choose a color
from your tube for the Foreground/Stroke Color.
Hide the Background/Fill color for now.

Select your Ellipse Preset Shape tool.
Set the Width at 7.00 & make sure the 
circle option is selected.
Draw out a circle to desired size.
Objects - Align - Center In Canvas
Convert to Raster. Rename the layer Circle.

Copy & paste a tube layer underneath
the circle layer. Apply the plugin
Mura's Meister Copies: Wallpaper Rotate
with Default Settings. If needed,
repeat the plugin effect once to completely
fill in the image with the tube copies.
Rename this layer Tube1

Select the circle layer area on the layers palette.
Click inside it with your magic wand.
Settings:  Add Shift
RGB Value
Tolerance 0
Contiguous & Anti-alias checked
Feather 4
Selections Invert.
Select the Tube1 layer & press delete
on your keyboard. Select none.

Duplicate the Tube1 layer & 
rename the copy as Tube2.
Staying on the Tube2 layer, go to 
Adjust -Blur - Gaussian Blur 10.00
Apply VM Experimental - Magnetic Detection
with default settings.

Repeat this again to eliminate the effect
outside of the circle layer.
Select the circle layer area on the layers palette.
Click inside it with your magic wand.
Settings:  Add Shift
RGB Value
Tolerance 0
Contiguous & Anti-alias checked
Feather 4
Selections Invert.
Select the Tube2 layer & press delete
on your keyboard. Select none.

Still on Tube 2, change the blend mode to 
Overlay or one of choice.
Duplicate Tube2 & rename it to Tube3.
Apply Distortion Filters - Radial Waves - default
Change the blend mode on this layer to Soft Light.

Now select Tube1 layer.
Apply Xero: Porcelain with default setting.
On the Circle layer, Add noise to the layer.
Adjust -Add/Remove Noise
Gaussian 25.00
Add drop shadow of choice to the layer.

Copy & paste your tube as a new layer above the 
background layer.Apply the plugin
Mura's Meister Copies: Wallpaper Rotate
with Default Settings. If needed,
repeat the plugin effect once to completely
fill in the image with the tube copies.
Lower the opacity 30 & set the blend mode
to Soft Light.

Select your rectangle preset shape tool.
On the Materials Palette, hide the 
Foreground Color & unhide the Background color.
Draw out a horizontal rectangle across the center of the 
Circle shape. Be sure not to draw it so far that it extends
past the Circle shape. Convert to Raster.
Apply EyeCandy 4000 Gradient Glow.
Setting Fat & Glow width 3.00.
Lower the opacity to about 38.00
Apply a drop shadow of choice to the layer.

Rename the Rectangle layer as Rect1.
Select your font tool & choose a font & color for your text.
Type out a word or two for your tag.
I used the words Magnetic Sorrow but choose words
that fit your tag.
Convert to raster & position on the Rect1 layer.
Add a drop shadow of choice to the text.

Add a new raster layer under that layer.
Fill with a dark color from your tag.
Merge the two bottom layers together.
Apply the mask DD-NFM_2015_5.
Merge group. Resize the mask layer 93% & 97%.
Duplicate the mask once.
On the original mask layer, go to Adjust
Blur - Gaussian Blur 5.00
Merge the two layers together.

Copy your tube or a layer of it.
Paste as a new layer as top layer of the tag.
Position along a side or as wanted on the tag.
Add a drop shadow of choice to the tube layer.

Crop your tag to desired size.
Add artist copyright & name to the tag.
Save as png.
Thanks for my trying my tutorial.


Friday, May 22, 2020


This tutorial was written on May 9,2020.
Any resemblance to another
tutorial is purely coincidental.
I am using the tubes
No More & Beauty and Decay by Zindy

Textures: Magic Realm by Devirose

Mask: 170 InsatiableDreams
Mask is unavailable right now

Plugins: 
Mura's Meister:Copies
VM Natural: Splash!
Funhouse

Open up a 700x700 new image.
Open up your tubes & textures of choice.

Copy & paste your tube as a new layer onto your 
blank canvas. 
Choose your preset shape tool.
Set your Foreground/Stroke to Black or a dark color
from your tube. Hide the Background/Fill color option for now.

On the Preset shape tool, set the width to 5.00.
I used a Rounded Rectangle shape.
Draw out a vertical rectangle approximately the same size
of your tube vertically. The one I used is 280x545.
This may vary depending on the tube you are using.

Dupclicate the tube layer once. On the Original tube layer,
apply the Mura's Meister:Copies - Wallpaper Rotate to the layer.
Add a new raster layer. Fill with black or the same dark color
you used for the shape.

Select your magic wand tool. Click inside the shape layer to select it.
Selections Modify - Expand by 3. Invert
Select one at a time the tube, tube copies layer & the fill layer.
Press delete on each layer.
Select none.
On the original tube layer, apply the plugin 
VM Natural Splash! with default settings.

Right click on your tag & copy merged.
Paste as a new layer. Reize the merged layer 93%.
Move to the left so that its partially off of your previous layers.

Copy & paste a texture of choice as a new layer.
Arrange so the texture layer covers the merged layer.
In your layer palette, make sure the merged layer is selected.
Selections - Copy, float, defloat. Selections invert.
Press delete on the texture layer. Select none.
Change the blend mode on the texture layer to Overlay - or whichever
looks good on your tag.

Duplicate the Merged layer once. Mirror this layer & move it below
the previous tag layers. Repeat the above steps except use a 2nd texture
of choice. Merge layers together.

Select your Font tool. Choose a font of choice & a color of choice for it. I did 
a very light grey & used the words Mental Torment. Apply the plugin Mura's Meister Copies: H-Tile(random rotate line). Click OK.
Apply a drop shadow of choice. to the text layer. Change the blend mode
to overlay.

Select the merged layers in your layer palette.
Selections - Float -Defloat. Selections Invert.
Press delete on the text layer.
Select none.

Copy & paste your 2nd tube of choice as a new layer.
Position along the bottom of your tag.
I did resize mine 88%.
Add a drop shadow to the tube.

Back to your text tool.
Type out your words once again. 
This time do them in one of the colors from the textures you used.
Position the colored wording along the bottom of your tag near
the 2nd tube. Apply the plugin Mura's Meisters: Copies
Afterimage(sphere random) Default settings.
Add a drop shadow of choice to the wording.

Add a new raster layer above the bottom/background layer of your tag.
Fill with black or a color of choice.
Apply the mask I used or one of choice.
I did check the Invert Mask option.
Merge Mask Group.

On your Mask layer, apply the plugin Funhouse: Heizenberg's 
Mirror with default settings.
Go to your Effects Menu 
Edge Effects - Enhance.

Merge the layers visible. Copy & paste a texture of choice as a new layer.
I used one I had already used previously.
In your Layers Palettes, select the merged layer.
Selections - Float - Defloat Invert
Press delete on the texture layer. Select none.
Change the blend mode on the texture to Soft Light 
& lower the opacity to 55. Merge down.

I resized my tag 95% but that is optional.
Crop tag to desired size.
Add copyright information & name.
Save as png.
Thanks for trying my tutorial.


Thursday, October 24, 2019
I just wanted to show a tag I made tonight
featuring my personal commission
by Queen Uriel. This one is so special
to me as she is depicted having 
Vitiligo like myself. It's an autoimmune
condition which changes the color of 
our hair & skin. We lose our color
& as a result, both become lighter in color.
I love how wonderfully she illustrated 
the spots our skin gets.


Saturday, October 6, 2018
CT tag featuring the beautiful art of 
Anna Liwanag using her tube closeup 80-2.
I am also showcasing the wonderful
BCA inspired scrap Find A Cure 
by Creative Scraps by Crys.
You can purchase the scrap
Breast Cancer Awareness is such
an important cause for everyone.
Be sure to check yourself & 
educate the women that matter 
dearly to you. Early detection
can make all the difference in treatment.


Friday, March 23, 2018
CT tag & wallpaper featuring the fanastic
scrap New Heart by  Chaos Priestess.
Unfortunately, the scrapkit has been retired
& is no longer available.
I am also showcasing the art of Zindy.
The wallpapers are available in two sizes:
1920x1080 here
1440x900 here
After the tears fall & dry, & after the pain
has been at its worst - dry your eyes.
Pick up your broken pieces & put yourself
back together again. Maybe the pieces
fit differently this time but you
will be stronger in the end.


Tuesday, June 27, 2017
CT tag featuring fantastic art by Arthur Crowe
using his tube Wiccan Witch. She is 
an exclusive tube to Helping Casper
available here. I am also using
the wonderful matching scrap
Wiccan Witch by Irish Princess Designs.
On this magical night, she steps outside
under the full moon to cast her spell.
For the moon brings a power 
unmatched in nature.


Tuesday, July 12, 2016
I wanted to illustrate my thoughts 
on everything happening in our country lately.
We should embrace our differences
& accept each other - regardless of race.
People should not live in fear in our country
just because of their appearance, faith
or a language that they speak. 
Once we stop seeing flaws in each other,
maybe, just maybe, we can discover some
pretty awesome people in one another.


Monday, March 7, 2016
CT tag featuring the wonderful
& huge Charity collab
Here 2 Help. Everything I have used
on my tag can be found in the collab.
The PSP community has come together to
aid the beloved designer Mirella during
her cancer battle.  For my tag, I am using art
by Kajenna and the scrap Vintage
by Honored Scraps. I am also
including a mask & wordart from 
the collab as well. 


Saturday, November 14, 2015
CT tag featuring art by Zindy, with her tube Silence &
Honored Scraps part of the Diabetes Awareness Collab.
Diabetes is a horrible disease and causes many health issues.
A close friend is battling it and I wanted
to help raise awareness with this tag.
Diabetes also runs in my family & my husband's family.
I also have a feel better snag as well.


TOUs

I do not allow resizing of my tags, timelines or wallpapers. All of my creations are for PU only unless otherwise stated. Nor are they to be altered in any way either.

Categories

Followers

Blog Archive

Contributors

Zone Award

Award_Wicked_Little_Cupcake
