



Showing posts with label Anime. Show all posts
Showing posts with label Anime. Show all posts
Saturday, January 16, 2021
CT tag featuring the fantastic art of Martin Abel
using a retired bonus tube from March 2014
which is available for purchase. I am also
showcasing the oh so wonderful IB
Anna Marine 77-3 Scrap by Chaos Priestess.
Before bed, she braids her hair for the next day.
It's the only way to make it behave after all.
Do you dream of her & her braids? Its her trademark
look after all.


Sunday, February 23, 2020

This tutorial was written by me
on February 23, 2020
Any resemblance to another
tutorial is purely coincidental.
I am using the tube 45-1 by Hannah Lynn.
Plugins:
Toadies - Glasswork Grey
Mura's Meister -Copies
VM Natural Transmission
Open up a new image 700x700.
Open up a tube of choice.
Open up the template I have provided for
this tutorial.
Fill each rectangle layer with a different color.
Make sure you select each layer before you fill it
with a different color.
For the main square layer, select a darker color than
the previous ones you have used.
Copy & paste your tube as a new layer above the rectangle layers.
Arrange so it covers the Left rectangle layer. Select the inside of
the rectangle layer with your magic wand tool.
Selections - Invert & select the tube layer.
Press delete on your tube layer.
Select none.
Duplicate the tube once & mirror.
This should position it on the opposite side
on top of the Right Rectangle.
Duplicate each of the tube layers once.
You want to arrange so they line up on the rectangle layers
with them facing Left - Right - Left - Right.
Now in your layers palette, arrange each tube layer above the
color rectangle layer it is positioned above.
Okay now on the Left & Middle Right Tube Layers, apply the plugin
VM Natural Transmission...default settings.
Change the blend modes on each of these layers to Overlay.
On the Middle Left & Right tube layers, apply the plugin
Toadies - Glasswork Grey to each of the tube layers with default settings.
Change the blend modes to Soft Light.
Duplicate the Main Square layer & hide the original Main Square layer.
Arrange the copy above the other layers.
Set the blend mode to Hard Light & lower the opacity to 57.
Select your Text tool. Choose a font of choice.
Type out a single word or two. Convert to Raster.
Use Mura's Meister - Copies.
Select the option of Tiling. Change the Tile Gap to 2
& click Ok.
Click the Main Square Copy Layer with your Magic Wand tool.
Click Invert. Select the wording you just tiled.
Press delete on your keyboard. Select none.
Change the blend mode on the word layer to Soft Light.
Duplicate the bottom layer twice.
On the top duplicated layer,
Set the Foreground on your Materials palette to a dark color.
Select your Airbrush tool. Using a Brush effect of choice,
apply it to the bottom duplicated layer in each of the corners.
I used a cross hatch type brush.
On the other duplicated layer, fill with a color of choice.
Apply a mask of choice. I used the mask LLM-901.
Merge group. Resize the mask 94%.
Merge layers together. Crop your tag.
Add copyright information & name to your tag.
Save as png. Thanks for trying my tutorial.
Friday, July 24, 2015
Ct tag featuring artwork by PinUpToons &
IB PinUpToons 216-3 Scrap by Foxys Designz.
The young lady is very shabby in her design &
has made a bit of a mess in getting ready to go out.
Her dog is just watching her with amusement.
I wonder if she is going to school, a date or maybe
just meeting some friends.
Find her and the the scrap at CDO.


Wednesday, July 15, 2015
Guest CT tag featuring the cute and fun scrap Moving Along by Wicked Princess Scraps.
This scrap is all about road trips, car repair & road construction.
Everyday obstacles we might experience while on the road.
You can find the scrap at TPP for purchase.


Monday, May 25, 2015
Most of us hate to clean the house. It is seen as a chore, but is a necessary part of keeping our homes clean. Mopping, washing the dishes, vacuuming, laundry, the list never seems to end. Having three kids myself it really never seems to end. We get the house clean one day and it is destroyed the next day. Today we are letting our inner housewife or man out in our graphics. Maybe they will clean our computers and blogs up a bit while they visit? Come find your cleaning items at CDO with
this kit by Monti called Clean As A Whistle.


Sunday, May 10, 2015


Thursday, March 19, 2015
New CT tag featuring art by Pinuptoons & IB Scrap Pinuptoons 172-2 by TKDezigns.
Both the tube and scrap are adorable and fun. The colors are bright and cheery, as are the elements.
They will make you smile and happy while you use them. You can purchase them at CDO.


Sunday, February 22, 2015
CT tags featuring the PTU attitude art of Martin Abel. I am using the Scrap tube bundle 51 featuring Abel's art & a matching scrap by Honored Scraps. The scrap compliments the tubes just wonderfully. You really can create some awesome attitude tags with the scrap. You can purchase the bundle at CDO. Have fun!


Thursday, March 28, 2013

Splash Flowers
This tutorial was written
by Sarah Fiack on
March 28,2013
Any resemblance to another
tutorial is purely coincidental.
For this tutorial, I’m using a tube
by Mashi. You can purchase it
at CDO.
Plugins:
Mura's Meister Copies
VM Natural Splash
Mask MB & SW Mask 32
Moonbeams & Spiderwebs Blog
Open a 600x600 new image.
Copy & paste your tube as a new layer.
Choose your rectangle preset shape tool.
On your materials palette, choose a light
color from your tube for Foreground color.
Choose a darker color for your background
color.
Preset shape setting:
width 5.00
Draw out a rectangle similar
in size to your main tube.
Convert to raster.
Move below the tube layer &
behind it.
Duplicate the tube once.
On the original tube, apply
Mura's Meister Copies
Wallpaper rotate default settings.
Select the rectangle layer with your
magic wand. Now back on the wallpaper layer,
selections invert & press delete key on keyboard.
Select none.
Duplicate this layer.
On the top wallpaper layer, apply the plugin
VM Natural Splash default settings
Change the blend mode on this layer to
Hard Light.This allows the original wallpaper
layer to be visible some & still see the splash effect.
On your main tube, resize 88% if needed.
Also add a drop shadow of choice to the tube.
Add a new raster layer below the tag layers.
Fill with a color of choice from your tag.
Apply the mask MB & SW Mask 32
Merge group.
Add text of choice along the bottom of your tag.
I used the words Splash Flowers.
Crop your tag to desired size.
Add artist copyright & name.
Save as png.
Thanks for trying my tutorial.
Saturday, August 11, 2012
Sharing a couple snag tags I made tonight. Artist I used is Annika Smidt
which you can purchase at DSI.


which you can purchase at DSI.


Wednesday, April 4, 2012

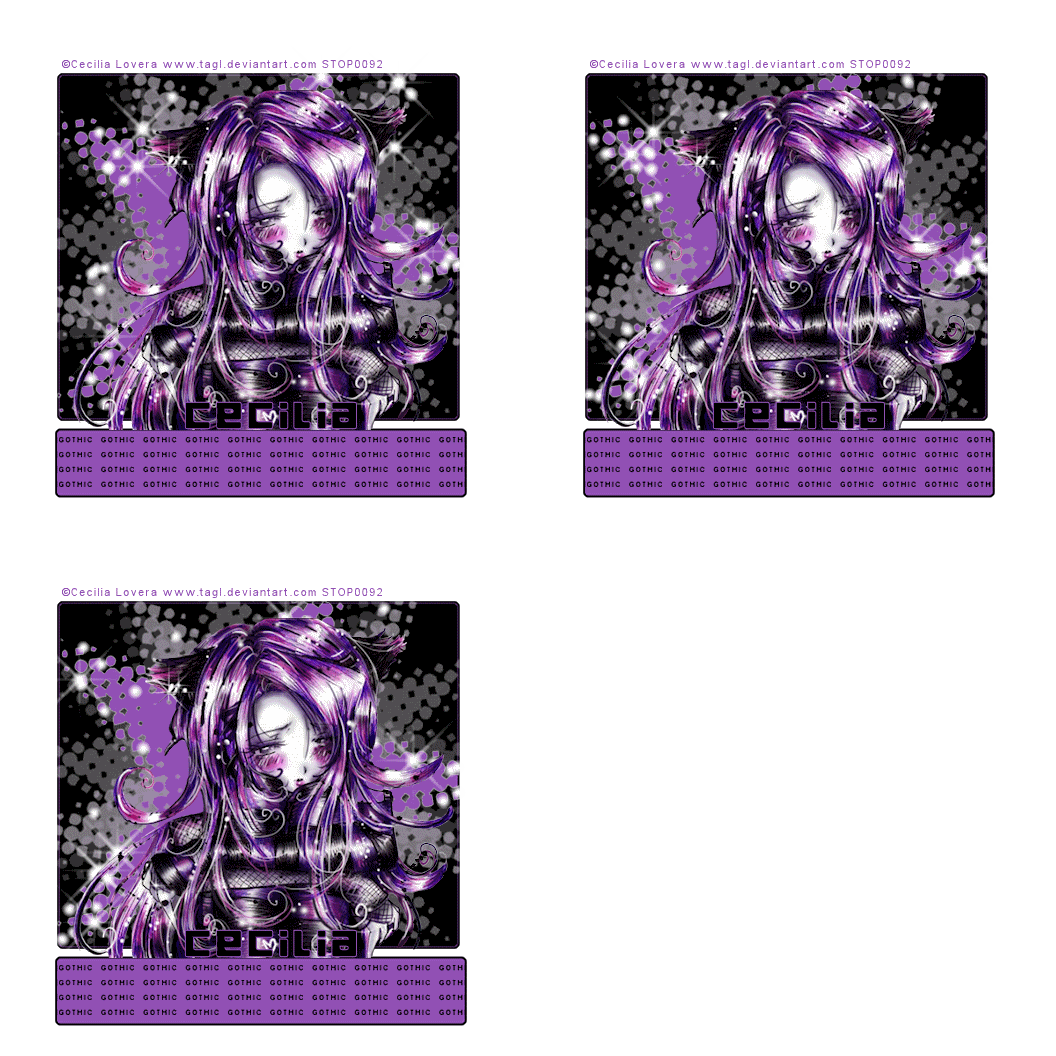
Gothic In Purple
This tutorial was written
by Sarah Fiack on
April 4th,2012
Any resemblance to another
tutorial is purely coincidental.
For this tutorial, I’m using
a tube by Cecilia Lovera
You can find the tube at
PSPTUBESTOP
Supplies:
Tube Of Choice
Animation Shop
Vixmask147 Blog
Tutorial Tag is animated.
You can view the animation here.
Open a 600x600 new image.
Open up your tube of choice.
Copy & paste your tube
as a new layer onto your new
image.
On your materials palette,
select two colors from your
tag.One for stroke and one for
background.
Select your rectangle preset
shape. Width 3.
Have your darker color as the stroke.
Draw out a small rectangle to
go underneath your tube image.
Once happy with the size, convert
to raster.Move to the center bottom
part of your tag underneath your tube.
Now on the materials pallete,
you just want the darker color
on both options.
Draw out a good sized square
for behind your tube.
Convert to raster.
Position the square behind your tube.
You want to leave a small amount
of space between the square and rectangle
layers.
Now with the square layer, duplicate it once.
On the duplicated layer, fill it with the original
2nd color you used earlier.
Now that the duplicated is a different
color from the original layer,apply the
Vixmask 147 to this layer.
Once applied, merge group.
Select the font tool.
Use an easy to read font.Size set
to 12. I used color black but
it varies on your tag.
Type out the word Gothic
or a word of choice.
Convert the word to raster.
Now the plugin Mura's Meister Copies.
Select tiling effect.
Change the tile gap to 2.
Hit Okay.
Select your small rectangle layer
with the magic wand tool.
On the text layer,
Selections invert & press delete.
Select none.
Resize all layers 88%.
Add copyright info & name.
Mask Layer
Xenofex 2 Constellation
Setting Bling Bling default settings
Copy merged into AS as new animation.
Now back into PSP.
Undo the constellation effect.
Select the plugin again & click
random seed once.
Copy merged into AS.
Paste after current frame.
Repeat the above steps until
you have a total of 3 frames in AS.
Select all.
Change frame properties to 20.
View animation.
If happy, save as gif.
Thanks for trying my tutorial.
Subscribe to:
Posts
(Atom)
Zone Award